 FREE 1 to 3-Day Delivery on Orders $149+ Details

How to Install a Smittybilt Chrome Locking Hood Catch Kit on your 1997-2006 Wrangler TJ
Shop Parts in this Guide
INCLUDED COMPONENTS:
2 – Hood Locks
2 – Lock Posts w/ Caps
4 – Lock Nuts
12 – Washers (4-mounted on locks)
2 – Rubber Gaskets (mounted on Locks)
2 – 2” Cap Head Bolts
2 – Threaded Mounting Plates
2 – Rubber Dampener (round)
2 – Rubber Spacers
2 – Stainless Spacers
2 - Keys
INSTALLATION INSTRUCTIONS
1) Open hood and remove existing hood catches from both the hood and the fender.
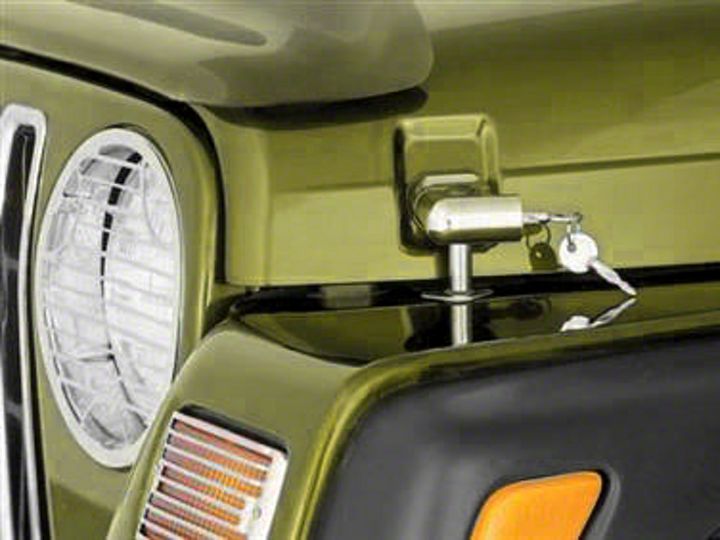
2) Temporarily remove the plastic cap from the locks (Figure 1). The Locks are press fit and can be removed by applying pressure on the inside of the cap.
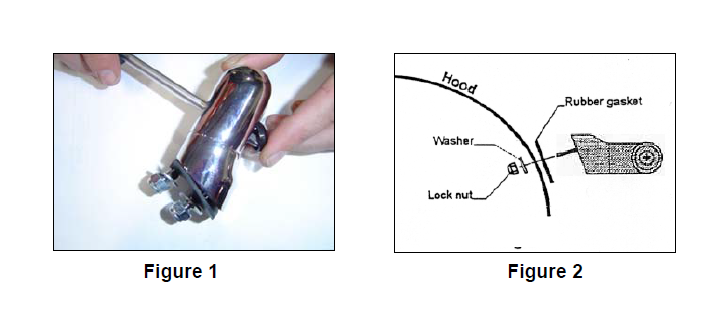
3) Install the Locks onto the hood but DO NOT tighten completely (Figure 2). Be sure to install proper lock on the proper side, lock should face to rear of the vehicle.
4) Remove Caps from Lock Post and install Lock Post onto fenders but DO NOT tighten completely (Figure 3 & 4). Use three (3) of the washers on each post to start. Leave off the caps for now. NOTE: The spacers are to help adjust the latch tension on the hood. If after the installation the Locks will not latch, add one extra spacer to the post. If the hood can be lifted when the locks are latched, remove a spacer.
5) Carefully close the hood and guide the Locks onto the Latches. Align the Locks and Posts to eliminate binding. Now tighten Lock Post in place with the Allen wrench though the opening where the cap was (Figure 5). NOTE: There may be some adjustment required to get the Locks and Post to line up properly.
6) Note the position of the Locks. Open hood and tighten the Hood Locks completely.
7) Install the Lock Post Caps and tighten securely. Re-install the plastic Lock Caps removed in step 2.

Do not slam hood with hood locks installed. Damaged to the fenders can result.
