 FREE 1 to 3-Day Delivery on Orders $149+ Details

How to Install Smittybilt Dual Battery Tray on your 2007-2013 Wrangler

Shop Parts in this Guide
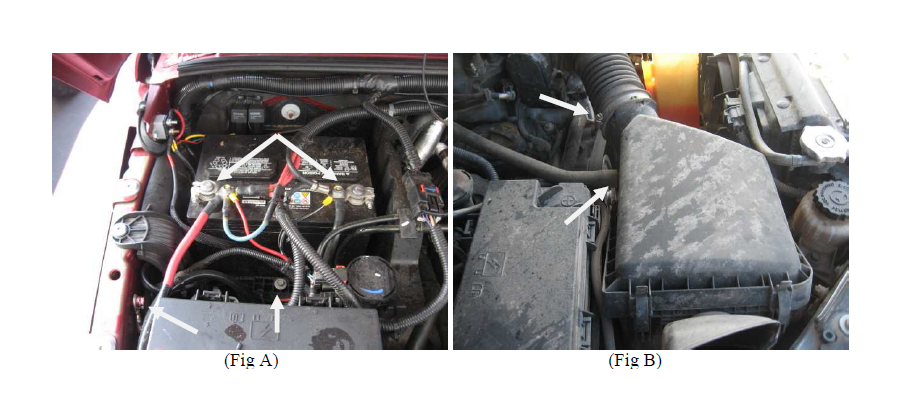
Step 1: Disconnect the battery negative cable (-) and then the positive ( ) cable. Remove the ground connected to the stud on the inner fender. Remove the bolt on the bottom front of the battery (Fig A) Remove the battery.
Step 2: Remove the Air filter box by first loosening the hose clamp then pulling the intake tube off of box. Remove side vent hose off of box also. Pull up/out air box. (It may take some wiggling to come loose) Fig B
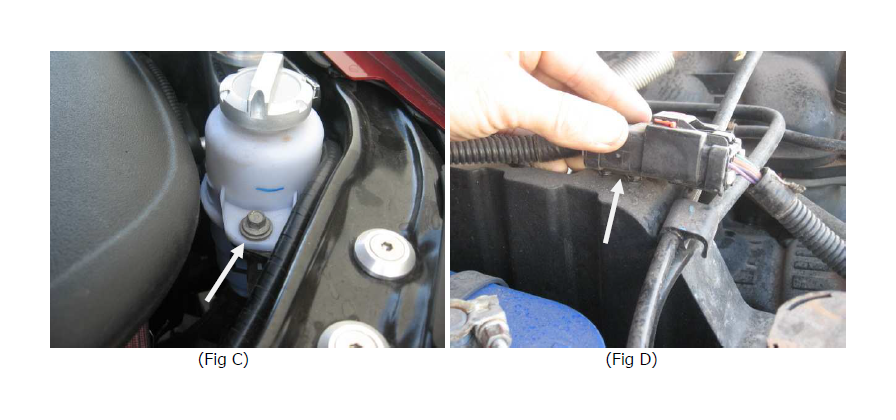
Step 3: Remove the bolt holding the power steering reservoir on and move to the side. (Fig C)
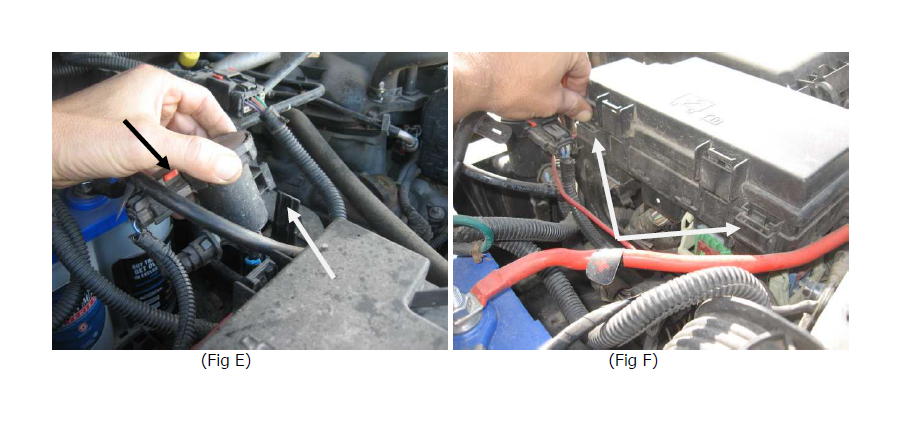
Step 4: Remove the power junction connector from the factory battery tray base (Fig D) Then proceed to disconnect the EVAP solenoid connector and slide off of the tab on the base.(Fig E)
Step 5: Push and release the four tabs (2 per side) the hold the fuse box onto the OEM bracket. (Fig F)
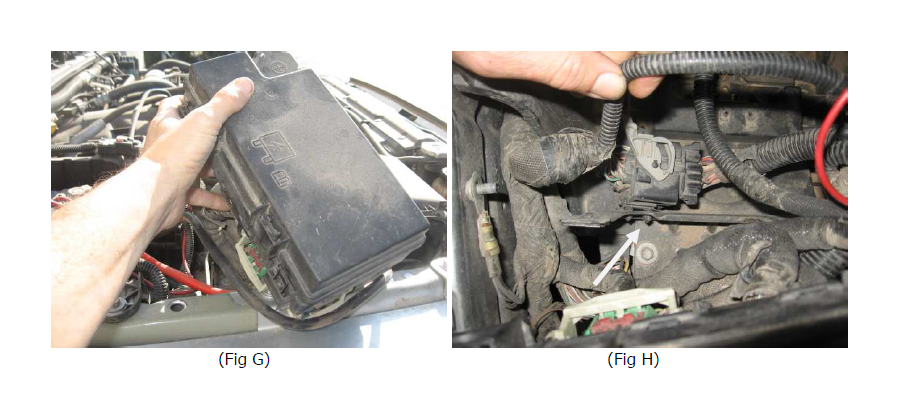
Step 6: Lift the fuse box upward and carefully lay over the side of vehicle (Fig G)
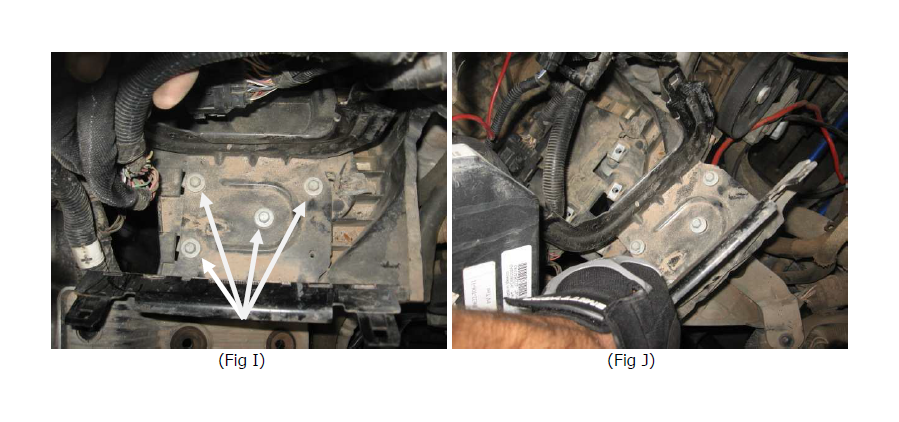
Step 7: If you have any connectors attached to the fuse box bracket remove them. (Fig H) then remove the Four bolts that secure the fuse box bracket, and remove bracket. ( Fig I,J)
Step 8: Remove the factory battery tray by removing the 3 nuts that hold the back of the tray onto the firewall and 4 bolts that secure it to the engine compartment area. (Fig K) Use care when removing from the vehicle. It will take some wiggling and turning to get it out.
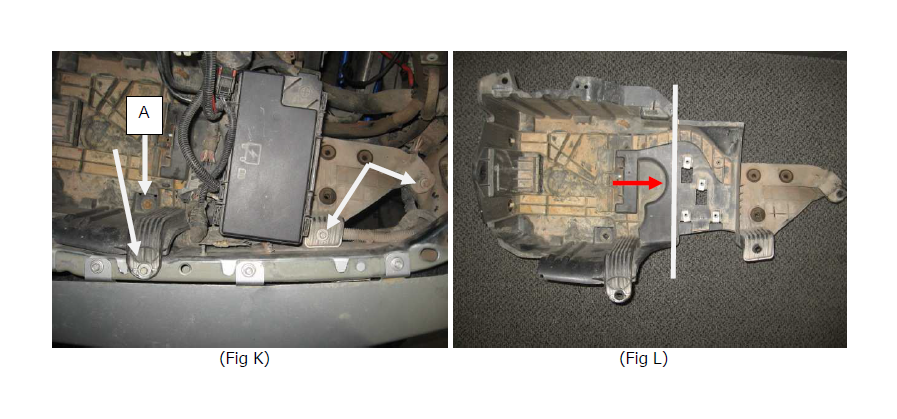
Step 9: You will need to cut your factory batter tray. Measure back approx 1” from the back 2 mounting holes on the fuse box area, mark a line and cut using a reciprocating saw or similar tool. (Fig L)
Step 10: Install the 3 included spacers over the 3 mounting studs on the firewall. (Fig M) Install the new battery tray on the studs and secure with the factory nuts you removed and bolt “A” in step 8. (Fig N, O) Note : Due to manufactures variances you may need to open up the hole the bolt goes through in Fig O

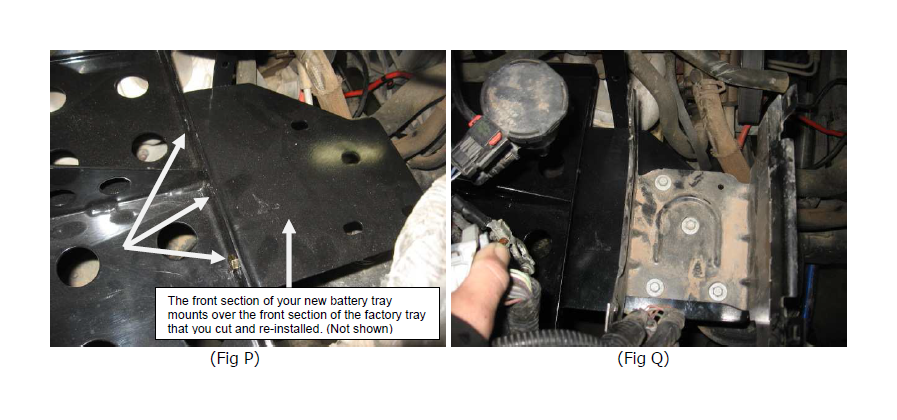
Step 11: Re-install the front section of the factory battery tray that you cut in step 9 using the front two factory bolts you removed in step 8. Then install the front section of your new battery tray over this using the included 3 bolts/washers. (Fig P)Now install the factory fuse box bracket on top of the front of the new battery tray using the factory hardware. (Fig Q) Reinstall the factory fuse box onto the factory bracket. Make sure all hardware is now completely tightened.
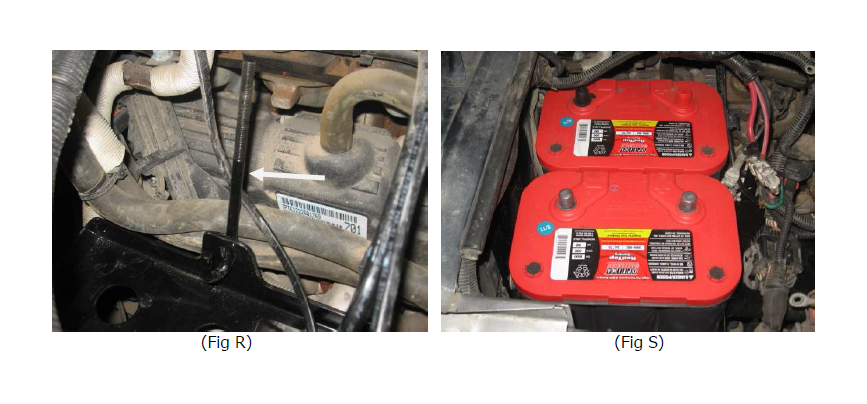
Step 12: Install your batteries and secure using the included “J” bolts, nuts and battery hold down bracket. Note: It is easier if you loosely attach the “J” hooks to the battery tray before you install the batteries. ( Fig R,S,T)
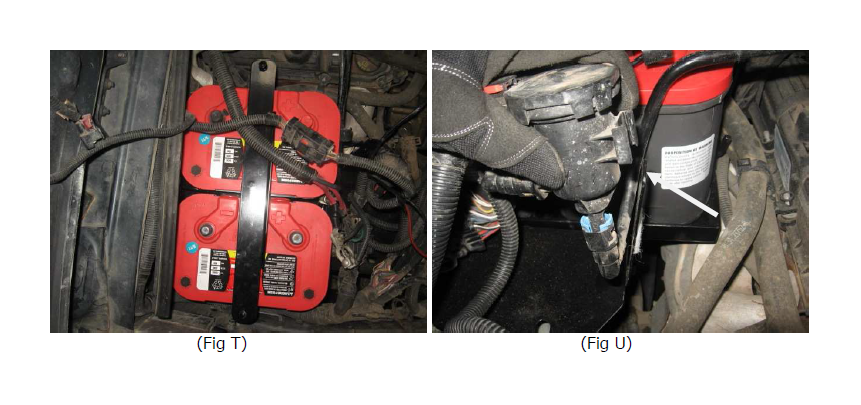
Step 13: Slide the EVAP solenoid over the tab on the new battery tray. Reinstall the air filter box/hoses and power steering bracket bolt you removed in step 2 and 3.
Step 14: Installation is now complete. Connect batteries to the configuration that you want. This should be done by an electrical specialist technician. You can hook up one of the batteries to the orginal connection in order to make the vehicle drivable.

