 FREE 1 to 3-Day Delivery on Orders $149+ Details

How to Install TruShield Slipstream Secure Cover System on your Wrangler

Shop Parts in this Guide
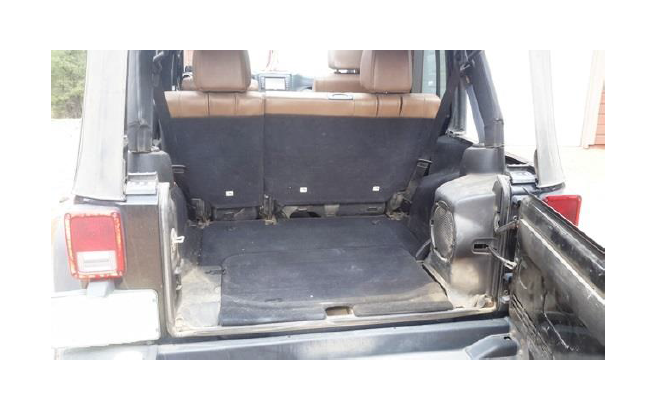
Clear out the back of your Jeep, and take off the hard top (if installed).
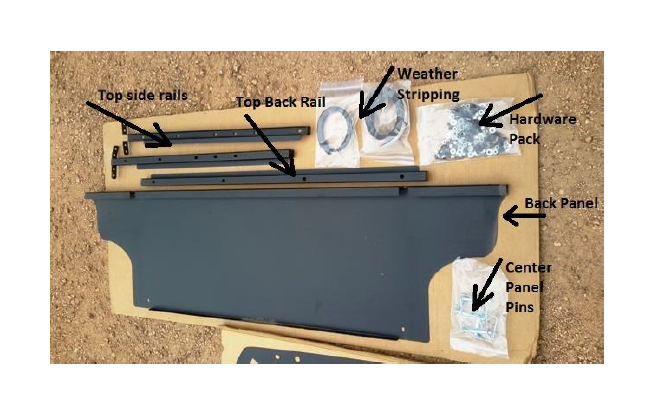
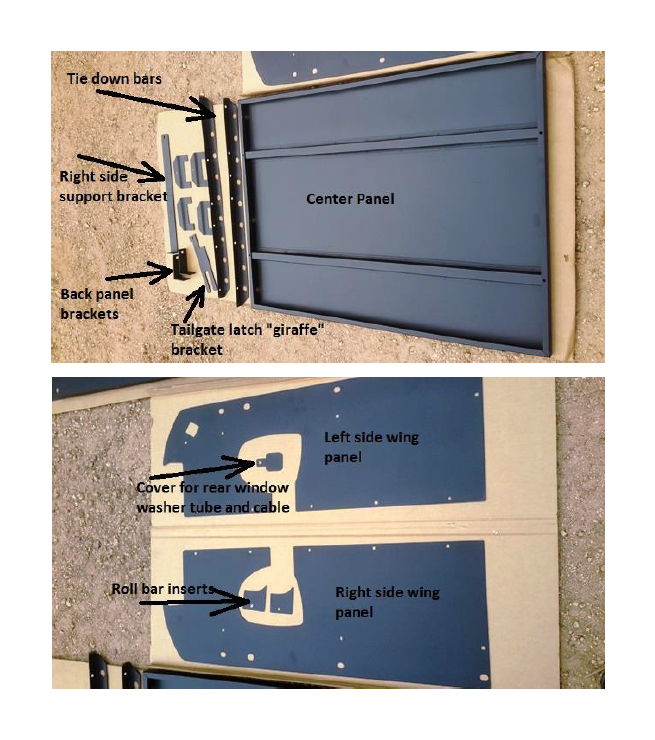
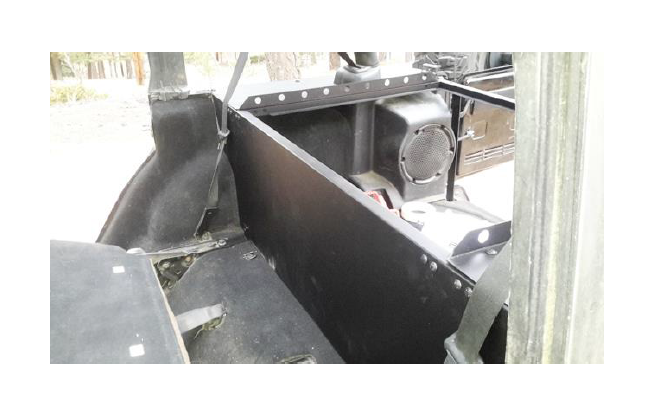
Parts Identification:
Installation Instructions:
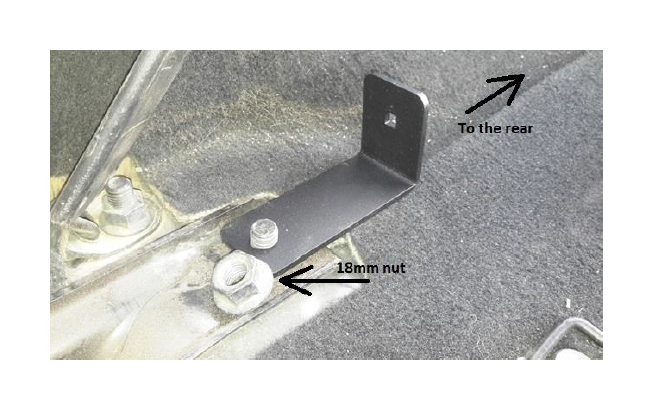
1. Fold down the rear seats. Remove the 18 mm nut from the rear seat bracket, and install an “L” shaped bracket over the bolt, with the L towards the rear of the Jeep. Reinstall the 18 mm nut, but do not tighten at this time. Repeat on the other side.
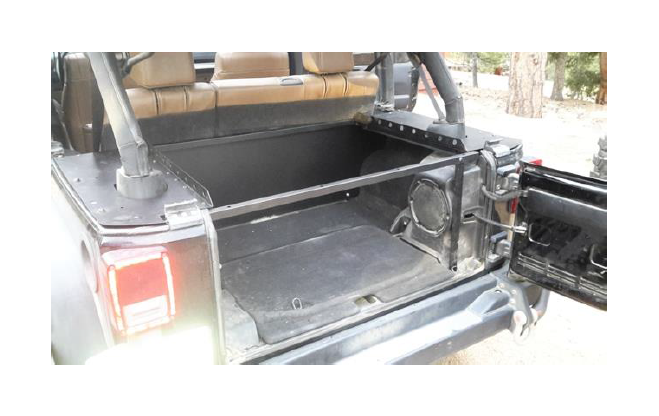
2. Place the back panel just behind the “L” brackets and secure with a carriage bolt, washer and lock nut on each side. Do not tighten at this time
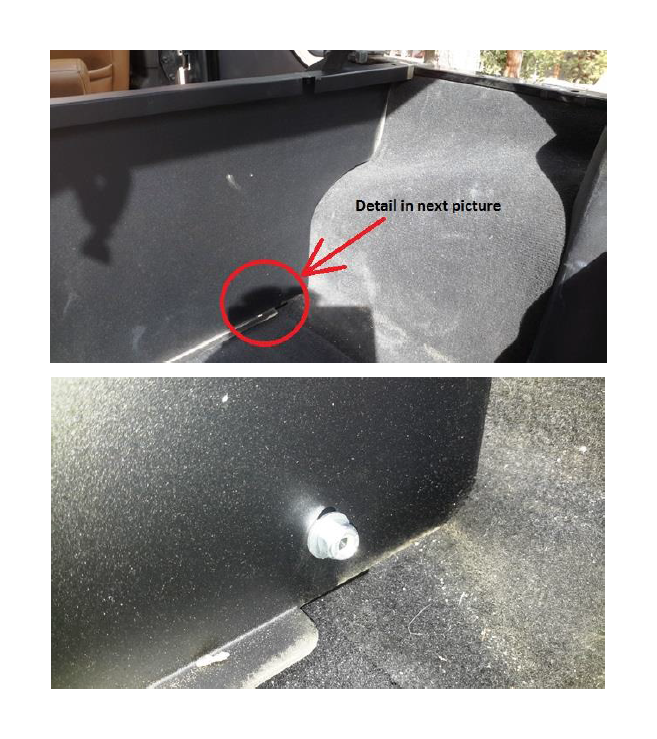
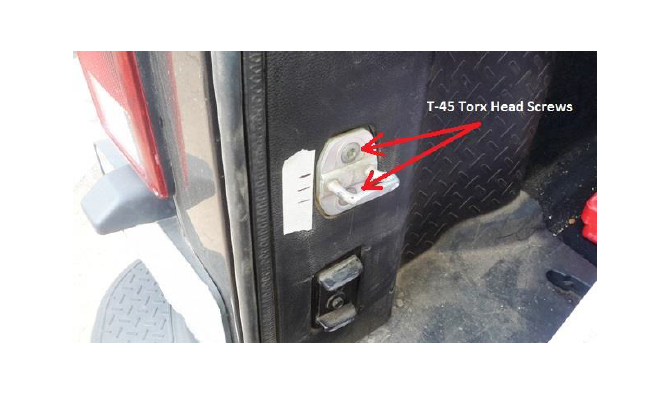
3. Mark the location of the tailgate latch using a piece of masking tape. This will help re-align the latch when installation is complete. Loosen the Torx screws (T45) holding the latch in place. ONLY LOOSEN, DO NOT REMOVE THE SCREWS, and remove the spacer plate behind the latch.
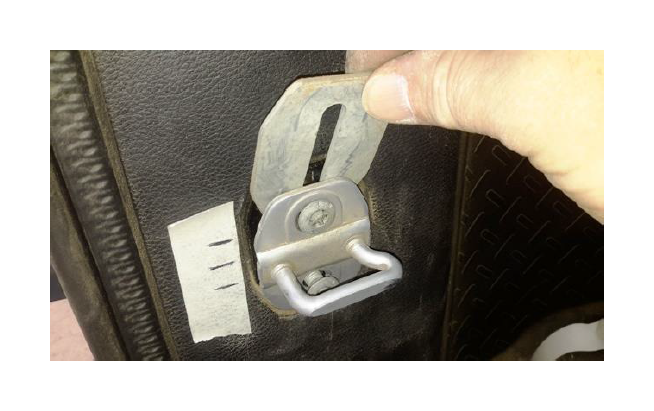
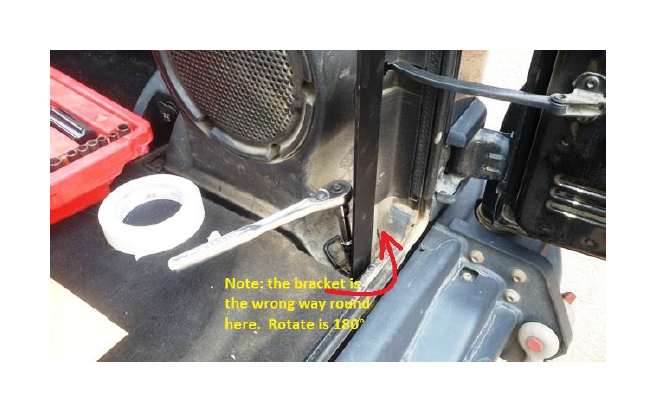
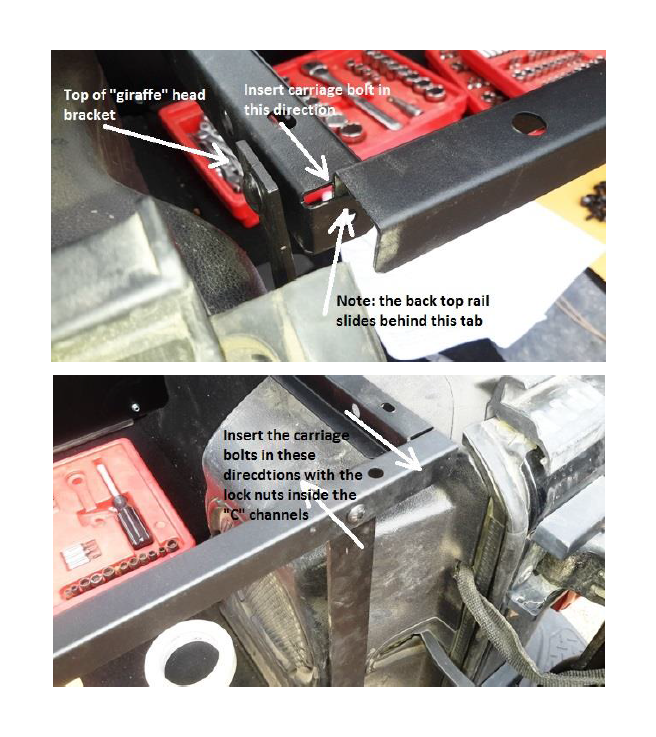
4. With the spacer removed, insert the tailgate latch “giraffe” bracket, with the “giraffe” looking towards the front of the Jeep. Do not tighten the T45 Torx head screws at this time.
5. Take the “C” channel top side rail for the left side. Insert the “T” end of the rail into the slot in the top of the back panel, and secure with 4 carriage bolts, washers and lock nuts. Do not tighten at this time. Repeat for the right side. Note: The top rails are different for left and right side. With the “T” end of the rail facing forward, the flat portion of the rail, on which the center panel will rest, needs to be on the inboard side when installed.
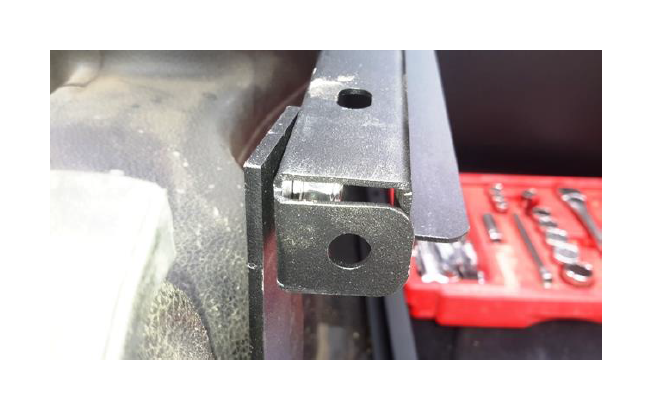
6. At the rear end of the left top rail, attach it to the top of the “giraffe” latch bracket, with a carriage bolt inserted from the outside into the “C” channel. The washer and lock nut should be inside the “C” channel.
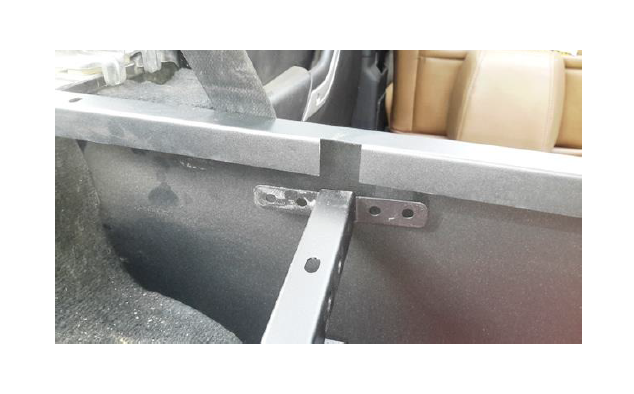
7. On the right side of the Jeep, remove the T30 Torx head screw holding the “D” ring closest to the tailgate hinge. Take the right side support bracket and reinstall the “D” ring on top of the small “L” at the end of the support bracket, with the long side of the bracket closest to the subwoofer enclosure.
8. Now take the top back rail and attach to the end of the left top rail, and the top of the right support bracket and the end of the top right rail. The ends of top back rail slide behind the tabs on the ends of the top left and right rails. The flat portion of the back rail also needs to be inboard, on which the back edge of the center panel will rest.
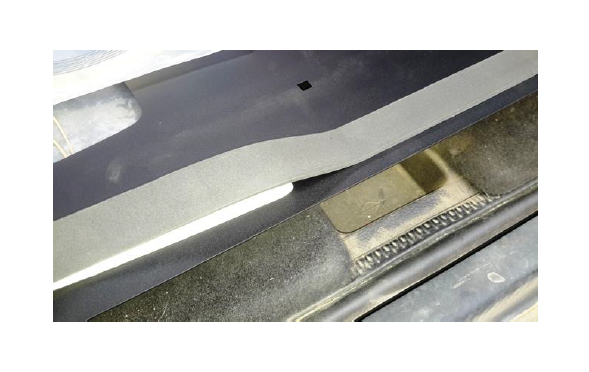
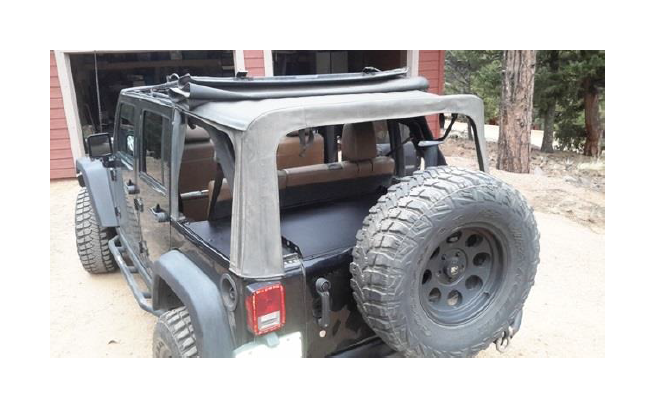
9. Begin to prepare the side wings for installation by applying the 1” wide weather stripping along the outside edge of the wing, where it will sit on the body of the Jeep, where the hard top normally sits. Be sure to apply it to the side which is against the body of the Jeep.
10. Cut away any weather stripping that covers the main holes which will be used to attach the wing to the body of the Jeep. This is also I good time to put the cover for the rear window washer tubes and cable in place. If you’re going to use the hard top, put the cover in place, just rotated 90° to allow the tube and cable to pass through.
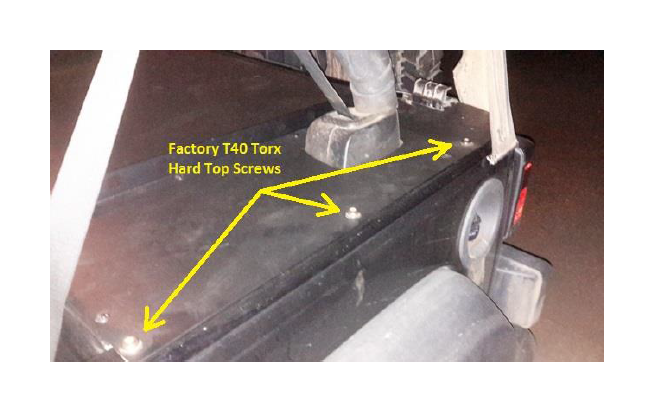
11. Almost done! Set the wings in place on the body of the Jeep. Do this by holding the wing at 90° to its finished orientation, slip the wing around the roll bar and then rotate the wing to line up with the body of the Jeep. Now insert 3 of the factory hard top T40 Torx head screws into the brackets that are normally used to secure the hard top. Do not tighten at this time.
12. If you going to install the tie down bars, slip the flat side with the square holes between the wings and the top left and right rails. Line up the holes with those in the wing and the rails.
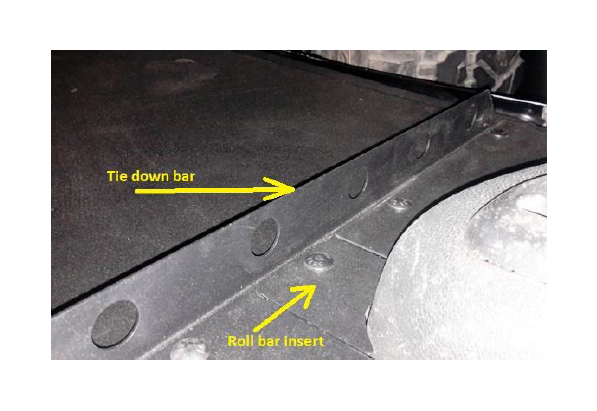
13. Insert a carriage bolt through the square hole in the roll bar insert and then through the tie down bar, and finally into the “C” channel of the top rails. Put a washer in place and thread a lock nut onto the carriage bolt.
14. Now install carriage bolts in any remaining holes and secure with a washer and lock nut.
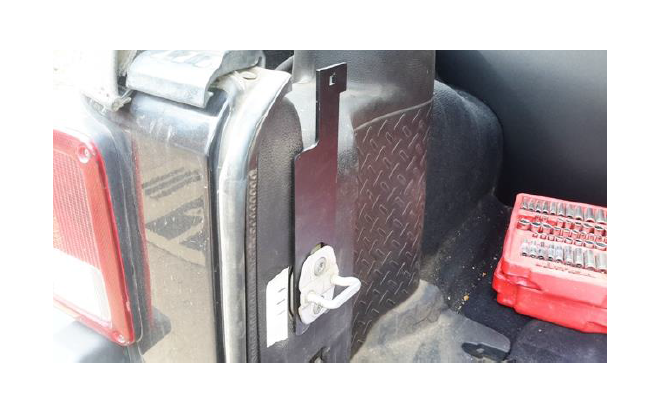
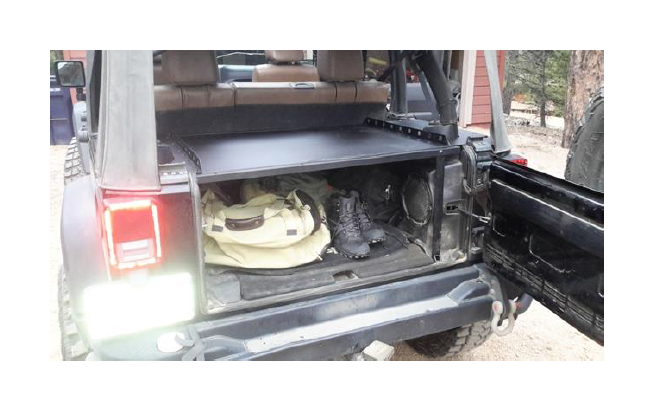
15. Final adjustment: Partially tighten the T45 Torx head screws so that the tailgate latch is in the same position as when you started. Check to make sure the tailgate closes. Put the center panel in place and closed the tailgate. Push, pull and gently tap the bars and rails with a rubber mallet to adjust for a snug but even fit. Now begin to tighten each of the lock nuts on each carriage bolt, working from the back panel towards the rear of the Jeep. Finally fully tighten the T45 Torx screws holding the tailgate latch.
Installation Instructions Written by ExtremeTerrain Customer Nick Gilmour 03/22/17
