FREE 1 to 3-Day Delivery on Orders $149+ Details

How to Install RBP Pro-Series Front Fenders (07-17 Wrangler JK) on your Jeep Wrangler

IMPORTANT!: In order to install these fenders the wiper cowl panel, and the side cowl panels, must b
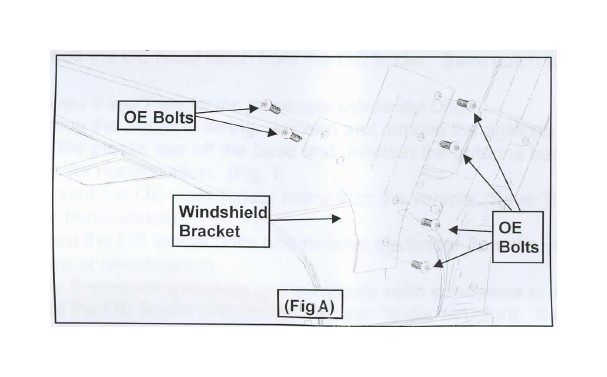
Step 1: Working on one side of the vehicle at a time, unbolt and remove the
windshield brackets from the vehicle. Save hardware for reinstallation. (Fig. A)
Step 2: Remove the windshield wipers from the wiper cowl panel.
Step 3: Remove the wiper cowl panel to expose the fender bolts.
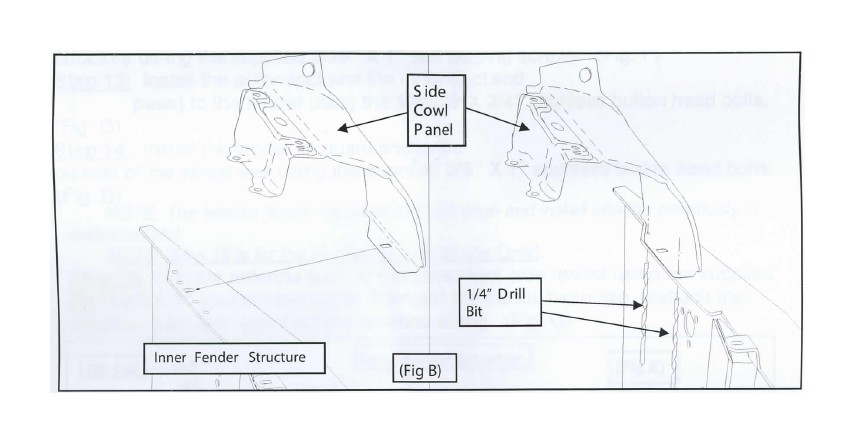
Step 4: Fold back the side cowl panel, as if it were hinged on the spot weld seam,
to expose the spot welds. Drill out the spot welds on the side cowl panel to fender
seam using a 1/4" drill bit. Remove the side cowl panel from the vehicle. (Fig. B)
NOTE: Once removed, clamp the cowl panel to a work surface and bend the panel back
to it's original shape. Save for reinstallation.
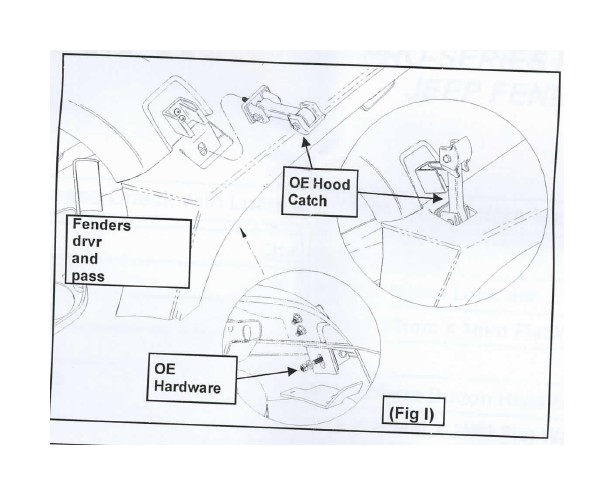
Step 5: Unbolt the OE hood catch from the OE fender. Save catch and hardware
for reuse.
NOTE: Steps 6 and 7 are for the passenger side fender Only!:
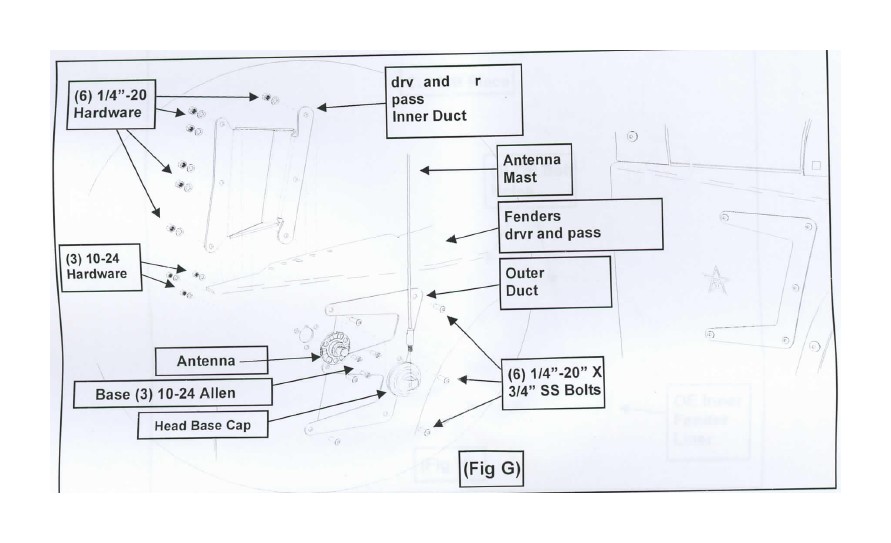
Step 6: Unplug the antenna wiring. Loosen and remove the antenna mast. (Fig. I)
Step 7: Pry the plastic cap off the base and unfasten the antenna base from the
fender. Save for reinstallation. (Fig. I)
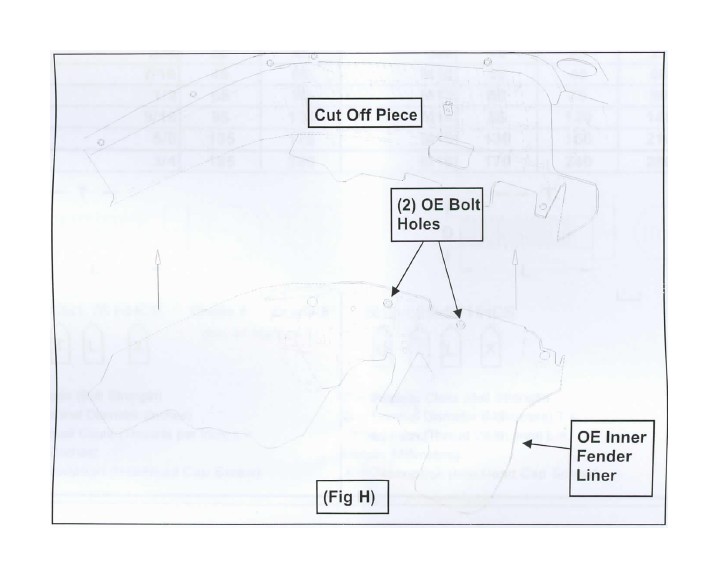
Step 8: Remove the OE inner fender liners from the vehicle. Save The OE
Hardware for reinstallation.
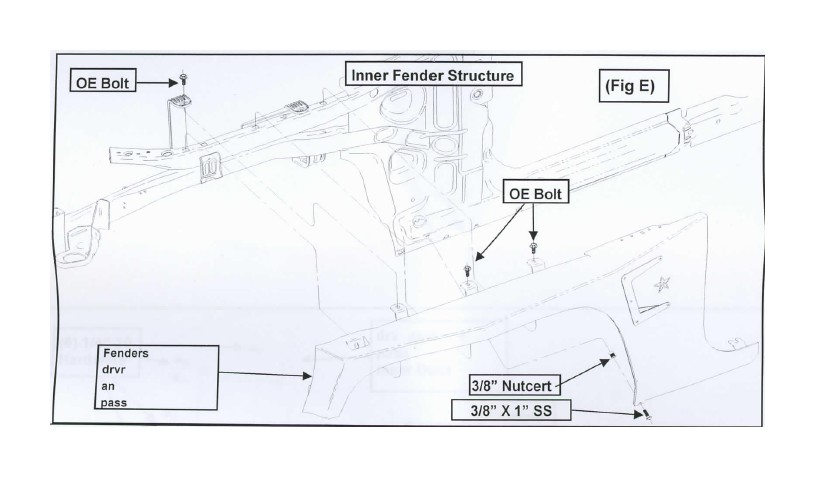
Step 9: Unbolt the OE fender bolts and remove the fender from the vehicle. Save
the hard-fware or reinstallation.
NOTE: The fenders are spot glued and will require some persistence to remove them.
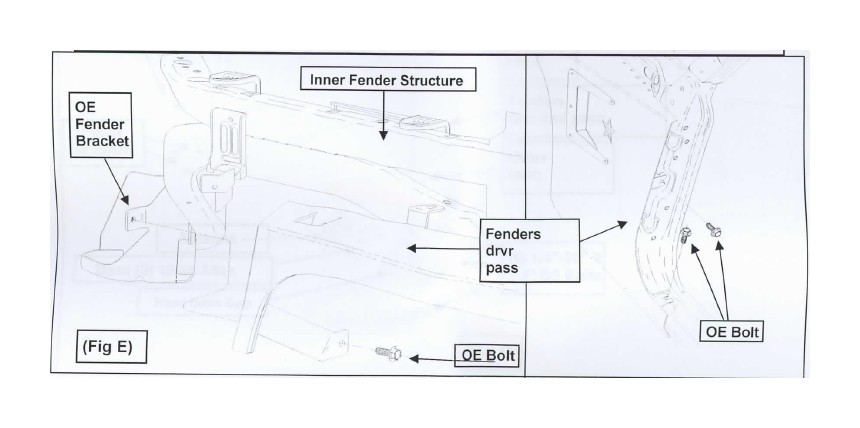
Step 10: Cut the OE fender bracket off the inner fender structure. It will no longer
be needed. (Fig. C)
Step 11: Reinstall the fenders and secure using the previously removed 0 Ehardware. (Fig. E)
Step 12: Reinstall the previously removed side cowl panel to the inner fender
structure us-ing the supplied 3/16" X 1" self tapping screws. (Fig. F)
Step 13: Install the outer duct and the inner duct and pass) to the fender using the 1/4"-20 X 3/4" stainless button head bolts. (Fig. G)
Step 14: Install the fender lip guard and to the outside of the wheel well using the supplied 3/8" X 1" stainless button head bolts. (Fig. D)
NOTE: The bottom fender lip guard bolt will align and install into the previously installed
nutcert.
NOTE: Step 15 is for the passenger side fender Only!:
Step 15: Bolt the antenna base to the passenger side fender using the supplied
(3) 10-24 X 1" socket head bolts. Reinstall the plastic base cap, reattach the
antenna mast and reconnect the antenna wiring. (Fig. G)

Step 16: While holding the inner fender liner into place install the rest of the plastic
retainers.
NOTE: The bottom portion of the inner fender liner will be sandwiched between the
body and fender.
Step 17: Reinstall the hood catch to the new fenders using the previously removed
OE hard-ware. (Fig. I)
Step 18: Reinstall the windshield braces to the vehicle using the previously
removed OE hardware. (Fig. A)
Step 19: Repeat the previous steps on the remaining side of the vehicle.
Step 20: reinstall the factory wiper cowl panel using the previously removed OE
hardware.
Step 21: Reinstall the windshield wipers.
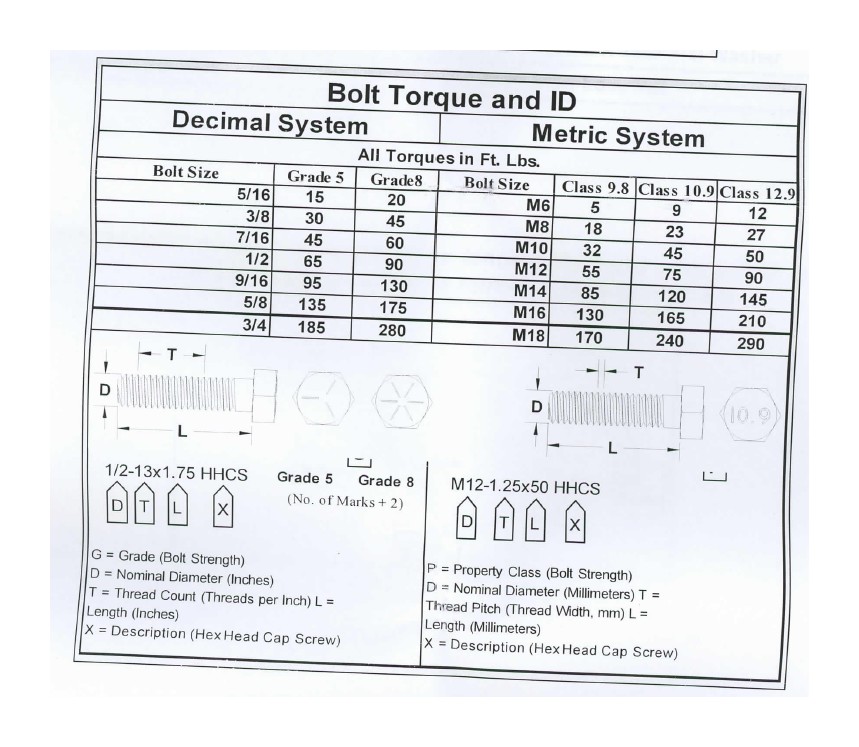
Step 22: Torque all OE hardware according to manufacturers specifications or the
supplied hardware according to the torque chart below. Installation is now
complete.