FREE 1 to 3-Day Delivery on Orders $149+ Details

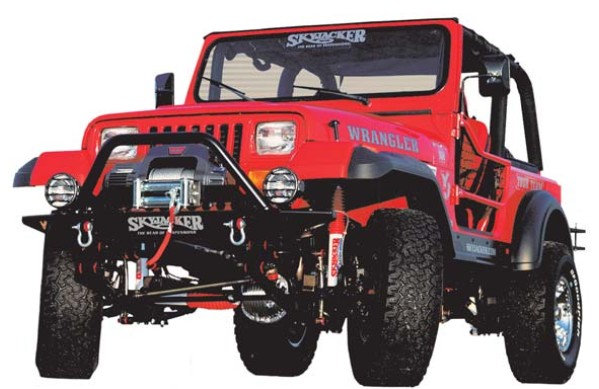
How to Install SkyJacker 3.5-4 in. Softride Suspension Lift Kit w/ Shocks (87-95 Wrangler YJ) on your Jeep Wrangler
Installation Time
1 days
Tools Required
- Metric and Standard wrenches and sockets
- Assorted Drill Bits
- Floor Jack
- Jack Stands
- Measuring Tape
- Torque Wrench

Shop Parts in this Guide
Before beginning the installation, read these instructions and the enclosed driver’s WARNING NOTICE thoroughly and completely. Also affix the WARNING decal in passenger compartment in clear view of all occupants. If any of these items are missing from this instruction packet, do not proceed with installation, but call SKYJACKER® to obtain needed items. If you have any questions or reservations about installing this lift kit, call SKYJACKER® at 318-388-0816 for Technical Assistance or Customer Service departments.
1. Make sure you park the vehicle on a level concrete or asphalt surface. Many times a vehicle is uneven (side-to-side) from the factory, but usually not noticed until a lift kit has been installed which makes the difference more visible. Using a measuring tape, measure the front and rear (both sides) from the ground up to the center of the fender opening above the axle. Record below for future reference.
IMPORTANT NOTES:
• Please refer to Parts List to insure that all parts and hardware are received prior to disassembly of vehicle. If any parts are found to be missing, contact your dealer as soon as possible.
• If larger tires (10% larger than stock) are installed, speedometer recalibration is necessary.
• After installation occurs, a qualified alignment facility is required to align the vehicle to OEM specs.
• The 2.5” Military Wrap springs are designed for spring over applications. If these springs are being installed under the axle (factory design) the center tie bolts must be removed and installed from the top. To perfrom this process properly you must use two large C-clamps to contain the elastic potential energy in a leaf spring when the center tie bolts are being removed. Attach and tighten a C-clamp on each end of the leaf spring to hold spring assembly securely together. Using vise-grips to hold the head of the center bolt, loosen and remove. Insert tie bolt from opposite side and tighten. With care, slowly loosen and remove the C-clamps.
FRONT:
2. Open the hardware bag and apply a thin coat of lithium-based grease around the polyurethane bushings and insert into each eye of the new front springs then apply a thin coat on the outside of bushings. Insert the metal sleeves into the springs eyes.
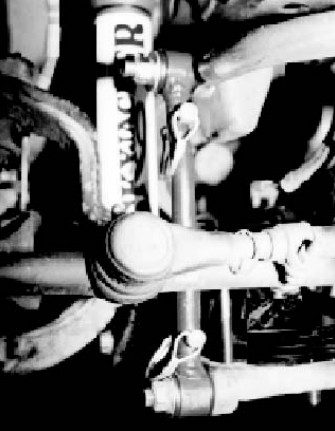
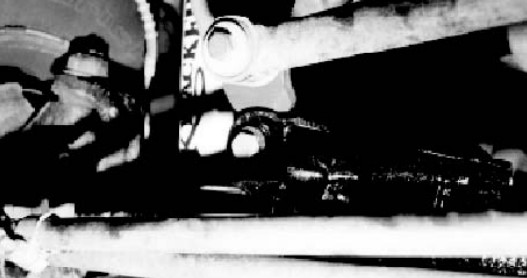
3. Raise front of vehicle and support securely with jack stands under the frame behind front springs and block the rear wheels. Remove the tires, shocks, u-bolts (Caution: once the u-bolts are removed, the front axle will be free to move, so support securely on a floor jack). If a drop pitman arm was purchased (needed with 4" lifts, #JA750 for Power Steering, JA850 for Manual Steering), disconnect the tie rod from the original pitman arm, and install new arm (refer to instructions included with drop pitman arm).
4. Unbolt each end of the original front leaf springs and remove both springs from vehicle. If new shackle bushings were purchased, grease and install them at this time. Install the new springs with small eye toward the front bumper for YJ20FS/YJ40FS. If Skyjacker Military wrapped springs were purchased, the spring can mount either way, simply be sure the correct sleeve is used with the correct factory bolt. (NOTE: It is important to NOT tighten the spring and shackle bolts at this time. If SOFTRIDE® springs are tightened, with no load being applied on the springs, a false lift and stiff ride will result. These bolts will be tightened later once the vehicle is on the ground.)
5. While still supporting the front axle with the floor jack, lower axle down to the leaf springs. Be certain the tie bolt heads align and fit into the holes in the axle housing. Install the new u-bolts included and tighten them to 90 ft.lbs. Install tires and lower vehicle to the ground.
2-2.5" Lifts, skip step 6.
6. On 4" kits, a front track bar (pan hard rod) relocation bracket is required. This bracket is packaged separately with its own metric hardware (top of bracket is wide end with slotted hole, and offset should bend toward the front bumper over the original mounting tab). To install bracket, unbolt the factory track bar from the original bracket on axle (save the original nut to re-use). Place the bottom of new bracket just behind the original bracket on axle with a washer between the brackets, then insert the shorter metric bolt from the front going through the original bracket, then the washer, and next through the new bracket. Now install the new nut and tighten. Hook up track bar by
first putting a washer on the new longer metric bolt and insert bolt though track bar (from the front), then through the slotted hole on new bracket. Tighten using the original nut.
NOTE: Be certain vehicle is on the ground and that vehicle weight is on the springs.
7. Tighten the track bar (pan hard rod) bolts (on 4" kits, this was done in step #6), and also tighten the sway bar bolts. If a polyurethane sway bar bushing kit was purchased, install it at this time.
REAR INSTALLATION:
8. Raise rear, support securely with jack stands and block the front wheels. Remove the tires, shocks and u-bolts. (Caution: the rear axle will now be free to move, so support securely on floor jack.)
9. Loosen the track bar bolt connecting the bar to axle housing and on 4" lifts, remove track bar from axle mount because because a relocation bracket will be installed in step 13).
10. Apply a thin coat of grease to the polyurethane bushings and insert into each eye of new rear springs. Now apply a thin coat of grease on outside of polyurethane bushings. Insert sleeves into spring eyes.
11. Notice each end of the factory springs (small eye-towards the rear bumper end and large eyetowards front) to see which way to install new springs YJ20RS / YJ40RS. With a floor jack supporting the rear axle, unbolt each end of rear leaf springs and remove from both sides. These springs have a degree shim attached, spring must be installed with thick end of shim towards front bumper. Install spring eye bolts. Skyjacker Military wrapped springs can bolt up either way as long as the thick portion of the degree shim is towards the front. (NOTE: Do NOT tighten spring eye bolts at this time.)
12. Using the floor jack, lower the rear axle down to leaf springs. Be sure tie bolts align and fit into the tie bolt holes in the axle housing. (NOTE: If new shackle bushings were purchased, grease and install them in the frame at this time.) Install and tighten new u-bolts, shocks and tires then lower vehicle to ground. Tighten spring eye bolts at this time.
2-2.5" Lifts, skip to step 14.
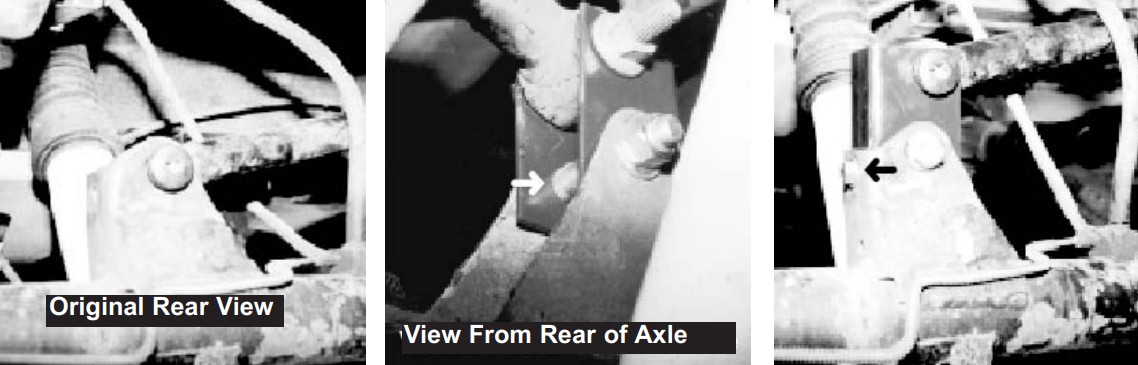
13. For 4" Lifts, place new rear track bar extension bracket into the stock bracket (on axle housing), with the slotted holes toward the top. Place the 1/2" x 1 1/2" spacer tube inside bracket (to prevent crushing, see white arrow) and install the 1/2" x 3" bolt and washer through original and new bracket and tighten securely with 1/2" lock nut. Insert track bar into new bracket, and install using original bolt and nut (do NOT tighten yet). Drill a 3/8" hole and install the new 3/8" x 1" bolt (see black arrow), washer and nut through side of new and original track bar bracket. Tighten all the track bar bolts and nuts at this time.
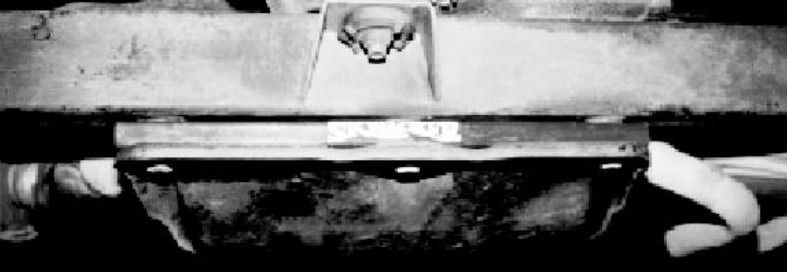
14. Check Brake Line Length, if they seem too short, longer stainless steel DOT Approved lines are available from Skyjacker. A driveline vibration may occur. If so, a transfer case lowering kit from Skyjacker should be installed.
NOTE: After driving the first 50 miles, re-torque ALL nuts, bolts and ESPECIALLY U-BOLTS, torque again for another 100 miles and then check periodically thereafter.
TROUBLE SHOOTING
Upon completion of installing the entire lift (front and rear) if the vehicle appears to sit un-level go to step 1 and record the AFTER measurements to verify the amount of lift obtained at each point. If the vehicle does sit un-level and it did not sit un-level in step 1, the following can be checked:
1. Be sure all of the polyurethane bushings were greased well so that they will not restrict the spring’s movement.
2. Check the condition of the shackle bushings in the frame (if not replaced with new ones) to be sure they are not worn, and if so, replace them with new polyurethane bushings.
3. Check the body bushings between the frame and the body to be sure they are not showing wear. If so, SKYJACKER® offers replacement polyurethane kits.
4. In order to be sure that the bushings are not restricting the spring from being at the correct ride height, loosen (do not remove) the spring eye bolts. Then stand on the bumpers and bounce the vehicle up and down vigorously to free up the bushings and then retighten spring eye bolts.
ACCESSORIES:
• Single and Dual Steering Stabilizer Kits
• Transfer Case Lowering Kit (Tubular Design), #TCL25
• Double Disconnect Sway Bar Extended End Links