 FREE 1 to 3-Day Delivery on Orders $149+ Details

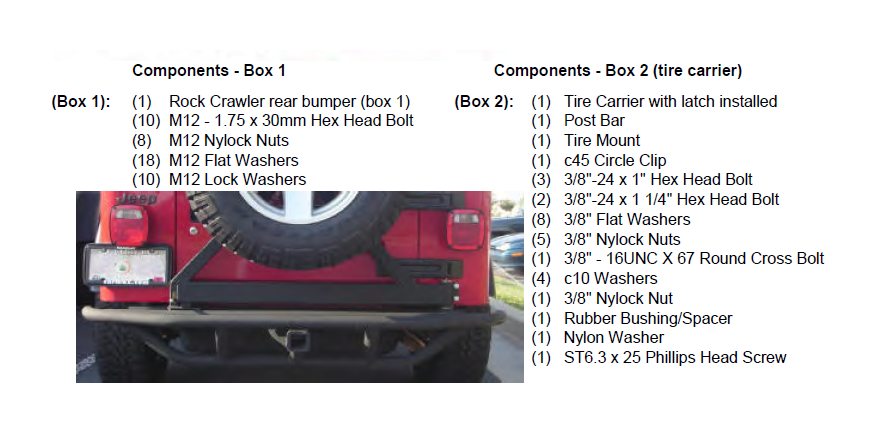
How to Install Rugged Ridge RRC Rear Bumper w/Tire Carrier, Textured Black on your 87-06 Wrangler
NOTE: TWO PEOPLE WILL BE NEEDED TO MOUNT THIS BUMPER.
(Step 1): Remove original factory bumper per manufacturer's instructions. The lower mounting bolts can be reused if desired.
(Step 2): The inner mounting holes on the Rock Crawler bumper will not align with any factory holes regardless of model year (Fig.1). With the help of another person mount the bumper using the outer holes only. With bumper secured scribe or mark the inner hole locations. (Fig.2) Be sure to mark hole location correctly for proper fitment. Remove bumper and set aside.
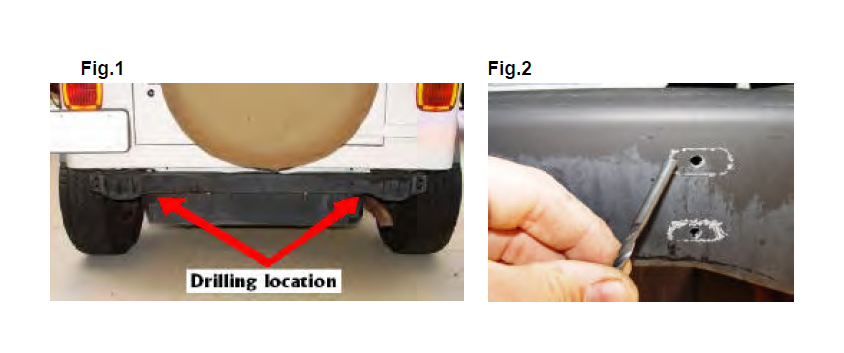
(Step 3): With the holes marked or scribed drill a small 3/16" pilot hole in the rear cross member in the center of your marks. The smaller pilot hole insures the centering of your larger mounting hole when drilled. CAUTION: EXTREME CARE SHOULD BE TAKEN BEFORE DRILLING. THE FUEL TANK IS LOCATED JUST BEHIND THE CROSS MEMBER. Great care will be needed to avoid damaging the fuel tank.
With the smaller 3/16" pilot holes drilled, enlarge the holes using a 1/2" drill bit. AGAIN, BE CAREFUL AND AVOID ANY CONTACT OF THE DRILL BIT TO FUEL TANK.
(Step 4): With mounting holes drilled reposition bumper back to frame cross member and secure using (6) M12 x 30mm Hex Head Bolts, (12) M12 Flat Washers,(6) M12 Lock Washers, (6) M12 Nylock Nuts.
DO NOT TIGHTEN HARDWARE AT THIS TIME.
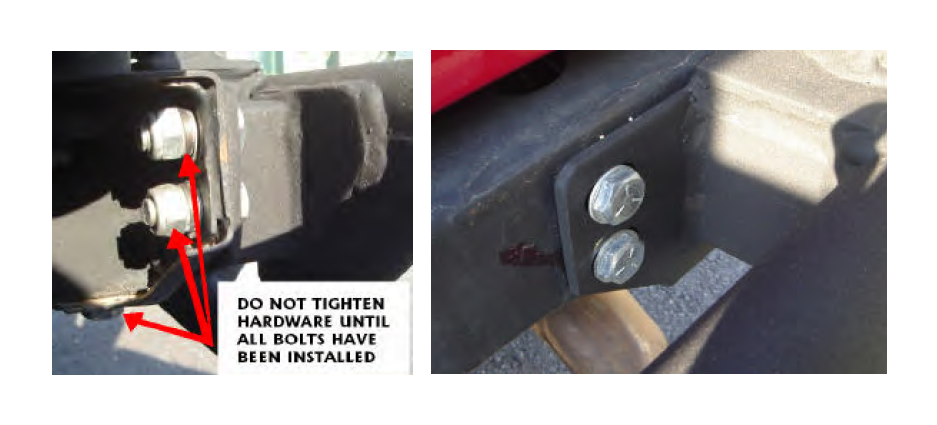
(Step 5): Locate (2) M12-1.75 x 30mm, (2) M12 Flat Washers, and (2) M12 Lock Washers NOTE: M12 Bolts fit most TJ vehicles, 7/16" bolts fit most YJ vehicles. If unable to use the supplied lower hardware you can reuse the original OE lower bolts. Secure the bottom of the bumper to the lower two mounting points using supplied hardware. Tighten all hardware at this time.
If desired the original lower mounting bolt can be reused.
(Step 6): With help secure the tire carrier to the bumper swing spindle. Work tire carrier all the way down onto the spindle and close. Install (2) 3/8"-24 x 1 1/4" Hex Head Bolts, (4) 3/8" Flat Washers and (2) 3/8" Nylock Nuts to the tire carrier arm clamp. (Fig.5 & 6)
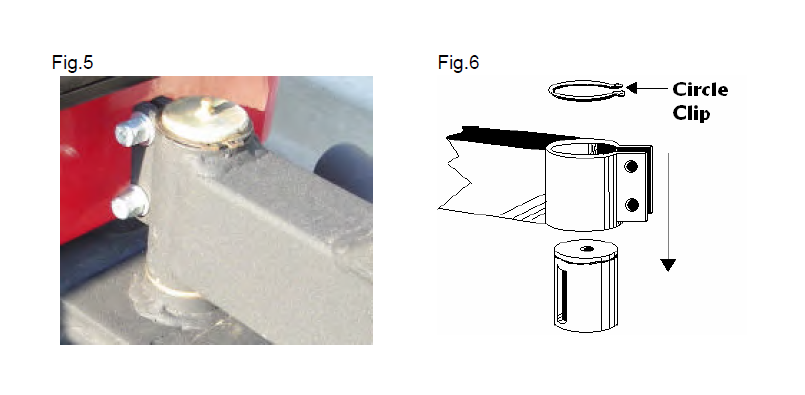
(Step 7): Install the circle clip onto the top of the spindle (Fig.6). Install grease nipple. Add grease using grease gun to lubricate the spindle and pivot before use.
(Step 8): Install Post Bar at this time to the top of the tire carrier. Use (1) 3/4" x 3" Hex Head Bolt, (2) 3/4" Flat Washers, and (1) 3/4" Nylock Nut.
(Step 9): Locate tire mount and install using (3) 3/8"-24 x 1" Hex Head Bolts, (6) 3/8" Flat Washers and (3) 3/8" Nylock Nuts. Slide mount onto tire carrier and hand tighten. There are two sets of mounting slots on the tire carrier. With post bar installed test fit the spare tire and determine what is the best mounting point for your vehicles spare tire. Tighten bolts.
(Step10): Mount rubber bushing to bumper swing arm latching point using supplied phillips head screw. The rubber bushing is needed to maintain proper preload to secure swing arm latch.
Note: When the spare tire is installed it should set snuggly against the post bar. For most oversized tires the outer mounting holes will be used. Tire carrier can be used with tires up to 35".
