FREE 1 to 3-Day Delivery on Orders $149+ Details

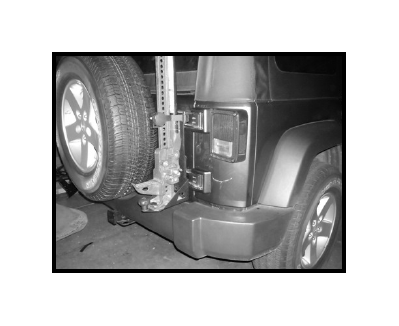
How to Install Rugged Ridge Hi-lift Jack Mounting Bracket on your 07-18 Jeep Wrangler JK; 2018 Jeep Wrangler JL

Shop Parts in this Guide
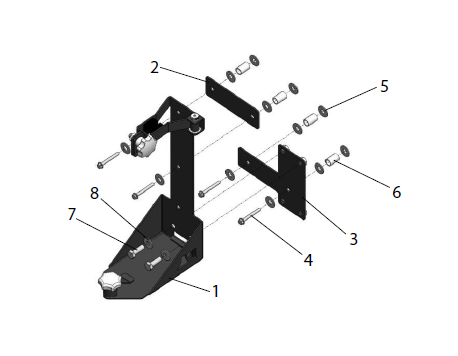
| SR No. | CONTENTS: | QTY |
|---|---|---|
| 1 | Mounting Bracket | 1 |
| 2 | Upper Mounting Plate | 1 |
| 3 | Lower Mounting Plate | 1 |
| 4 | M8 Bolt | 4 |
| 5 | M8 Washer | 12 |
| 6 | 25mm Spacer | 4 |
| 7 | M10 Bolt | 2 |
| 8 | M10 Washer | 2 |
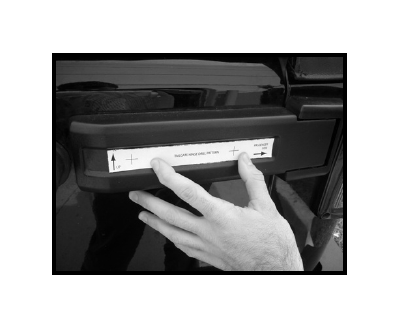
1. Remove rear tailgate hinge covers using a flat head screwdriver. These covers are easily removed by gently prying the covers from the hinge side until they pop off then sliding to the left being careful not to crack the clip on the back of the cover. The template on page 3 can be used to drill clearance holes in the top and bottom tailgate hinge covers for the use with the spacers used to mount the bracket.
NOTICE: IN THE FOLLOWING STEPS THE TAILGATE HINGE BOLTS WILL BE REMOVED. THE WEIGHT OF THE TAILGATE RESTS ON THESE BOLTS. BE SURE THAT ONLY ONE TAILGATE HINGE IS UNBOLTED AT A TIME. THIS WILL ENSURE THE TAILGATE REMAINS ADEQUATELY SUPPORTED.
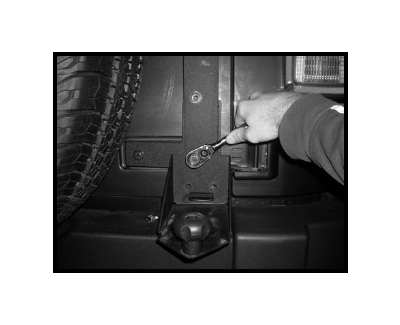
2. Install lower mounting plate by rst removing the (2) lower tailgate hinge bolts. If installing on a vehicle with a RR tire carrier, use (2) M8 bolts with (2) 25mm spacers to secure the lower mounting plate to the tailgate as shown. (3) flat washers should be used for each bolt. Place (1) under the bolt head and (1) on either side of the spacer.
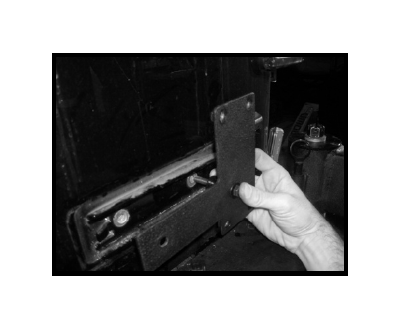
If installing on a vehicle without a RR tire carrier, the mounting bracket should be installed with the lower mounting plate in this step. Line up the bottom M8 hole with the bottom right tailgate hinge bolt hole and insert M8 hardware as shown. Do not fully tighten the bolt securing the mounting bracket. The mounting bracket will have to be rotated to gain access to the upper right tailgate hinge bolt in the next step.
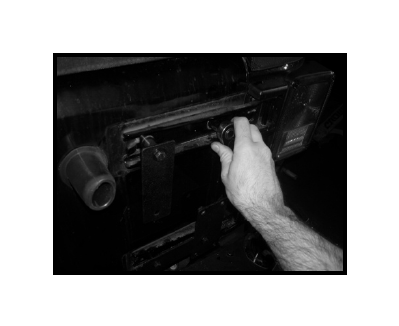
3. Install upper mounting plate into position by first removing the upper left tailgate hinge bolt. Use (1) M8 bolt with (1) 25mm spacer and (3) M8 washers to secure the upper mounting plate to the left hole of the upper tailgate hinge. Do not fully tighten as this plate will have to rotate behind the mounting bracket after it is installed. Next, remove the upper right tailgate hinge bolt.
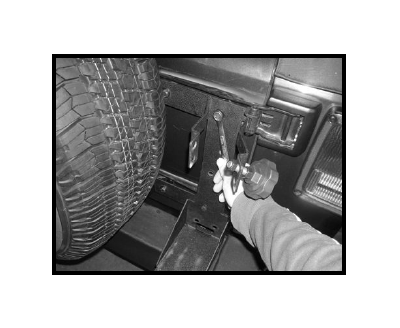
4. If installing Off Road Mounting Bracket with a RR tire carrier, secure the mounting bracket to the lower mounting plate’s top two holes using M10 hardware as shown. The upper mounting plate can now be rotated into its horizontal position to line up with the mounting bracket’s middle hole and the upper right tailgate hinge hole. Insert the remaining M8 hardware and tighten. Go back and make sure all bolts are tightened before inserting your Off Road Jack.
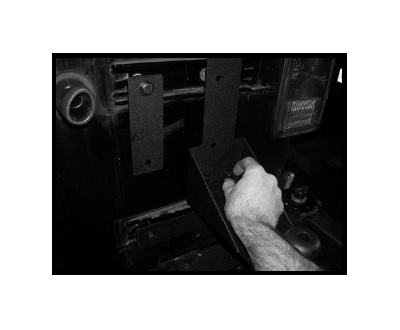
If installing Off Road Mounting Bracket without a RR tire carrier, install the final M10 bolts into the bottom holes in the mounting bracket as shown. Go back and make sure all bolts are tightened before inserting your Off Road Jack.
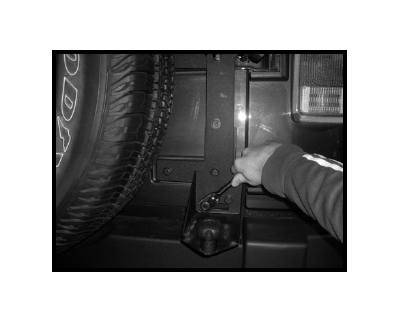
5. You are now ready to install your Off Road Jack. Use the bottom knob to clamp the base of the jack into position being sure that the rear of the base is slid back under the tab in the mounting bracket. Close the top swing arm making sure the rubber pads grip the jack’s vertical beam.