FREE 1 to 3-Day Delivery on Orders $149+ Details

How to Install Rugged Ridge Frame Brace w/ Track Bar Drop Bracket on your 2007-2013 Wrangler
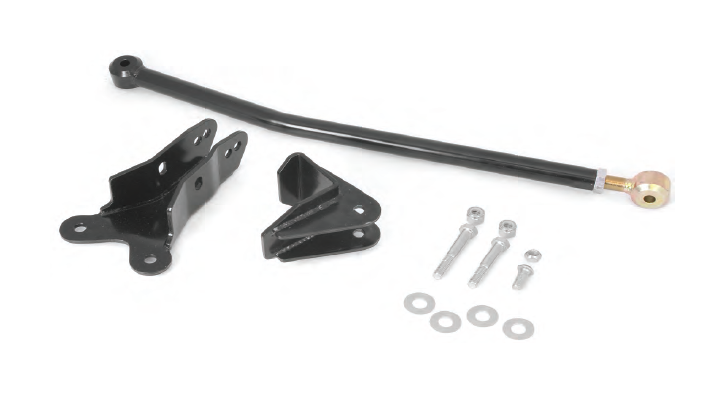
| SR No. | Kit Contents: | QTY |
|---|---|---|
| 1 | Frame Brace Bar | 1 |
| 2 | Pass. Brace Bracket | 1 |
| 3 | Dr. Brace Bracket | 1 |
| 4 | 9/16” x 3 1/2” Hex Bolt | 1 |
| 5 | 9/16” x 3” Hex Bolt | 1 |
| 6 | 9/16” Flat Washers | 4 |
| 7 | 9/16“ Nylock Nut | 2 |
| 8 | 1/2” x 1” Button Head | 1 |
| 9 | 1/2” Lock Nut | 1 |
PLEASE READ AND UNDERSTAND ALL INSTRUCTIONS BEFORE YOU BEGIN.
Note: This product requires structural welding. Depending on capabilities a certified welder may be necessary to install this item.
Caution: Always park vehicle on level ground when working under vehicle. Always use jack stands when removing tires from vehicle. Eye protection is required when drilling and working under vehicle. Penetrating oil may be necessary to remove track bar.
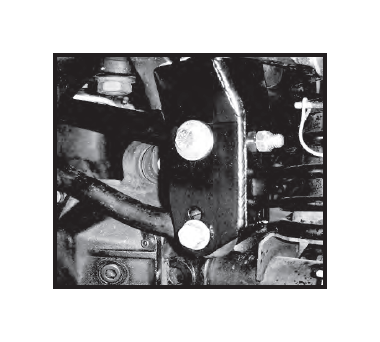
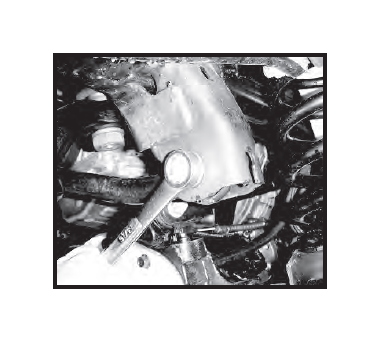
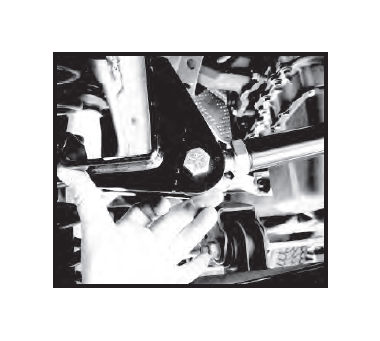
Step 1. Raise the vehicle and support with jack stands. Remove both front wheels. Remove the track bar from the driver side of the vehicle. A penetrant spray may be needed to loosen the bolts. Use caution when removing the bolt from the track bar as it may have some tension on it. Remove the lower two bolts that hold the steering gear box to the frame. Do not discard hardware it will be reused.
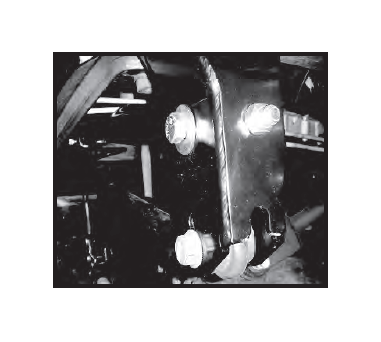
Step 2. Attach the new frame brace bracket onto the drive side of the frame using the two bolts removed from the lower section of the steering gear box. Do not tighten at this time. Place the supplied button head bolt in the hole located in the center of the bracket. The button head should be on the inside of the brackets with the threads extending outward towards the coil spring. Use the supplied lock nut to mate the brackets together. Reinstall the track bar using one of the two mounting holes which line up best.
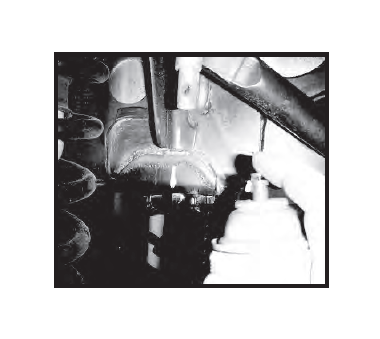
Step 3. Install the frame brace bar with the fixed end into the driver side bracket. The curve in the bar should go upward.
Step 4. Temporarily install the frame brace bar into the passenger side L-bracket. Adjust the length of the bar so that the L-bracket fits flush against the frame rail.
Step 5. Once you have made the adjustments to the bar and bracket, verify that the bar is perpendicular to the frame. Using a marker or scribe trace the outline of the bracket onto the frame. Mark a reference line on the bracket and frame to align after grinding.
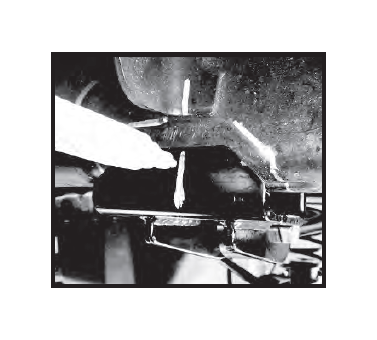
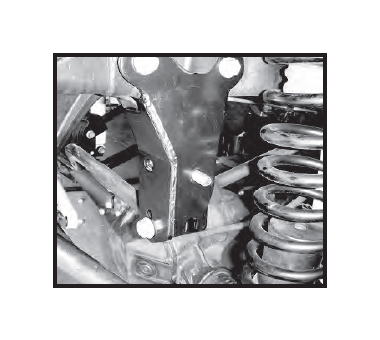
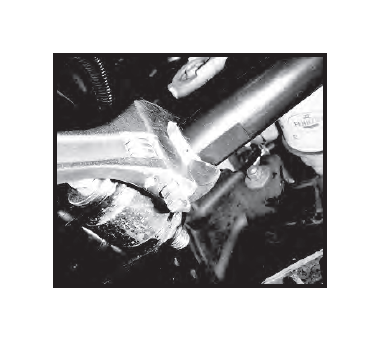
Step 6. Using a grinder or sander clean the outlined area marked on both sides of the frame. Remove the brace bar from the bracket. Remove the powder coating from the outer edges of the bracket. Place the bracket against the frame and align the reference marks. Weld the bracket to the frame around the entire perimeter of the bracket. Once the bracket has been welded in place, clean the area that was welded and coat with paint.
Step 7. Install the frame brace bar in the brackets using one 9/16” x 3” hex bolt on the passenger side and one 9/16” x 3 1/2” on the driver side with flat washers and a hex nut on each. Tighten the jam nut on the frame brace bar.
Step 8. Torque the bolts to the following specifications: -Frame Brace Bar End Bolts- 85 ft lbs. -Steering Bear Box Bolts- 65 ft lbs. -Track Bar Bolt- 125 ft lbs.
Note: The extra threads sticking out on the button head bolt may have to be trimmed for clearance of the sway bar ends.