FREE 1 to 3-Day Delivery on Orders $149+ Details

How to Install Rugged Ridge Dual Battery Tray (12-17 Wrangler JK) on your Jeep Wrangler
Tools Required
- Flat Head
- Screwdriver
- Socket Wrench
- 13 mm Socket
- 10 mm Socke
- Panel Clip Tool
- Rotary Tool
- Cutting Wheel
- Sanding Bit
- Sandpaper

Shop Parts in this Guide
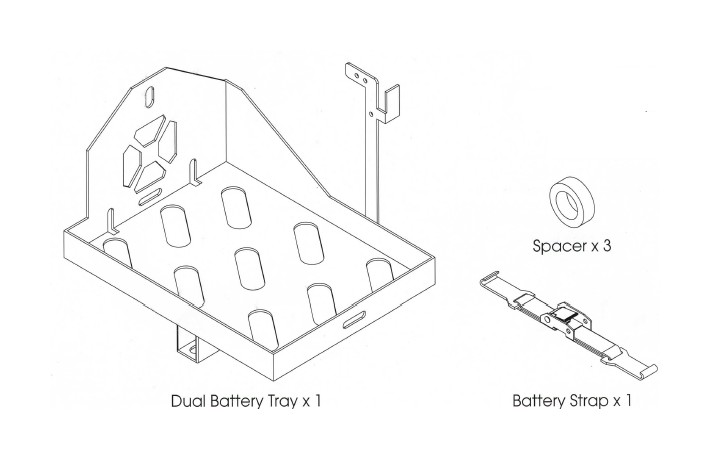
CONTENTS:
• Dual Battery Tray (1)
• Battery Strap (1)
HARDWARE:
• Spacer (3)
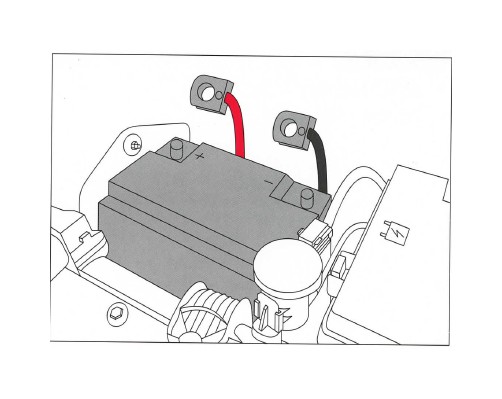
1. Remove plastic engine cover and disconnect battery, removing the negative cable first. Remove battery from tray.
WARNING: When removing battery cables do not touch the positive and negative terminals together.
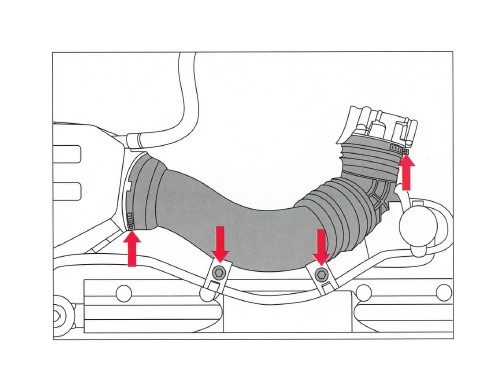
2. Loosen the two hose clamps, two 10 mm bolts, and release coolant bypass hose from air intake tube. Lift up air intake tube and unplug the IAT Sensor. Remove the air intake tube. Hardware will be reused.

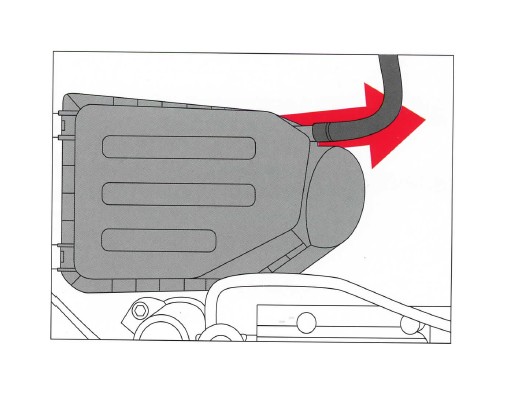
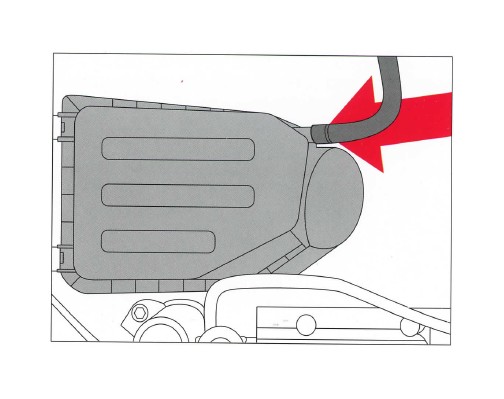
3. Remove Air Filter Housing by removing rubber beather hose and pulling up on Air Filter Housing to free from mounting grommets.
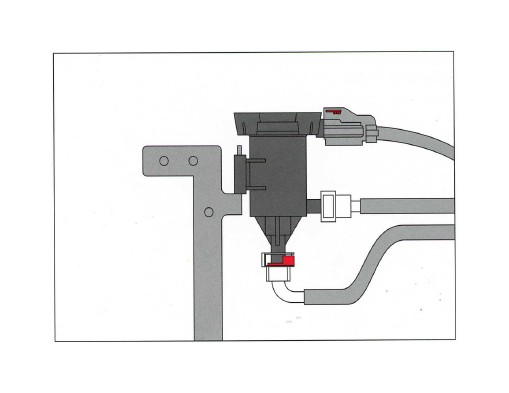
4. Disconnect Linear Purge Valve wiring by pulling red tab out and then releasing the connector.

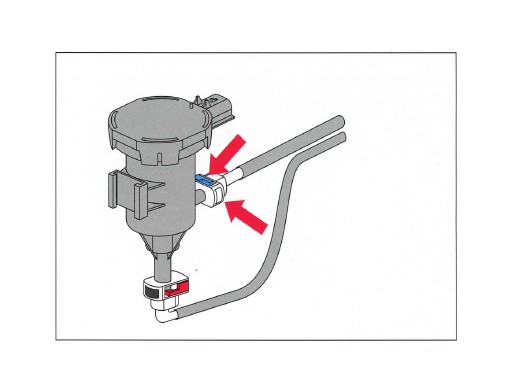
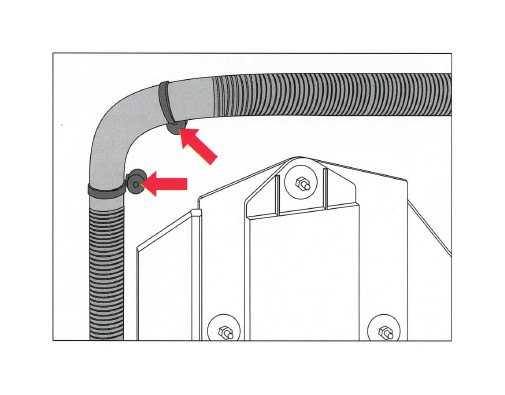
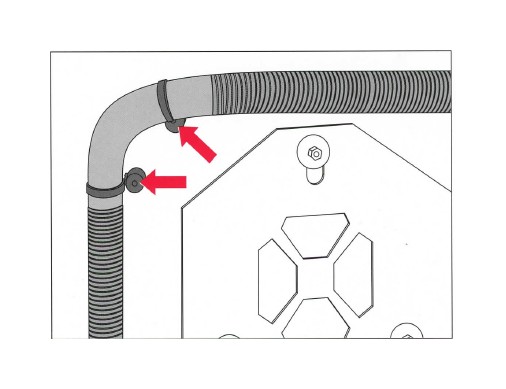
5. Slide Linear Purge Valve off of mounting tab and remove the blue and red lines. Unlatch blue colored clip, press and hold button on opposite side of con-nector, and pull connector off. Repeat for red line.
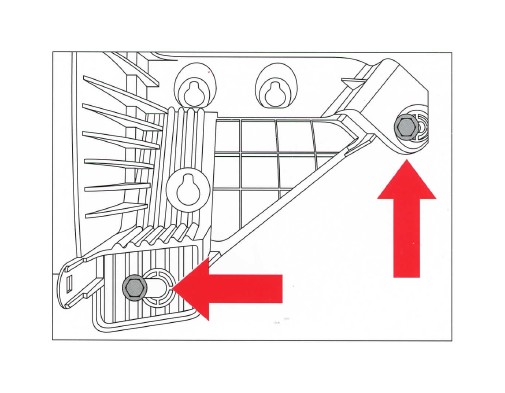
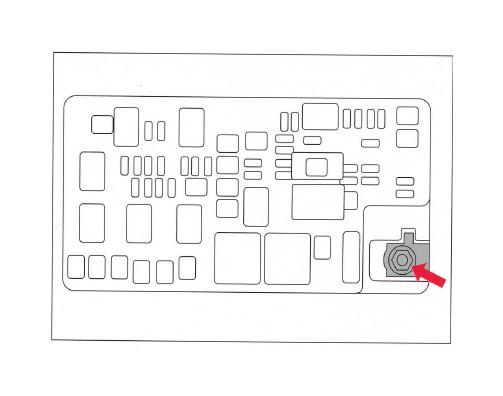
6. Open Fuse Box lid and remove 13mm nut to disconnect power lead.

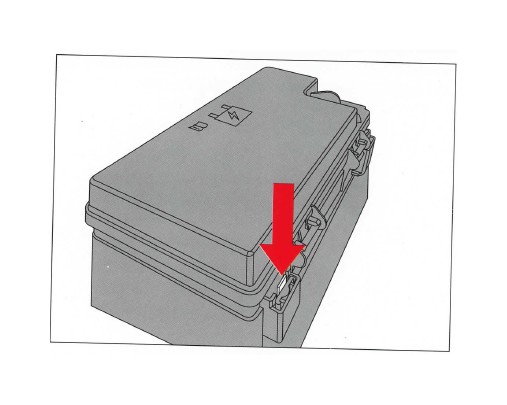
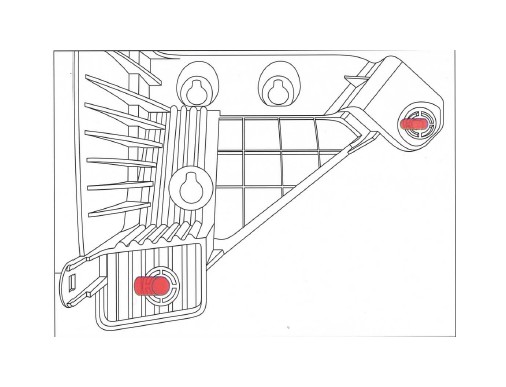
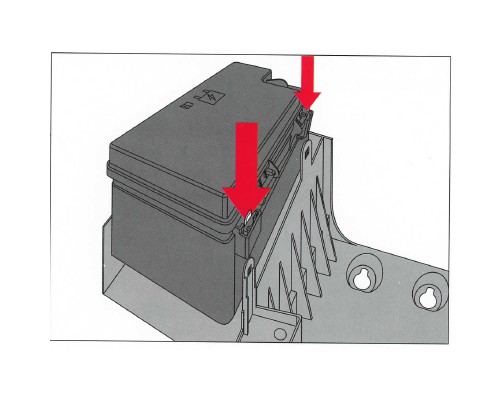
7. Remove Fuse Box from battery tray by compressing the tab shown with a flat head screwdriver. Do so for all four tabs on Fuse Box. Carefully pull up and out, exposing the wiring connectors on the bottom.
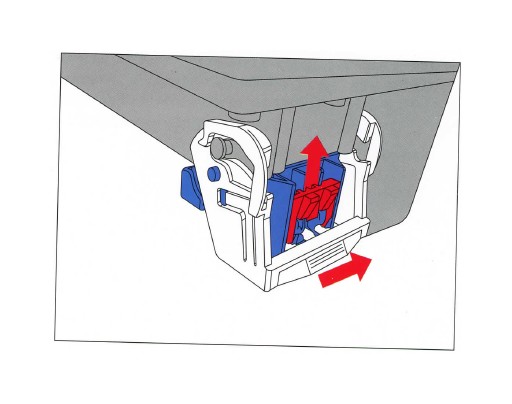
8. Disconnect all electrical connectors by sliding red tab up and gently lifting whitetab to unplug connector. Remove Fuse Box from tray.
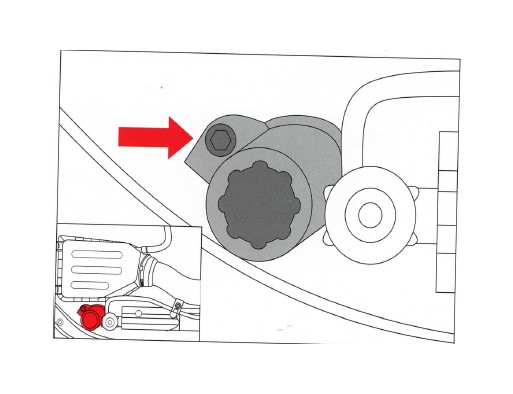
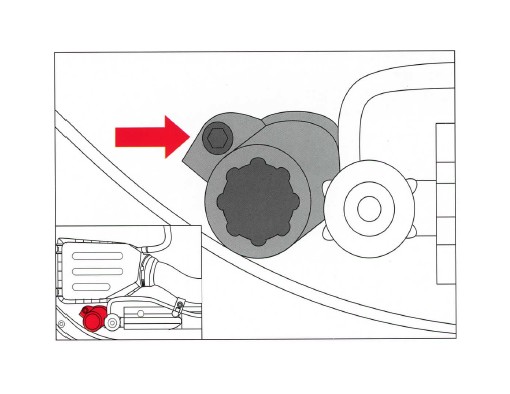
9. Remove 10 mm bolt securing Power Steering Fluid Reservoir and move Power Steering Fluid Reservior toward center of vehicle. Hardware will be reused.
10. Unattach all plastic clips securing wiring harness to battery tray and firewall above battery tray using a panel clip tool.
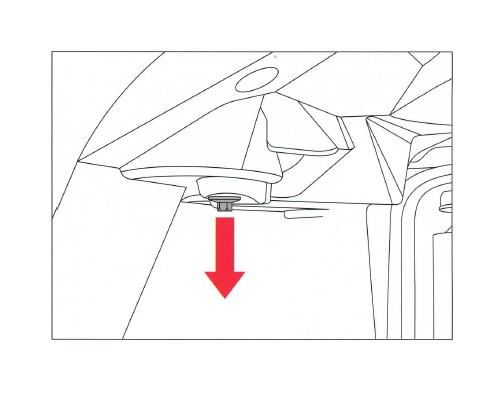
11. Remove 10 mm bolt from fender liner located underneath fender near shock.
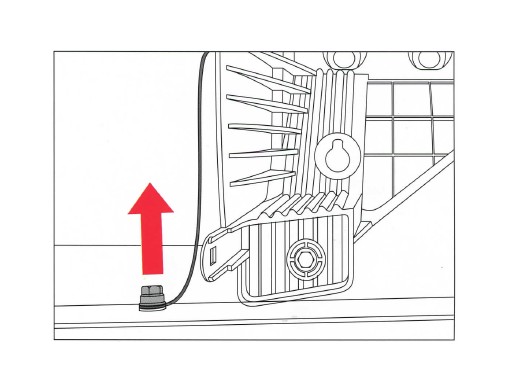
12. Disconnect ground wire closest to Fuse Box mounting tabs by removing 10 mm nut. Hardware will be reused.
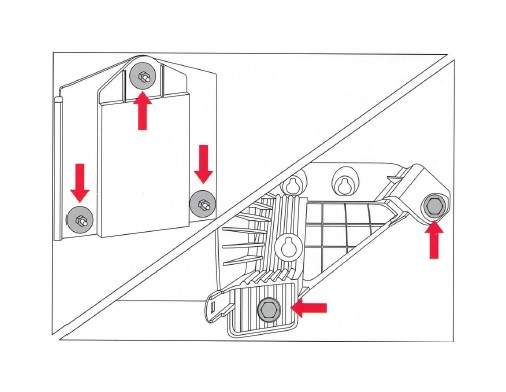
13. Remove three 10 mm nuts holding battery tray to the firewall, three 10 mm bolts holding it to inner fender, and one 10 mm bolt on upper fender. Remove stock battery tray from the engine bay. All hardware will be reused.
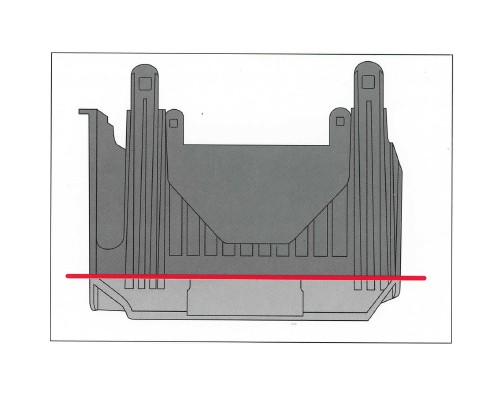
14. Mark a line on stock battery tray along line shown. Cut along marked line using a rotary tool with a cutting wheel. Keep the piece with Fuse Box mounting tabs for use in next step.
CAUTION: Cutting/Sharp Edge Hazard: Wear eye protection while cutting.

15. Mark a line on stock battery tray along line shown. Cut along marked line using a rotary tool with a cutting wheel and sand all rough edges.
CAUTION: Cutting/Sharp Edge Hazard: Wear eye protection while cuffing.
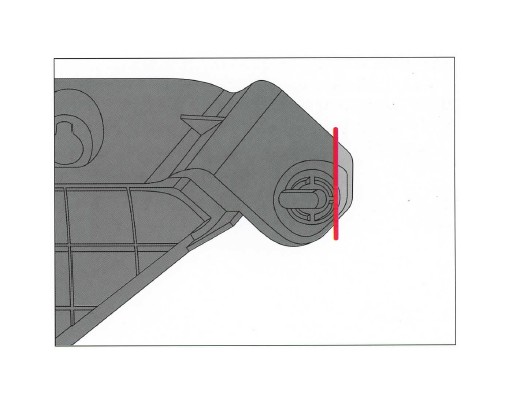
16. Mark a slot 3/8" long toward the firewall on the two mounting holes. Using a rotary tool with a sanding bit, slot the holes to marked line and sand all rough edges.
CAUTION: Cutting/Sharp Edge Hazard: Wear eye protection while cuffing.
17. Mark a line on stock battery tray along shown line. Cut along marked line using a rotary tool with a cutting wheel and sand all rough edges. Test fit and trim stock battery tray where necessary.
CAUTION: Cutting/Sharp Edge Hazard: Wear eye protection while cuffing.
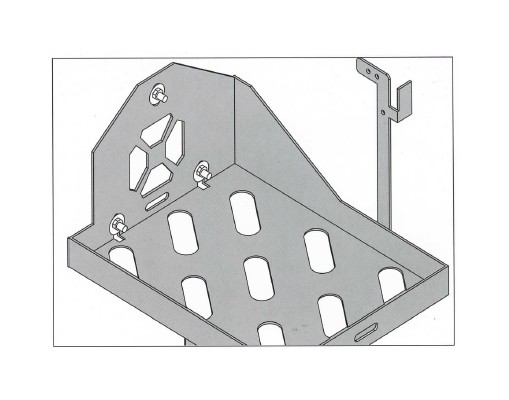
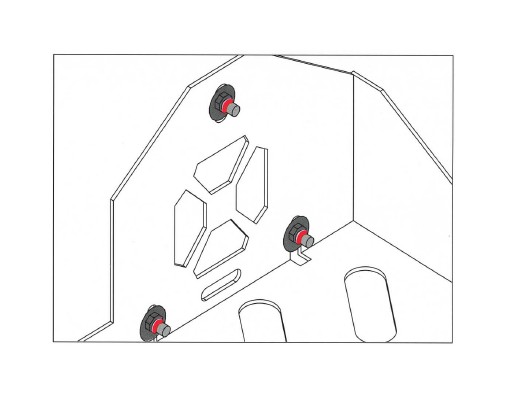
18. Install supplied Spacers on the fire wall studs. Install Dual Battyer Tray, aligning fire wall studs, reusing previously removed hardware.
19. Make sure nuts are tightened properly and cut off extra length of mounting stud using a rotary tool with a cutting wheel.
CAUTION: Cutting/ Sharp Edge Hazard: Wear eye protection while cutting.
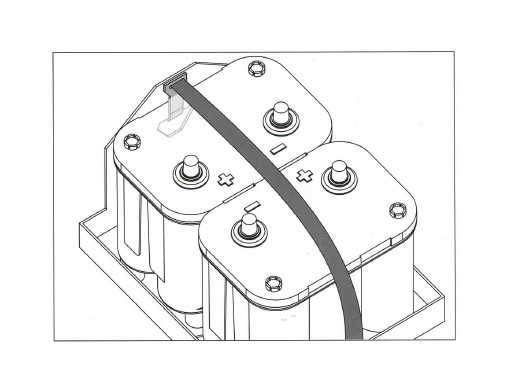
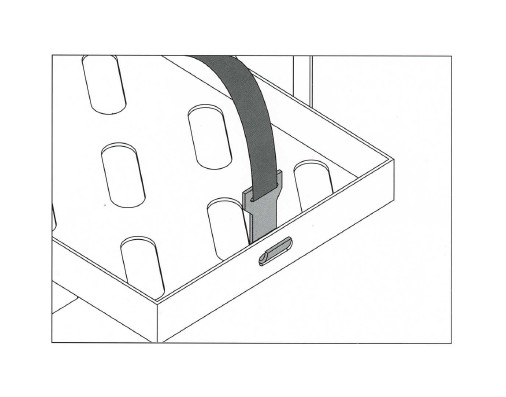
20. Install the Battery Strap in mounting slot closest to the front and loosen as much as possible. Ensure hook is facing the same way as shown.
21. Reinstall stock battery tray, reusing previously removed hardware.
22. Reattach ground wire to inner fender, reusing previously removed hardware.
23, Reinstall Power Steering Fluid Reservoir, reusing previously removed hardware.
24. Install Linear Purge Valve on the flat tab of Dual Battery Tray and connect blue and red lines as well as electrical connector.
25. Reinstall electrical connectors to bottom of Fuse Box. Reattached Fuse Box by using the four mounting tabs on tray.
26. Open Fuse Box lid and reconnect power lead.
27. Reinstall Air Filter Housing and connect rubber breather hose.
28. Reconnect IAT Sensor and re-install air intake tube by tightening the two hose clamps and 10 mm bolts. Reattach coolant bypass tube.
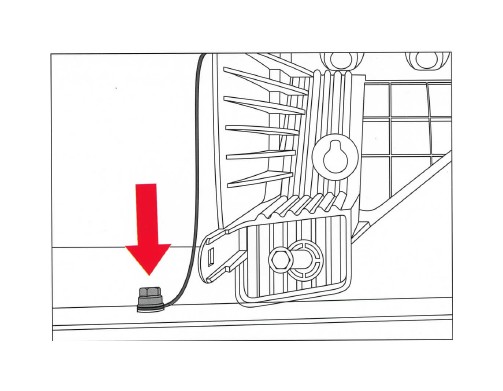
29. Reattach clips on wiring harness to firewall and Dual Battery Tray next to the Linear Purge Valve.
30. Install both batteries in the Dual Battery Tray, hook Battery Strap on cutout under the top stud, and tighten.