 FREE 1 to 3-Day Delivery on Orders $149+ Details

How to Install Rugged Ridge Body Armor Guard Kit, 5 Pieces, Black on your Wrangler
Installation Time
30 minutes
Tools Required
- Phillips head screwdriver
- 3/8” socket or Flat head screwdriver
- 1/2” socket
- 7 mm socket
- 10 mm socket
- Socket wrench
- Socket wrench extension bar
- Socket adapter
- Wire snips or a strong scissor
- Utility knife
- Allen wrench (provided with rocker guards)
- Soapy water
- Wash rag
- Lint-free drying towel
- Recommended: Alcohol pads
- Optional: Small scrap of 2 x 4 or similarly sized scrap material for propping hood open

Shop Parts in this Guide
Notes:
Manufacturer recommends installing when temperature is between 65F – 100F.
Manufacturer recommends allowing vehicle and newly installed body armor to sit overnight before driving.
Installing the Rear Corner Guards:
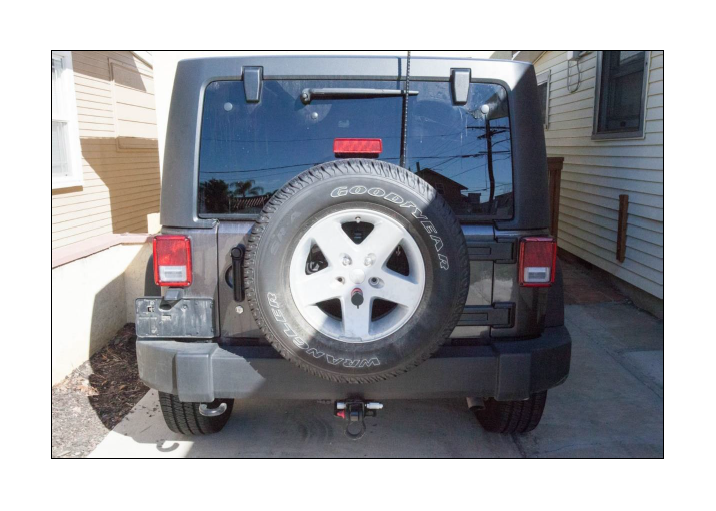
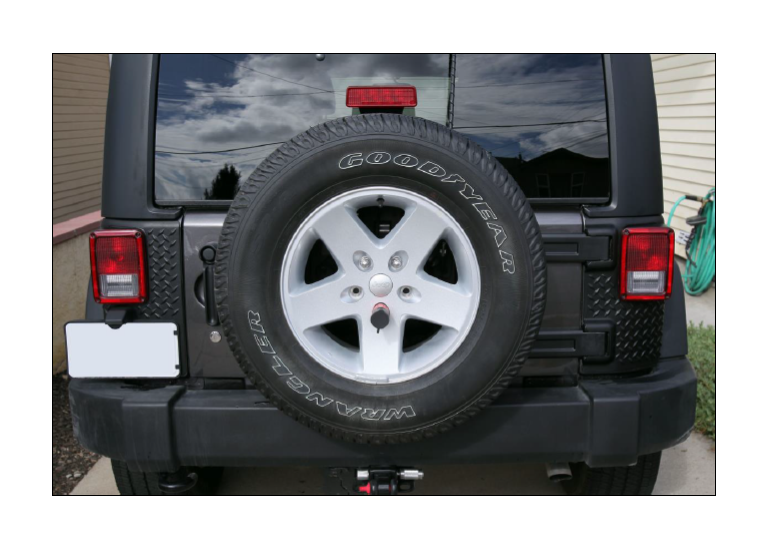
1. Before:
Notes:
Manufacturer recommends installing when temperature is between 65F – 100F.
Manufacturer recommends allowing vehicle and newly installed body armor to sit overnight before driving.
Installing the Rear Corner Guards:
1. Before:
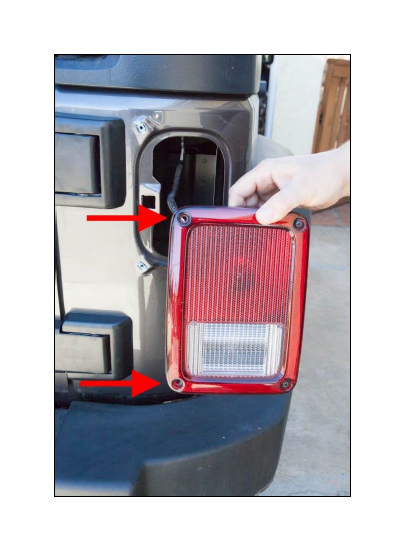
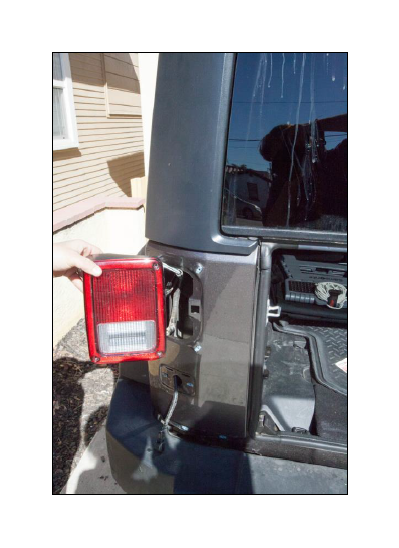
2. Using a Phillips head screwdriver, remove two left-side screws of the passenger’s side tail light and gently pull the tail light housing away from the body of the Jeep. You do not need to remove the two right-side screws.
2. Using a Phillips head screwdriver, remove two left-side screws of the passenger’s side tail light and gently pull the tail light housing away from the body of the Jeep. You do not need to remove the two right-side screws.
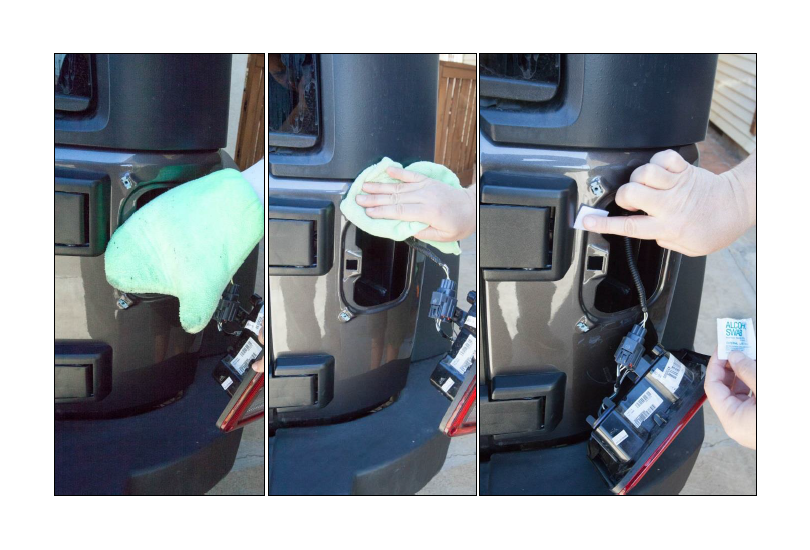
3. Using soapy water and wash rag, clean the area to be covered by the corner guard. Dry area thoroughly with a lint-free towel. Finally, wipe the area with an alcohol pad and let air dry.
3. Using soapy water and wash rag, clean the area to be covered by the corner guard. Dry area thoroughly with a lint-free towel. Finally, wipe the area with an alcohol pad and let air dry.
4. Without removing any of the tape covering, dry fit the corner guard to check alignment. If corner guard does not lay flush over hinge areas, remove plastic factory hinge covers.
4. Without removing any of the tape covering, dry fit the corner guard to check alignment. If corner guard does not lay flush over hinge areas, remove plastic factory hinge covers.
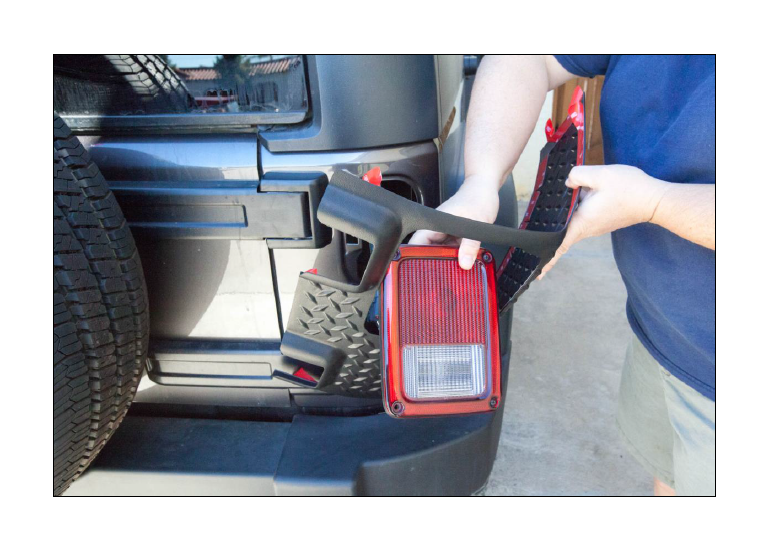
5. When satisfied with fit, remove corner guard. Completely peel away inner sections of protective tape covering and approximately two inches of outer protective tape covering. Bend protective covering up and away to create a grab handle.
5. When satisfied with fit, remove corner guard. Completely peel away inner sections of protective tape covering and approximately two inches of outer protective tape covering. Bend protective covering up and away to create a grab handle.

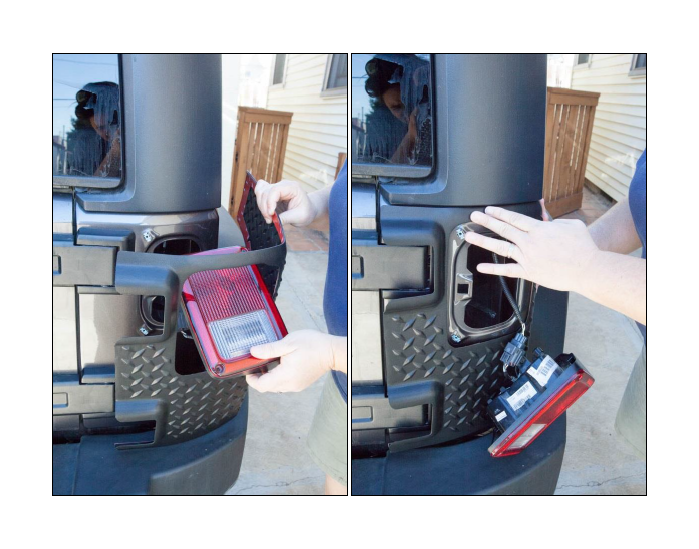
6. Feed the brake light through the corner guard opening and reposition the corner guard near the Jeep body without letting the exposed tape touch the Jeep.
6. Feed the brake light through the corner guard opening and reposition the corner guard near the Jeep body without letting the exposed tape touch the Jeep.
7. Align center of corner guard with corner of Jeep. Press exposed tape section against Jeep body and hold firmly in place while using previously created grab handles to remove remaining protective tape covering.
7. Align center of corner guard with corner of Jeep. Press exposed tape section against Jeep body and hold firmly in place while using previously created grab handles to remove remaining protective tape covering.
8. Reinsert and reattach the tail light using factory screws and a Phillips head screwdriver.
8. Reinsert and reattach the tail light using factory screws and a Phillips head screwdriver.
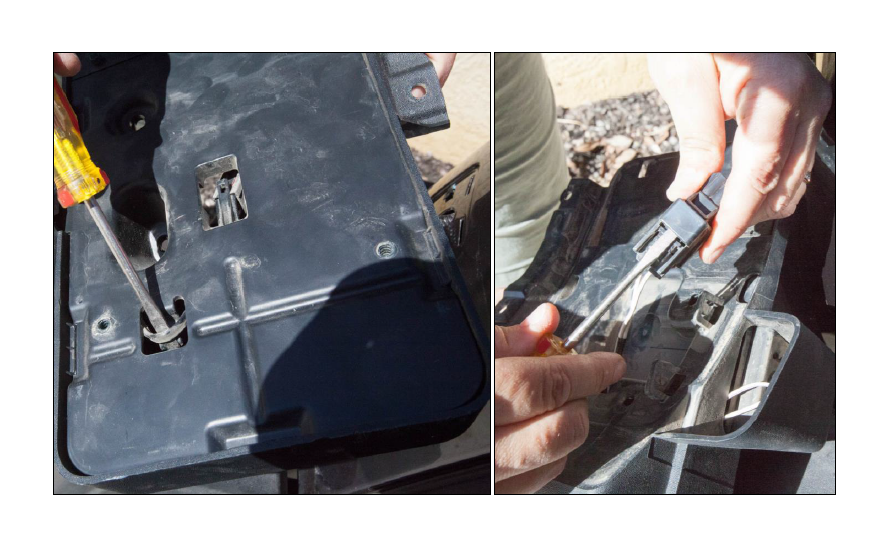
9. Move to the driver’s side rear corner. Remove license plate using a flat head screwdriver or 3/8” socket and socket wrench. Remove four license plate frame bolts using a 7 mm socket, extension bar, and socket wrench.
9. Move to the driver’s side rear corner. Remove license plate using a flat head screwdriver or 3/8” socket and socket wrench. Remove four license plate frame bolts using a 7 mm socket, extension bar, and socket wrench.
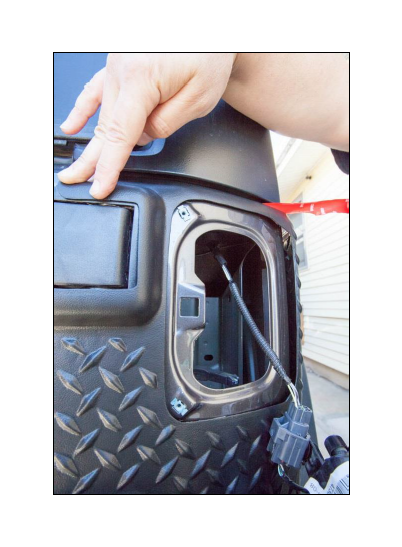
10. Using a flat head screwdriver, gently release license plate lighting wire from capture bracket and disconnect wiring harness.
10. Using a flat head screwdriver, gently release license plate lighting wire from capture bracket and disconnect wiring harness.
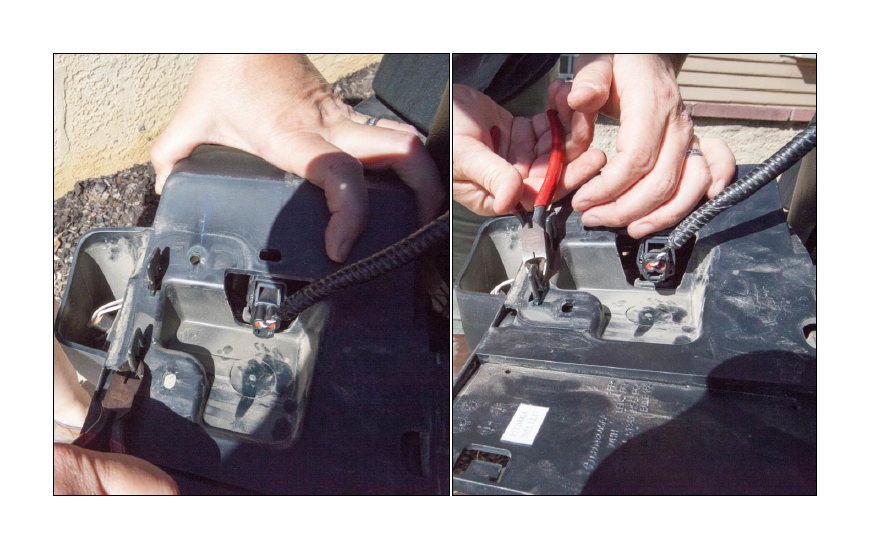
11. Using a Phillips head screwdriver, remove two right-side screws of the driver’s side tail light and gently pull the tail light housing away from the body of the Jeep. You do not need to remove the two left-side screws.
11. Using a Phillips head screwdriver, remove two right-side screws of the driver’s side tail light and gently pull the tail light housing away from the body of the Jeep. You do not need to remove the two left-side screws.
12. Install the driver’s side corner guard using the same method as was used on the passenger’s side corner guard (e.g. clean, dry fit, peel off two inches of tape covering, align, remove all protective tape covering, and affix).
12. Install the driver’s side corner guard using the same method as was used on the passenger’s side corner guard (e.g. clean, dry fit, peel off two inches of tape covering, align, remove all protective tape covering, and affix).
13. Reinsert and reattach the tail light using the factory screws and a Phillips head screwdriver. Reconnect the wiring harness for the license plate holder and tuck the lighting cable into place around the capture bracket.
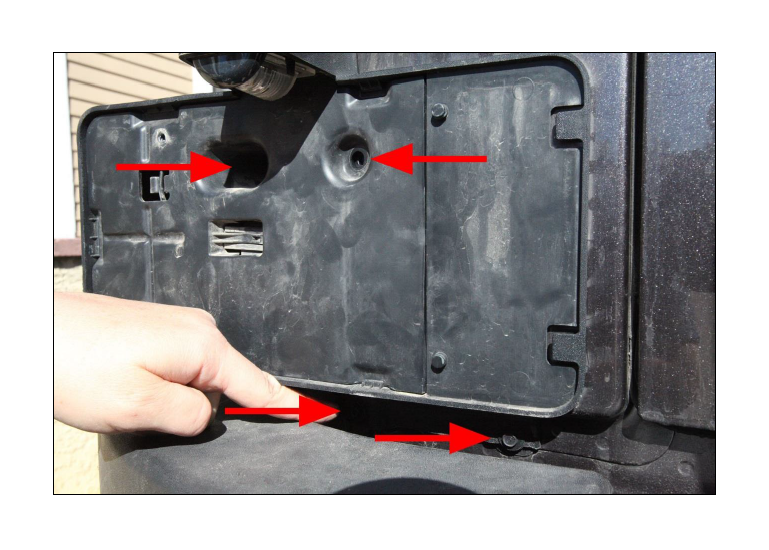
14. Before reattaching the license plate frame, use wire snips or a strong scissor to remove the two tabs protruding from the back of the license plate holder. Reattach the license plate holder using the four factory bolts, a 7 mm socket, extension bar, and socket wrench.
13. Reinsert and reattach the tail light using the factory screws and a Phillips head screwdriver. Reconnect the wiring harness for the license plate holder and tuck the lighting cable into place around the capture bracket.
14. Before reattaching the license plate frame, use wire snips or a strong scissor to remove the two tabs protruding from the back of the license plate holder. Reattach the license plate holder using the four factory bolts, a 7 mm socket, extension bar, and socket wrench.
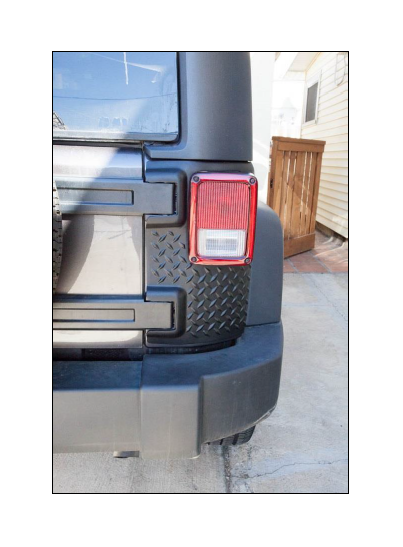
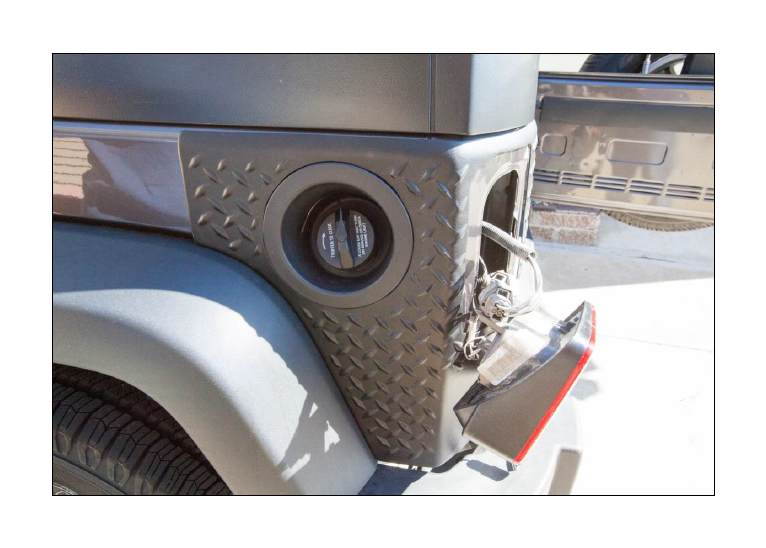
15. After:
15. After:
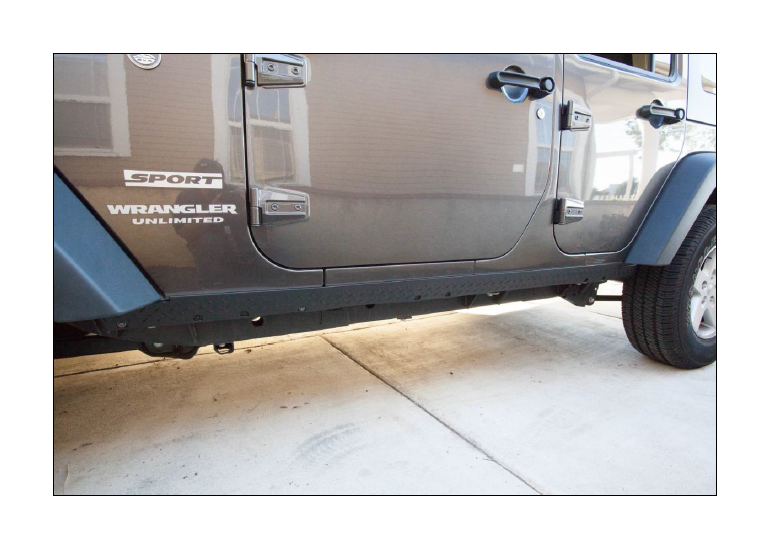
Installing the Rocker Armor:
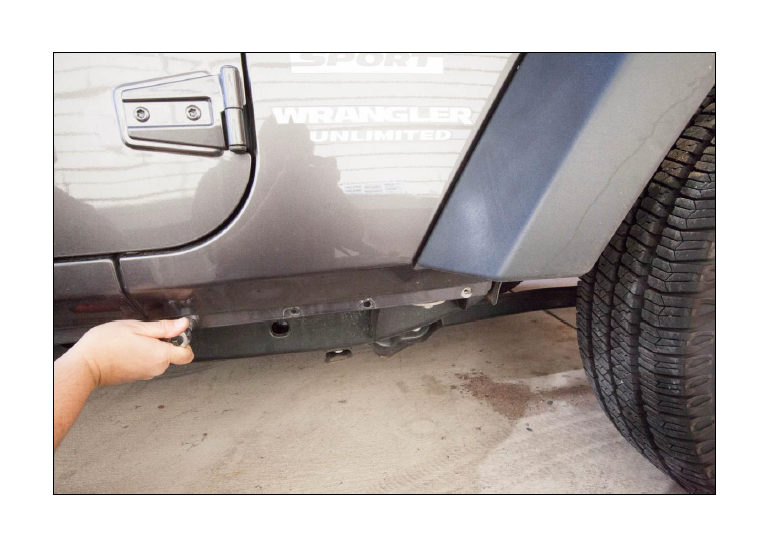
1. Starting on the passenger’s side, remove two factory bolts from the pinch seam using a 10 mm socket and socket wrench.
Installing the Rocker Armor:
1. Starting on the passenger’s side, remove two factory bolts from the pinch seam using a 10 mm socket and socket wrench.
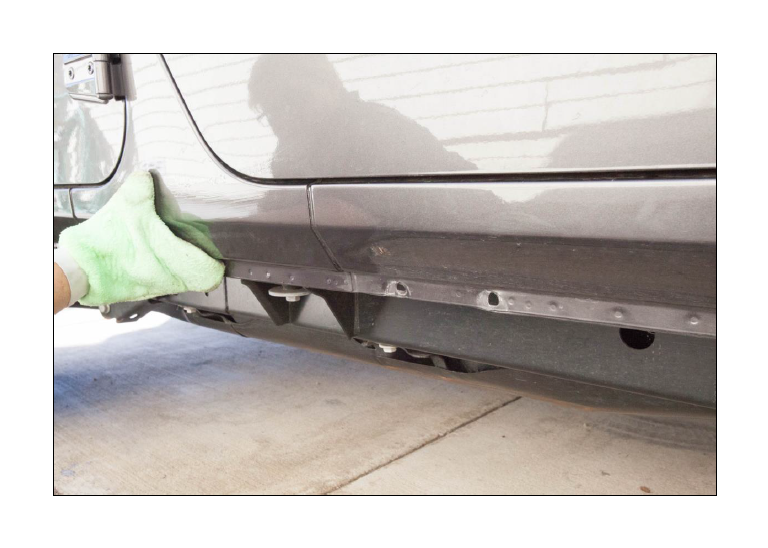
2. Wash, dry, and alcohol wipe the pinch seam and rocker panel.
2. Wash, dry, and alcohol wipe the pinch seam and rocker panel.
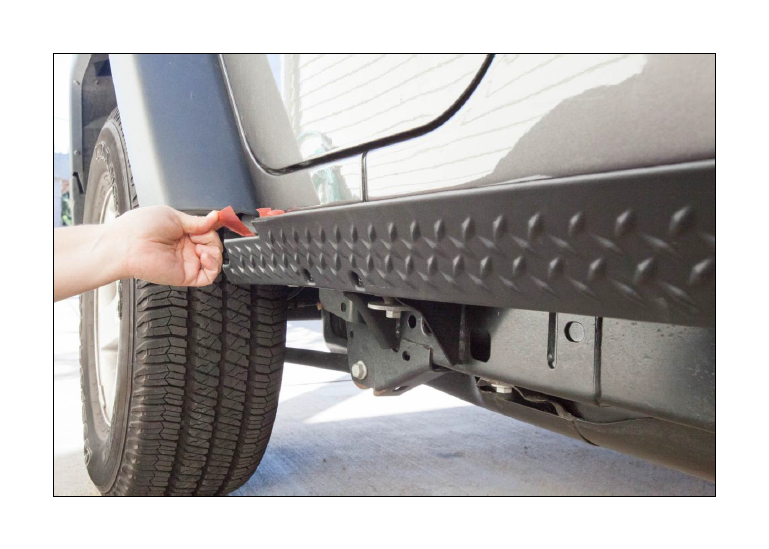
3. Dry fit the rocker guard, making sure the rocker guard bolt holes line up with the factory pinch seam bolt holes. You may need to widen the rocker guard bolt holes if they don’t align with the pinch seam bolt holes. Also, if rocker guard end protrudes into rear tire well, mark rocker guard for trimming. Pull rocker guard away from body of Jeep and trim excess length with utility knife.
3. Dry fit the rocker guard, making sure the rocker guard bolt holes line up with the factory pinch seam bolt holes. You may need to widen the rocker guard bolt holes if they don’t align with the pinch seam bolt holes. Also, if rocker guard end protrudes into rear tire well, mark rocker guard for trimming. Pull rocker guard away from body of Jeep and trim excess length with utility knife.
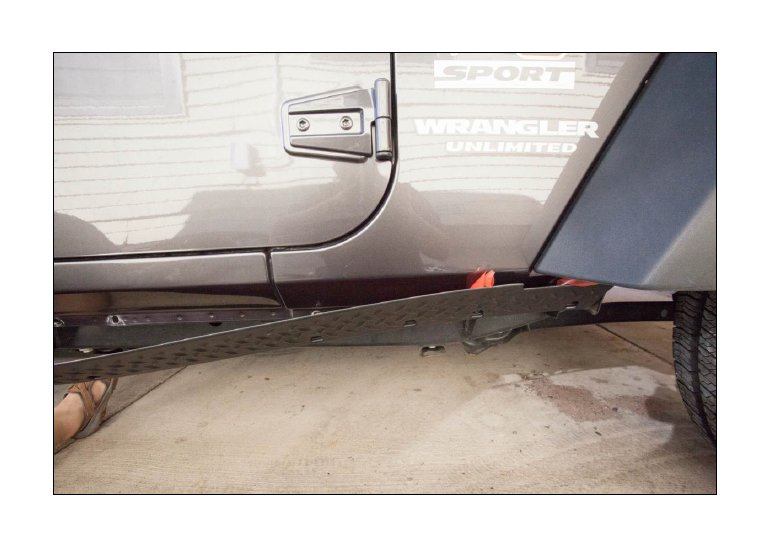
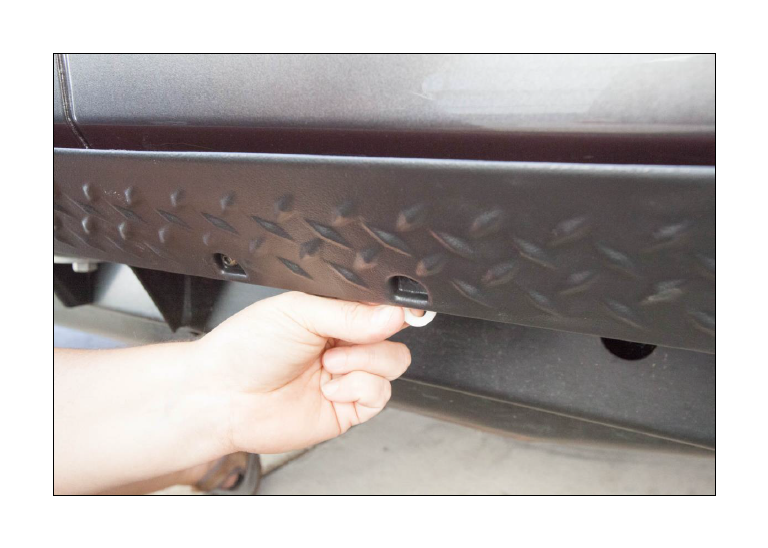
4. Peel two inches of protective covering away from tape. Bend covering up and away to create a grab handle. Align front edge of rocker guard with front edge of frame (near front passenger’s side tire). Lightly press exposed tape section against Jeep body to temporarily hold in place while attaching hardware.
4. Peel two inches of protective covering away from tape. Bend covering up and away to create a grab handle. Align front edge of rocker guard with front edge of frame (near front passenger’s side tire). Lightly press exposed tape section against Jeep body to temporarily hold in place while attaching hardware.
5. Installing hardware into bolt holes 1, 2, 6, & 7: Using the supplied hardware, insert a bolt through a washer and then insert through bolt hole #1 (closest to the rear tire). Affix nut loosely to bolt, just enough to support the rocker guard, but not pull it against the body of the Jeep. Repeat for holes #2, #6, and #7.
6. Installing hardware into center bolt holes 3 & 4: Using the supplied hardware, insert a bolt through a washer. Insert a spacer in between rocker guard and Jeep body, then insert bolt with washer through bolt hole #3. Affix nut loosely to bolt, just enough to support the rocker guard, but not pull it against the body of the Jeep. Repeat for center hole #4.
7. Installing hardware into bolt holes 5 & 8: Using factory bolt and washer, insert into bolt hole #5 and tighten just enough to support the rocker guard, but not pull it against the body of the Jeep. Repeat for hole #8.
8. Press exposed tape section near rear tire against Jeep body and hold firmly in place while using previously created grab handles to remove remaining protective tape covering.
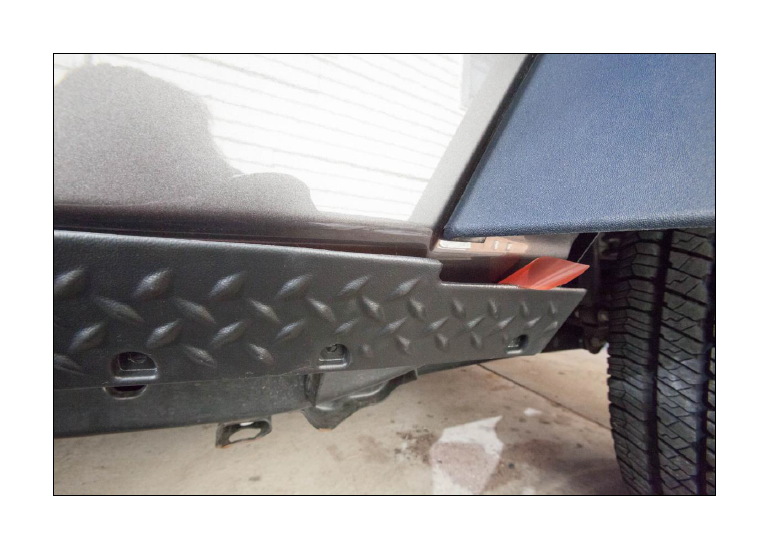
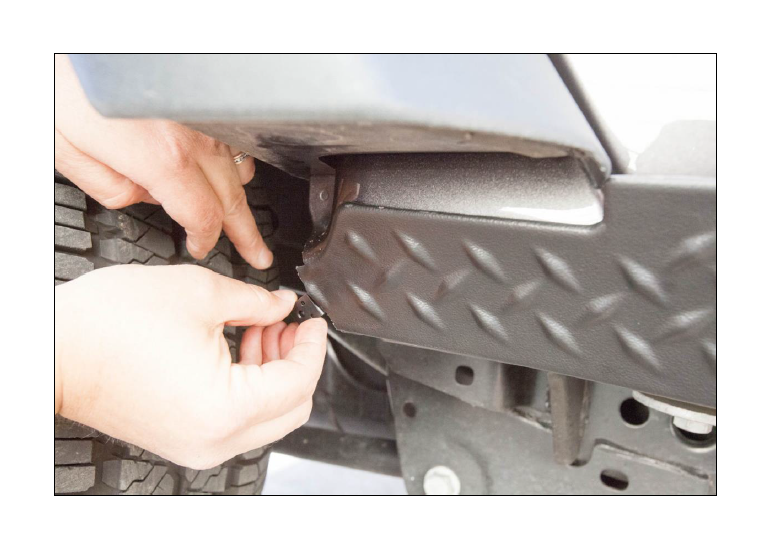
9. If supplied clip fits around rocker guard and Jeep body, attach supplied clip to rear corner of rocker guard. Otherwise, discard clip.
9. If supplied clip fits around rocker guard and Jeep body, attach supplied clip to rear corner of rocker guard. Otherwise, discard clip.
10. Repeat process for driver’s side rocker guard.
10. Repeat process for driver’s side rocker guard.
Installing the Hood Armor:
1. The final piece of this kit is attached to the Jeep hood. Release your hood latches and raise your hood.
Installing the Hood Armor:
1. The final piece of this kit is attached to the Jeep hood. Release your hood latches and raise your hood.
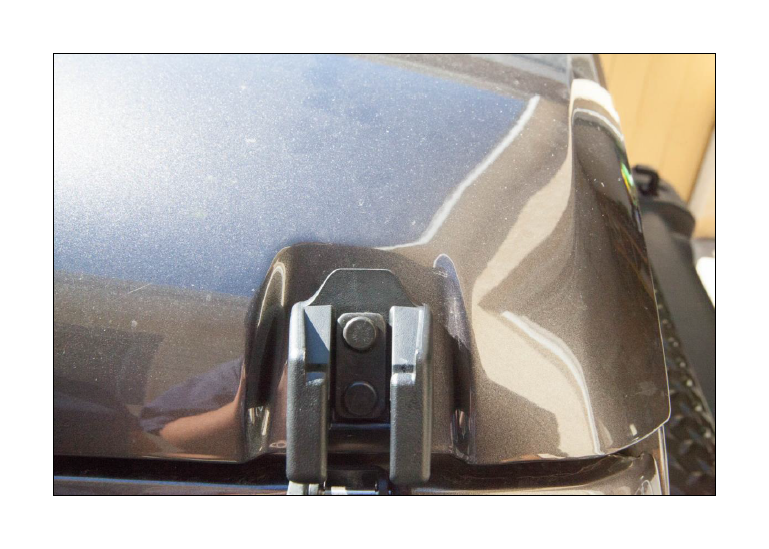
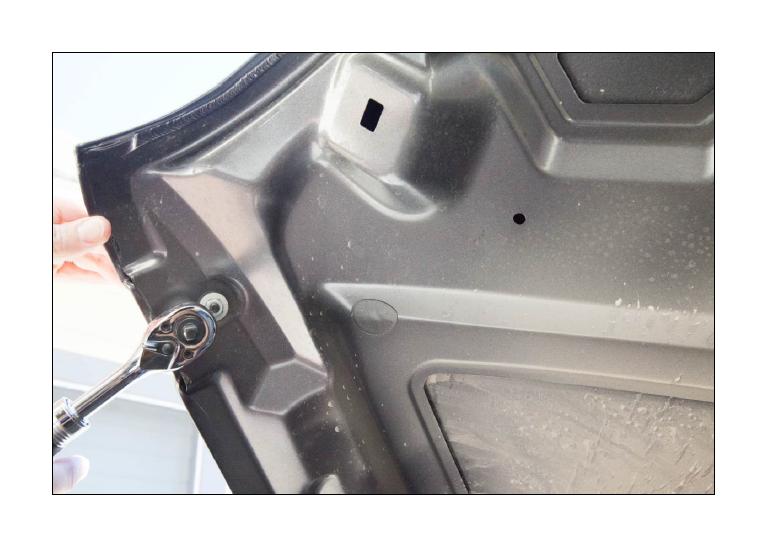
2. Using a 1/2" socket and socket wrench, remove the upper hood latch bolts from the inside of the hood. The lower hood latch bolts do not need to be removed from the body of the Jeep.
2. Using a 1/2" socket and socket wrench, remove the upper hood latch bolts from the inside of the hood. The lower hood latch bolts do not need to be removed from the body of the Jeep.
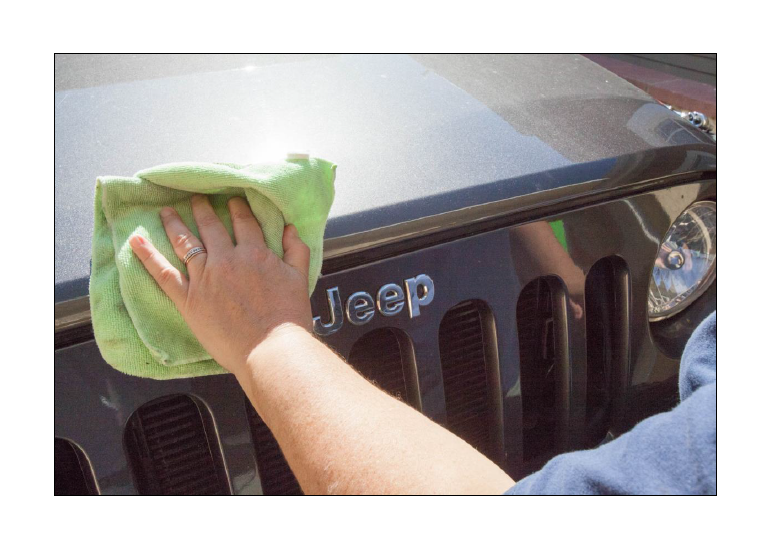
3. Wash, dry, and alcohol swab the area that will be covered with the hood armor.
3. Wash, dry, and alcohol swab the area that will be covered with the hood armor.
4. Prop the hood open slightly with the scrap 2 x 4 (or similarly sized material). Dry fit the hood armor, ensuring the armor bolt holes line up with the hood latch bolt holes. You may need to widen the hood armor bolt holes.
4. Prop the hood open slightly with the scrap 2 x 4 (or similarly sized material). Dry fit the hood armor, ensuring the armor bolt holes line up with the hood latch bolt holes. You may need to widen the hood armor bolt holes.

5. Peel two inches of protective covering away from tape. Bend covering up and away to create a grab handle. Align the hood armor bolt holes with the hood latch bolt holes and loosely install your hood latches using a 1/2" socket and socket wrench.
5. Peel two inches of protective covering away from tape. Bend covering up and away to create a grab handle. Align the hood armor bolt holes with the hood latch bolt holes and loosely install your hood latches using a 1/2" socket and socket wrench.

6. Remove protective covering from tape, using previously created grab handles, while pressing hood armor firmly into place as tape is exposed.
6. Remove protective covering from tape, using previously created grab handles, while pressing hood armor firmly into place as tape is exposed.
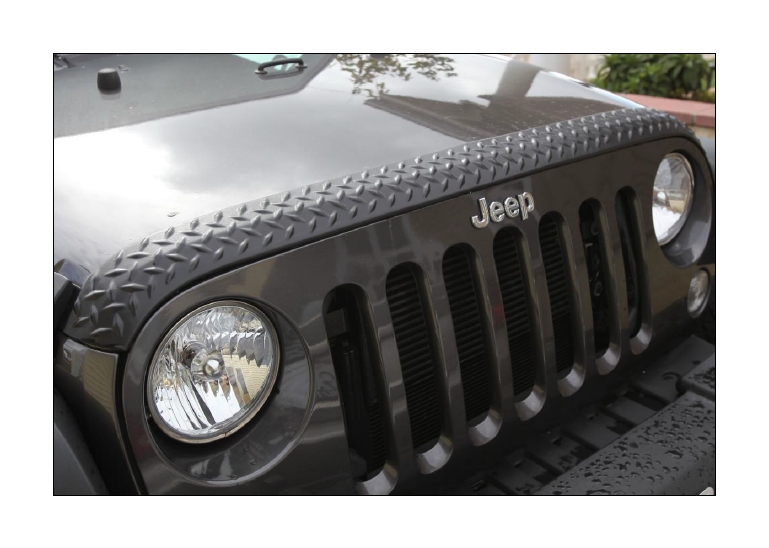
7. Walk around your Jeep and admire your new body armor, but don’t drive it until tomorrow morning.
7. Walk around your Jeep and admire your new body armor, but don’t drive it until tomorrow morning.
