 FREE 1 to 3-Day Delivery on Orders $149+ Details

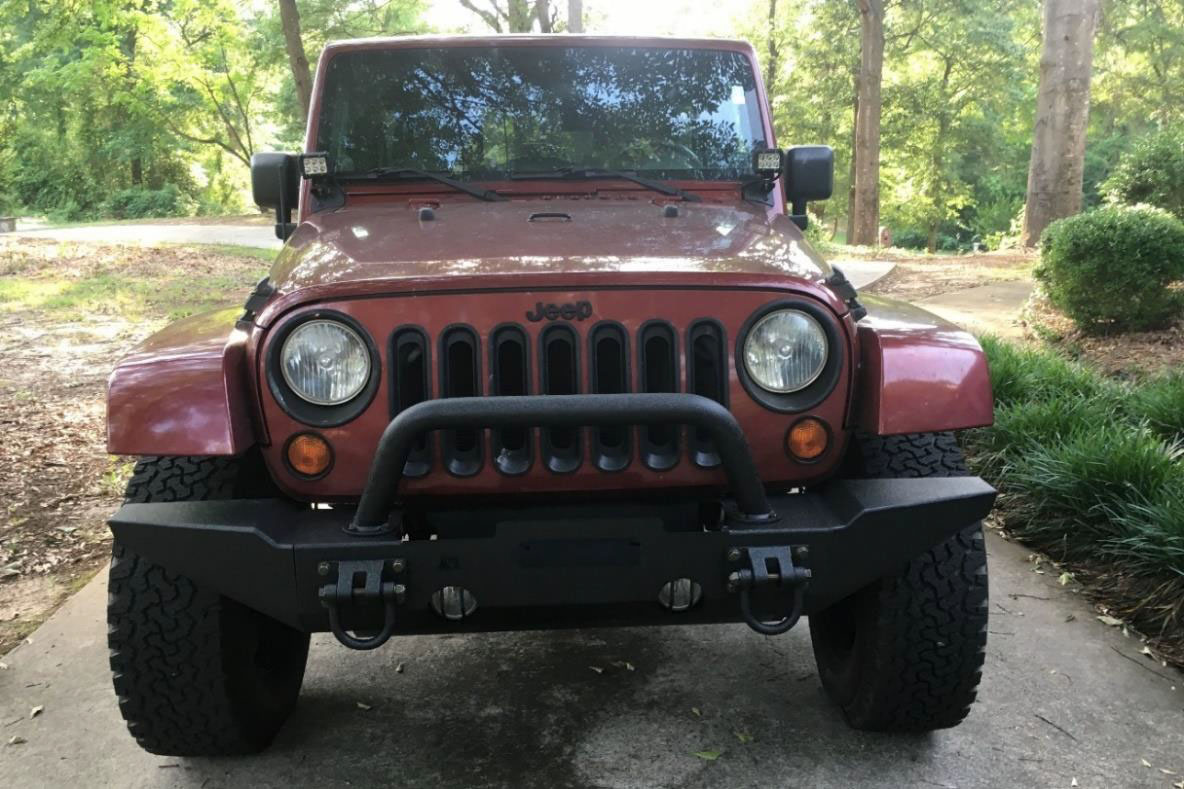
How To Install Rugged Ridge XHD Front Bumper Kit w/Standard Bumper Ends on your 07-18 Jeep Wrangler JK; 2018 Jeep Wrangler JL
Installation Time
2 hours
Tools Required
- Phillips head screwdriver
- Flat head screwdriver
- Socket wrench with 6” extension
- 13mm, 18mm, 19mm and 24 mm sockets
- 19mm and 24mm wrenches

Shop Parts in this Guide
Installation Instructions:
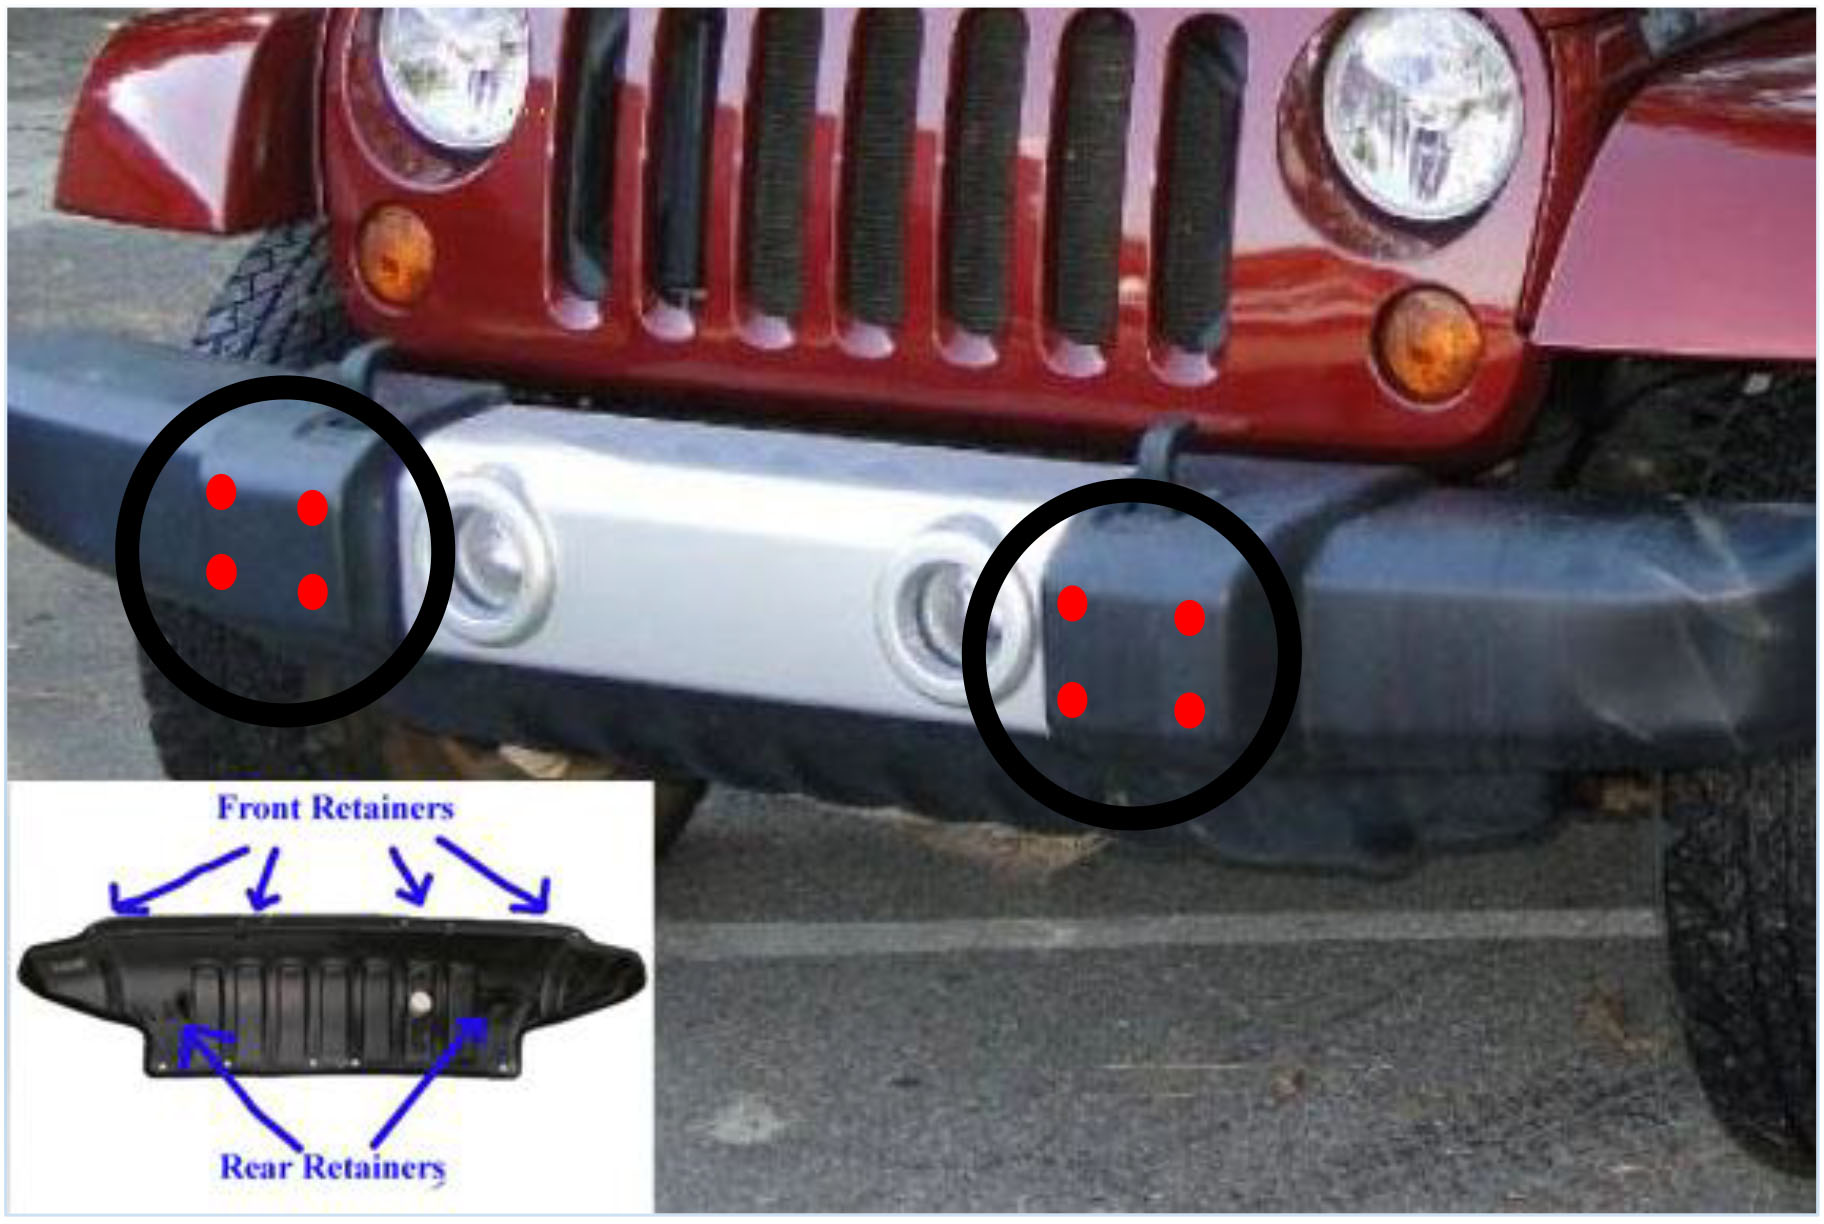
1. Remove OEM plastic splash guard by removing the six (6) plastic retainers (4 located under the bumper and 2 on the aft end of the guard-blue arrows) using the Phillips screwdriver and pry out retainers using the flat head screwdriver. (Figure 1)
Figure 1
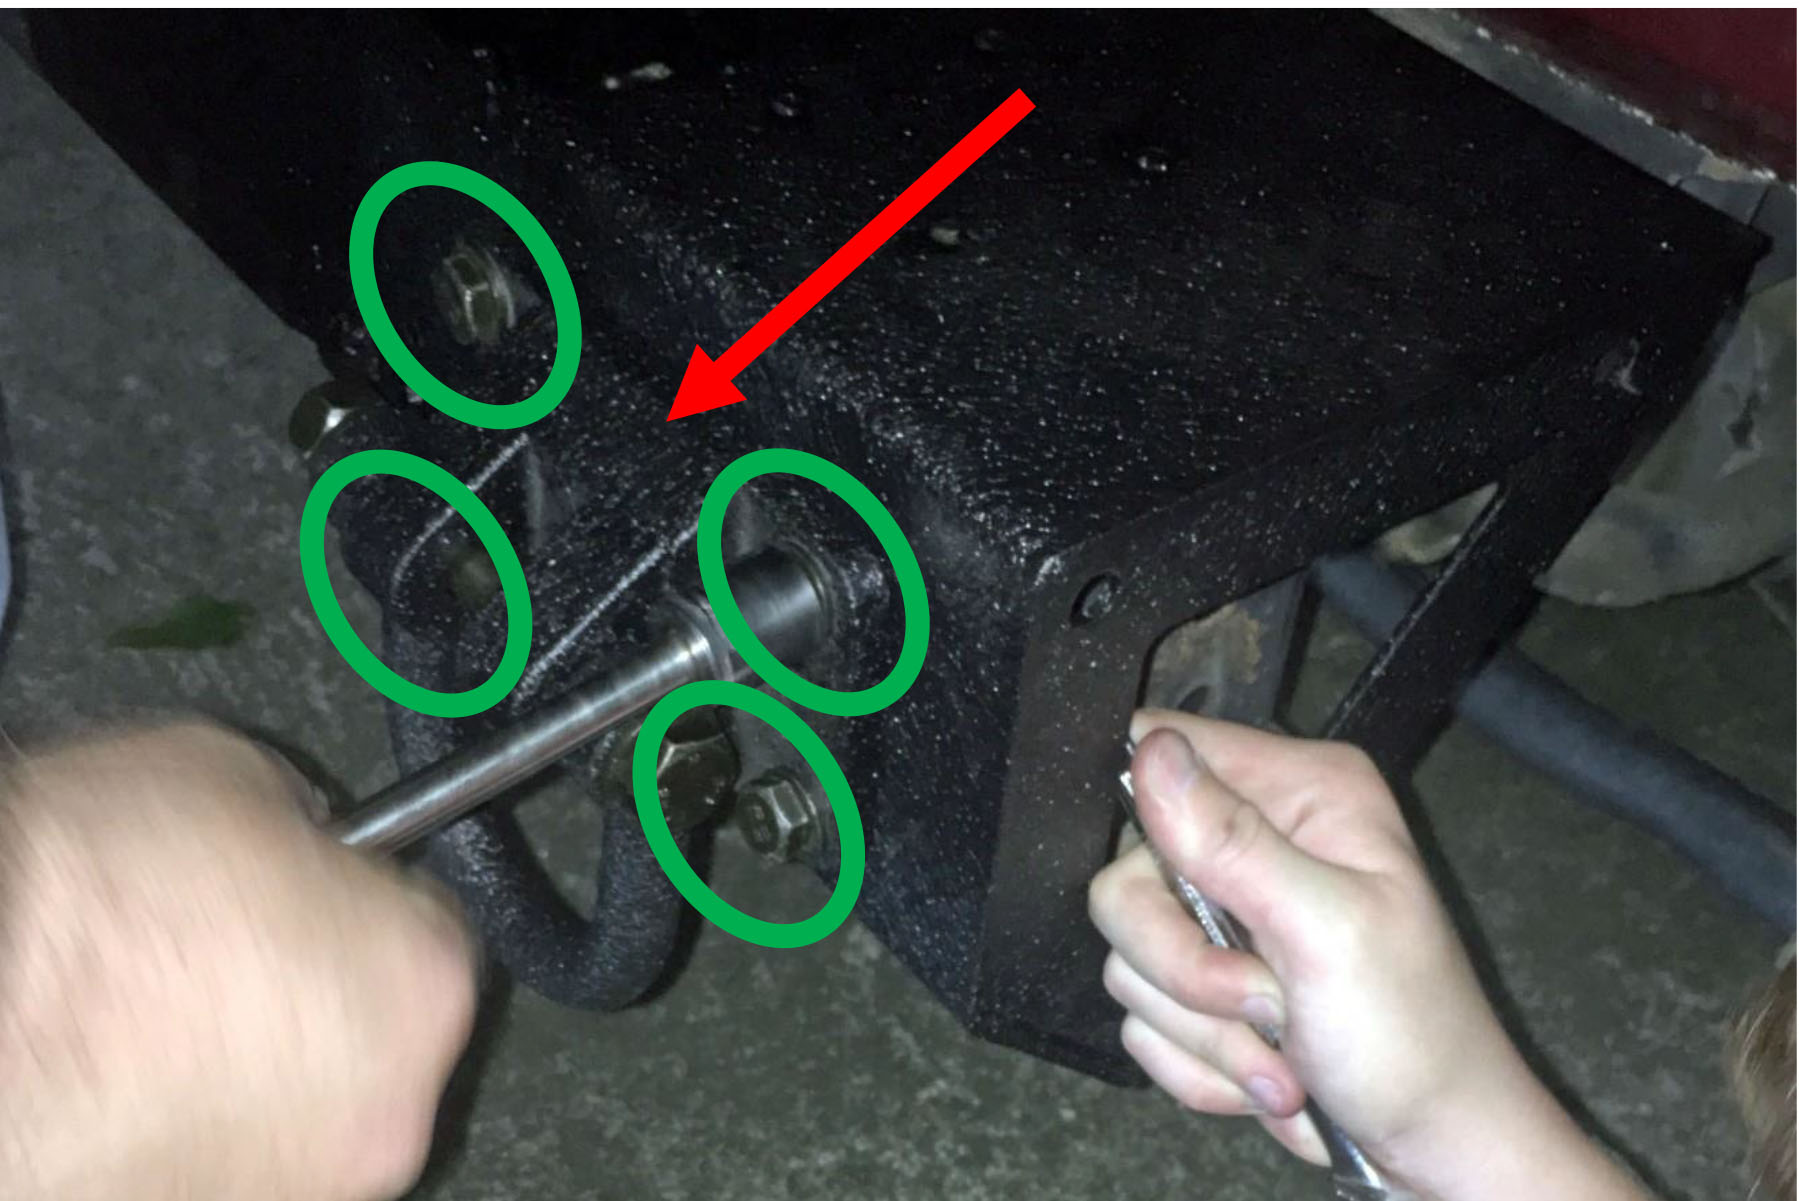
2. Using the 18mm socket and socket wrench with 6” extension, remove the eight nuts (four each side) that attach the bumper to the frame from behind. Carefully slide the bumper forward and disconnect the fog lights from their wire harness. Remove bumper. (Figure 1-red circles)
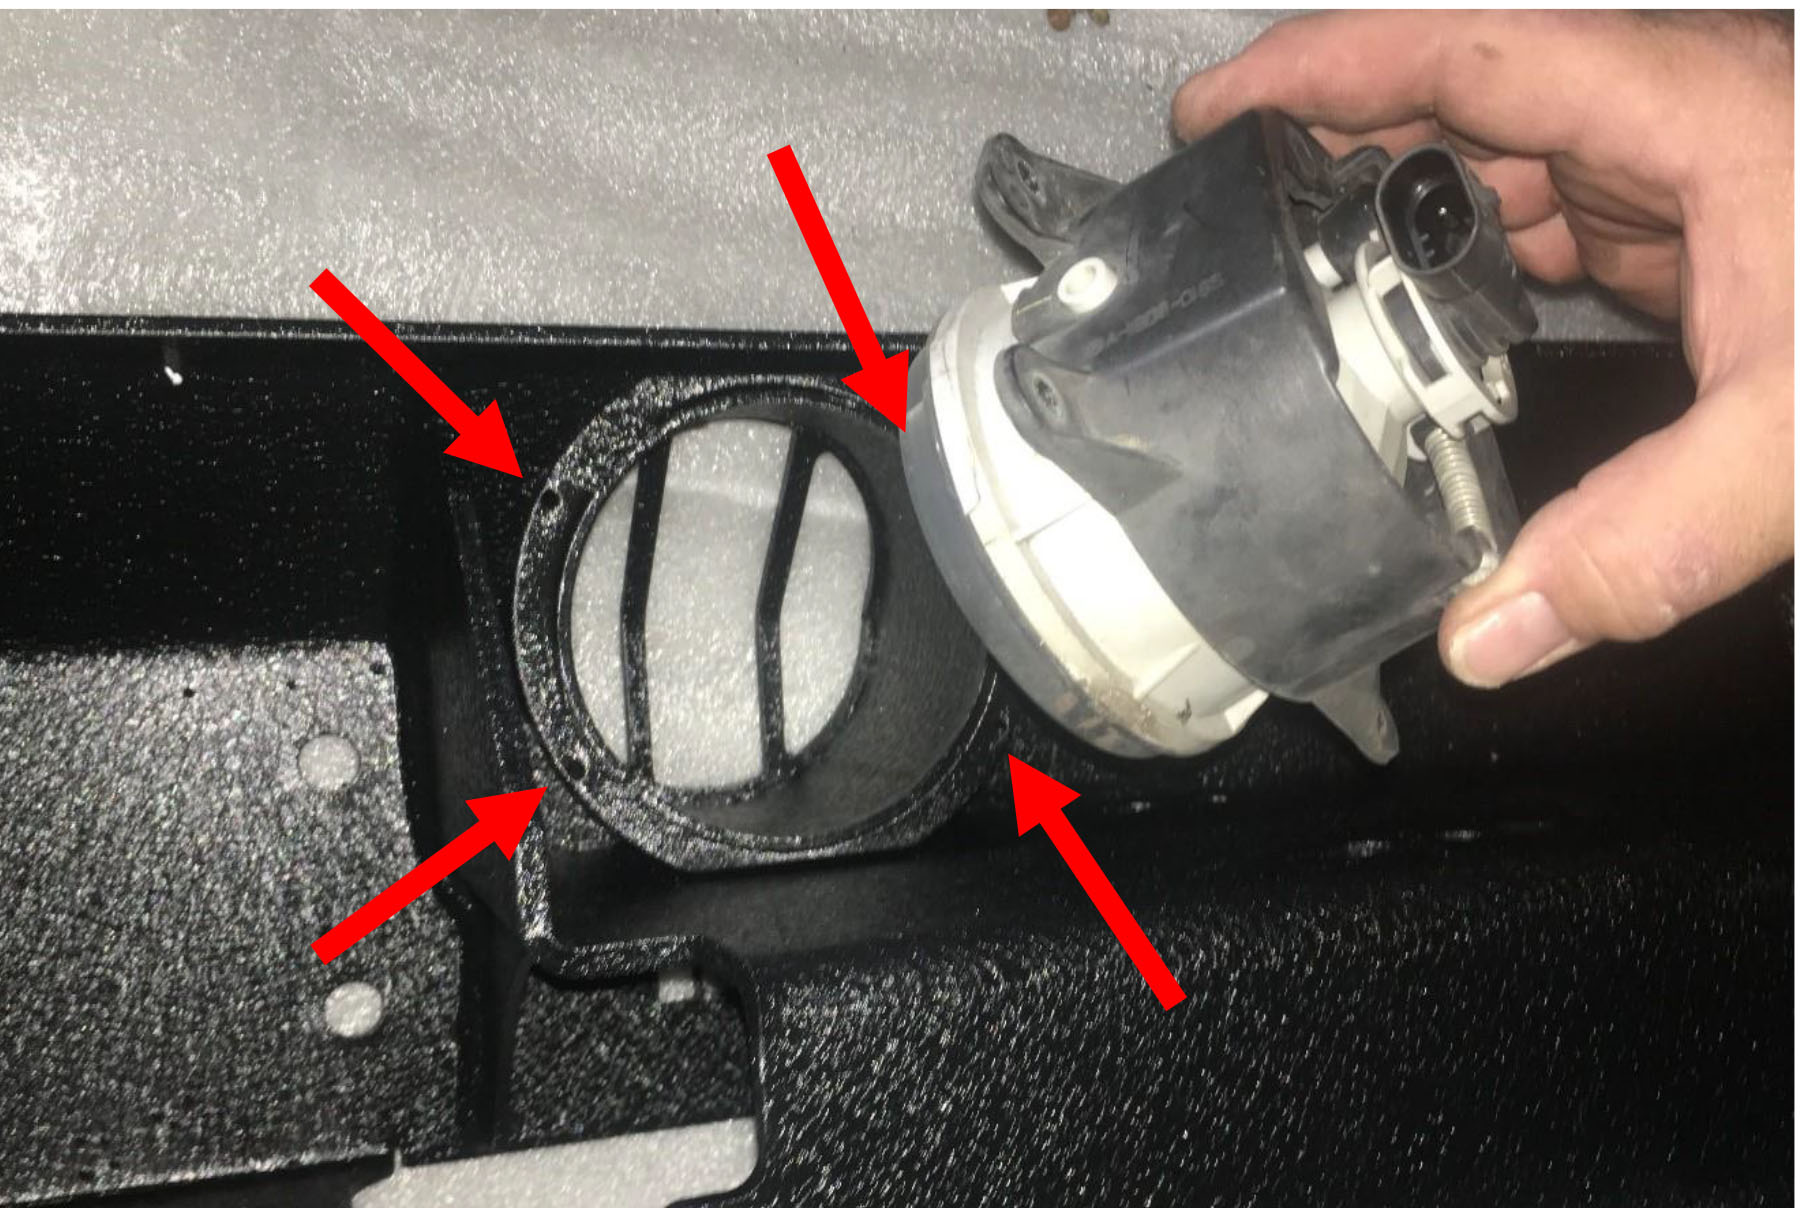
3. Using the Phillips screwdriver, remove the fog light assemblies from the bumper by removing the eight sheet metal screws and reinstall into the new XHD bumper with new sheet metal screws (four on each light assembly- red arrows). (Figure 2)
Figure 2
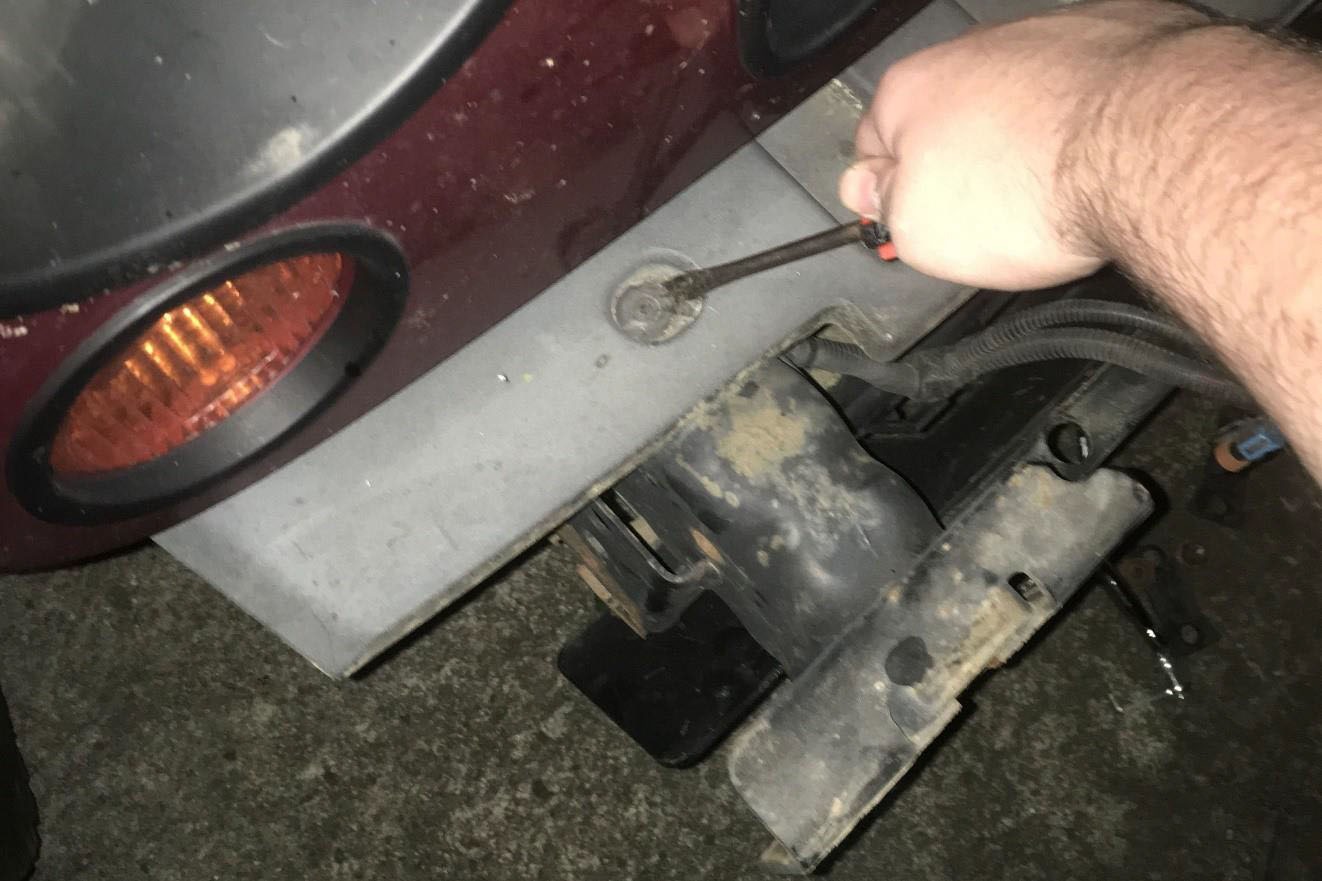
4. Remove OEM upper plastic trim panel by removing the two (2) plastic retainers (1 located above each frame member- red arrow) using the Phillips screwdriver and pry out using the flat head screwdriver. (Figure 3)
Figure 3
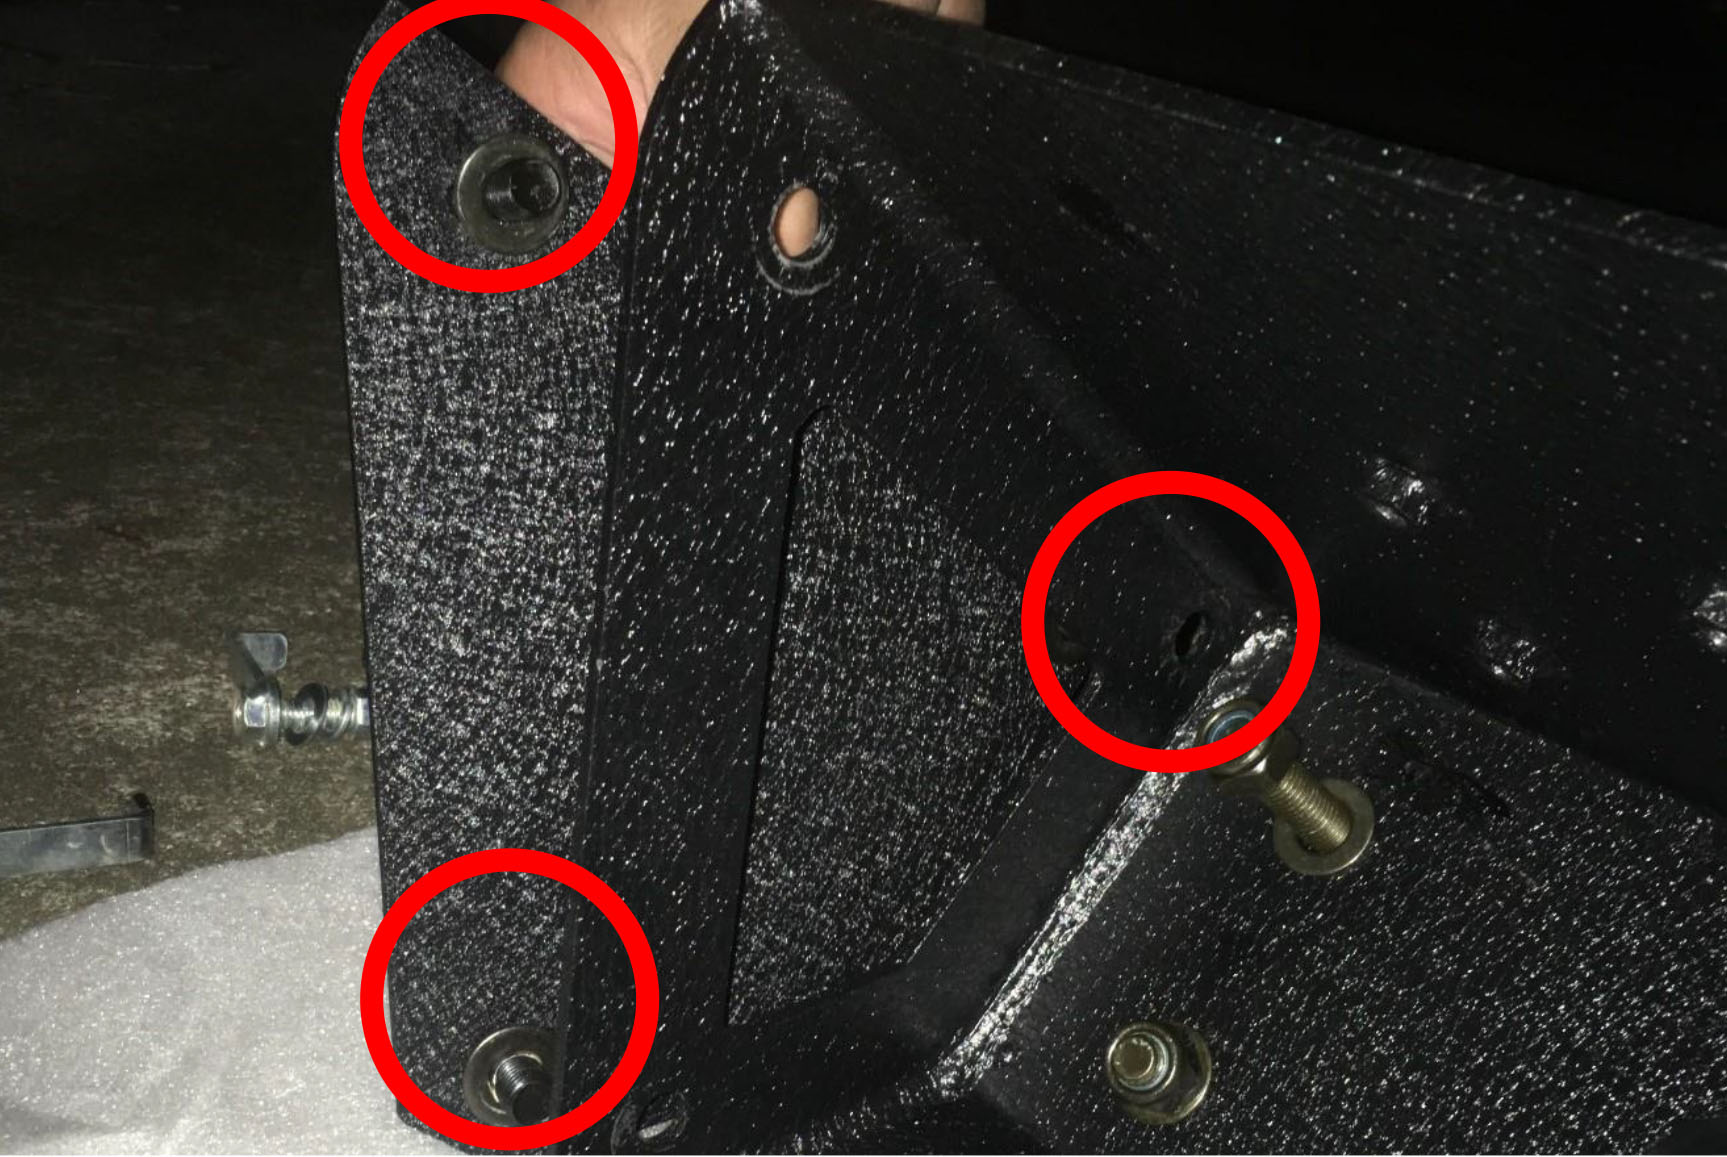
5. Using the 19mm socket and socket wrench, remove the three (3) nuts from the factory installed flat cover plates from the sides of the new XHD bumper and replace endplates with the standard extended bumper ends and reinstall nuts. (Figure 4)
Figure 4
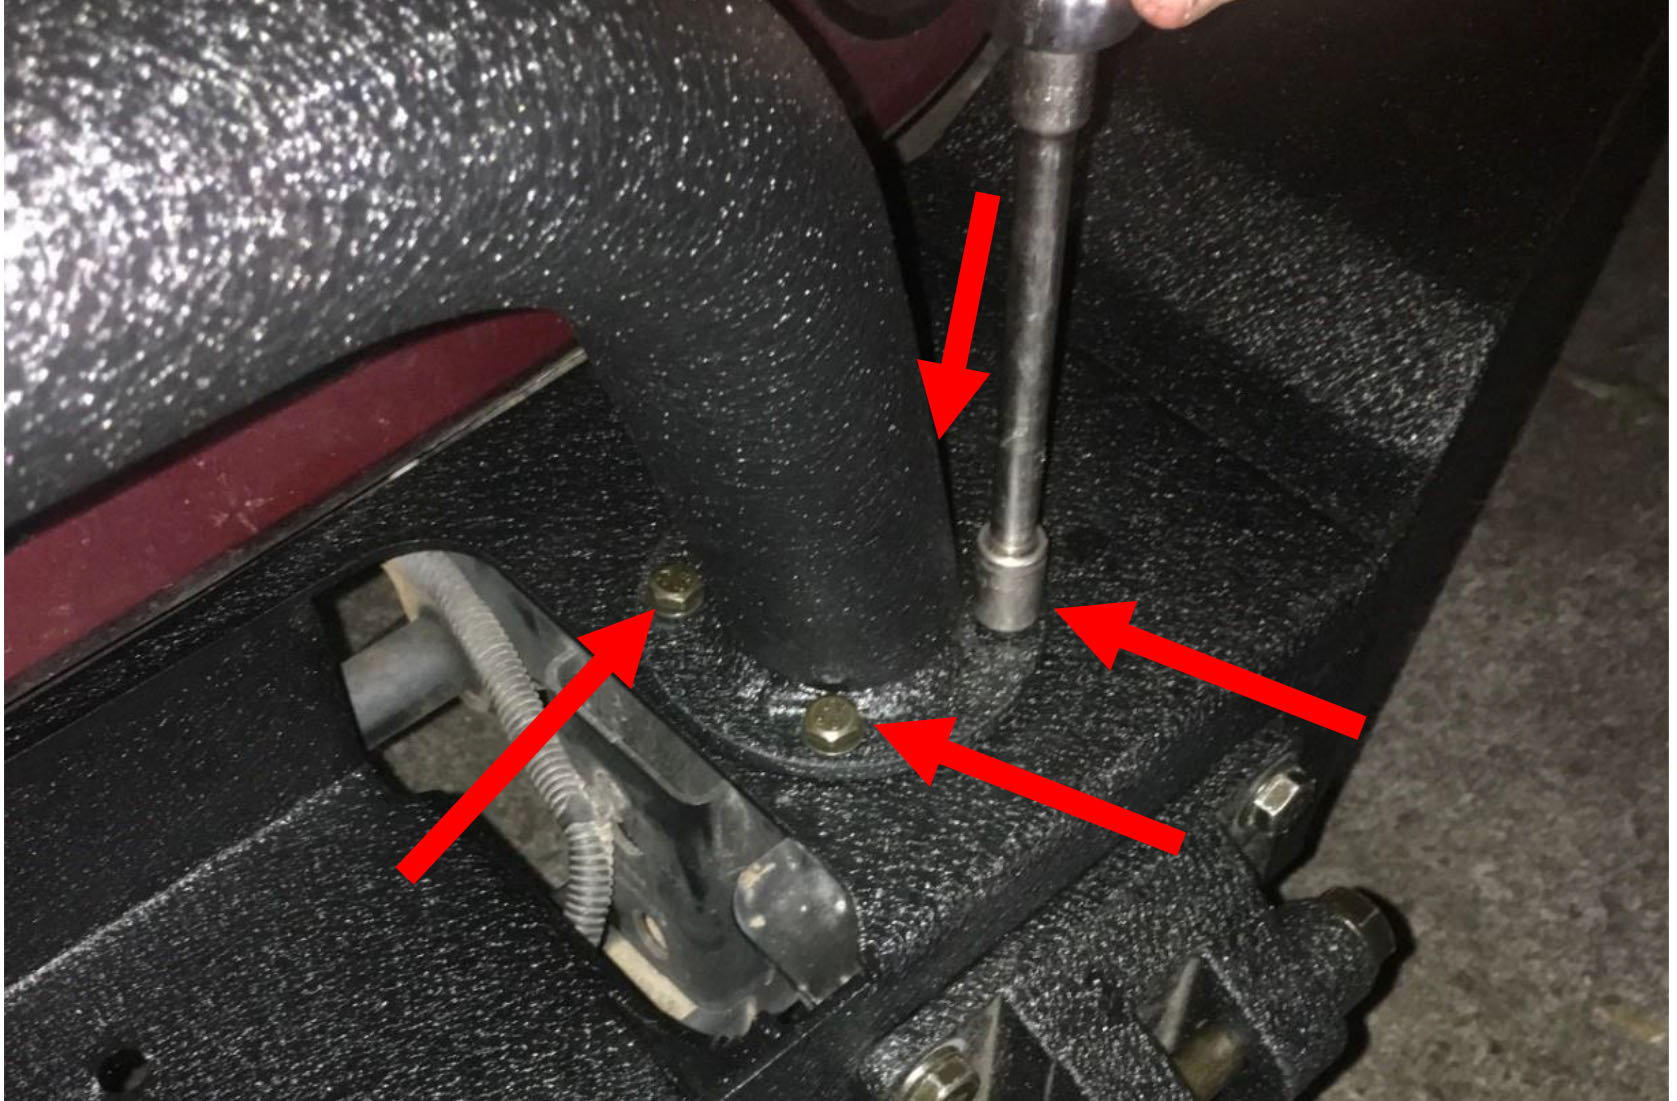
6. Using the 18mm socket, socket wrench with 6” extension and 19mm wrench, install the XHD bumper assembly using eight (8) nuts, bolts and sixteen (16) washers (place one washer under the head of each bolt and nut- green circles). Using the 24mm socket and socket wrench, assemble the D-rings mounts (red arrow). (Figure 5)
Figure 5
7. Reconnect fog light wiring harness to each of the two fog light assemblies.
8. Using the 13mm socket and socket wrench with 6”extension, install the hoop with the eight (8) bolts and washers-red arrows. (Ensure all eight bolts are started before tightening). Note: hoop may be installed leaning back or forward. (Figure 6)
Figure 6
9. Completed installation. (Figure 7)
Figure 7
Installation Instructions Written by Extreme Terrain Customer Ben Puckett 05/10/2016
