 FREE 1 to 3-Day Delivery on Orders $149+ Details

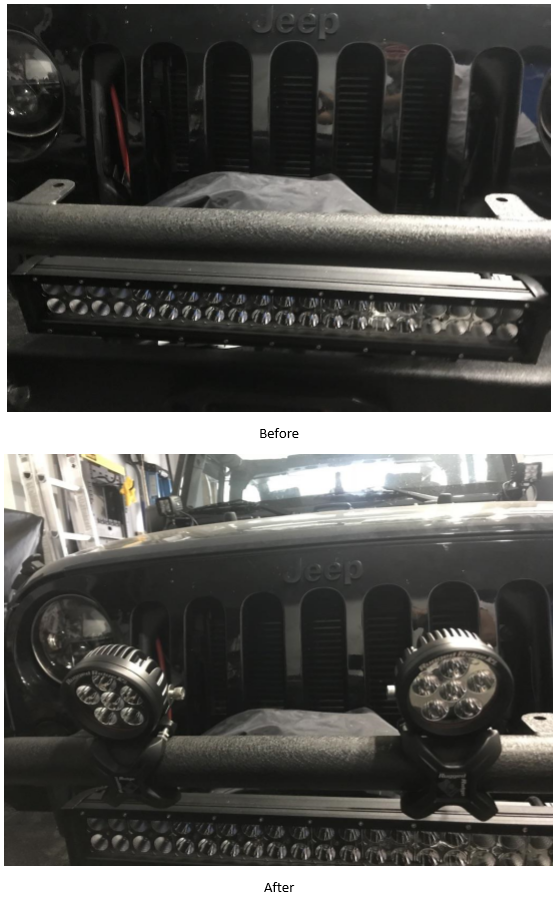
How to Install Rugged Ridge Textured Black X Clamp for 1.25-2 in. Tubing & 3.5in Round LED Light Kit, 2 pc on your 87-18 Jeep Wrangler YJ, TJ, JK & JL
Installation Time
30 minutes
Tools Required
- Box Cutter/Knife
- 3/8" Allen Wrench
- 1/4" Allen Wrench
- Crescent Wrench
- Crimp Tool or Pliers
- Wire Connectors
- Wiring Harness
- Switch
Installation Instructions:
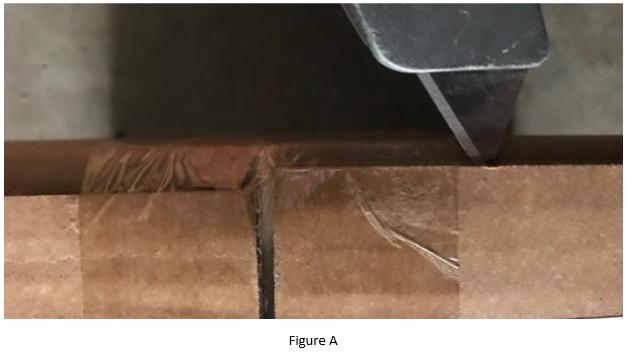
1. Carefully open the package using a box cutter or knife (Figure A) and ensure both LED Lights, X Clamps, and hardware are included and undamaged.
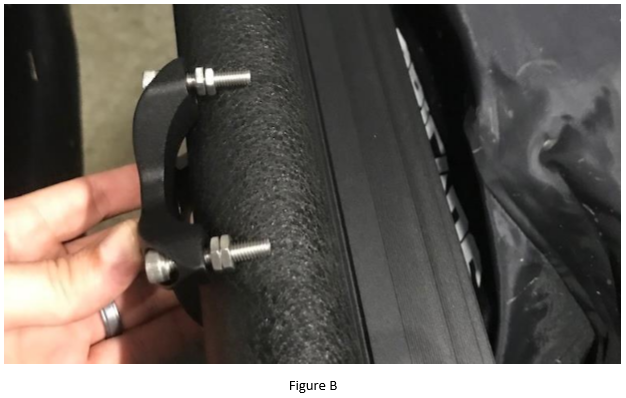
2. Position the exterior piece of the X Clamp on the tube to be mounted against (Figure B).
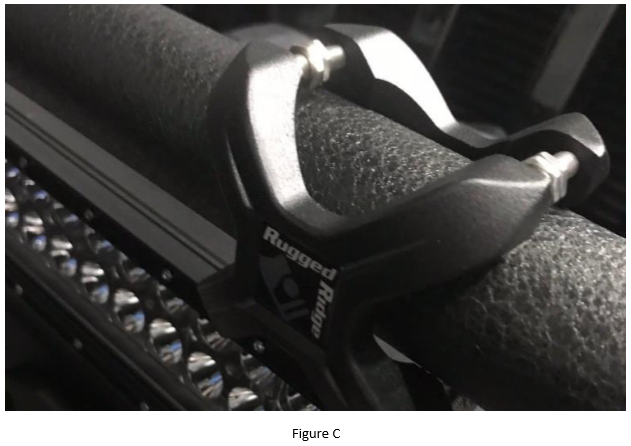
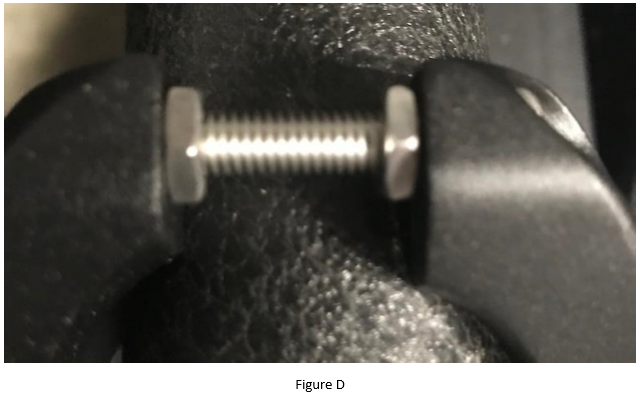
3. Using the supplied bolts and washers, connect the interior piece of the X Clamp to the exterior piece with the tube in between (Figure C). The bolt sequence should be bolt, interior X Clamp, washer, washer, exterior X Clamp (Figure D).
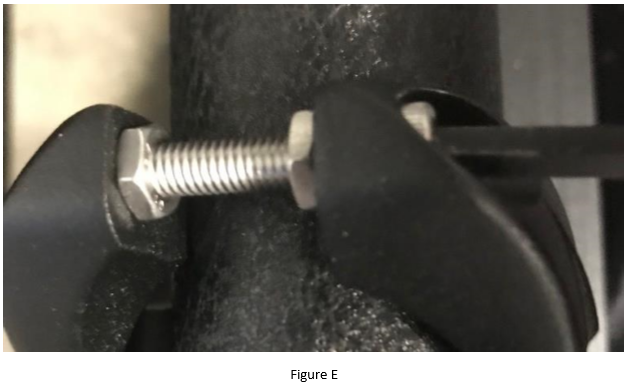
4. Using the 3/8" Allen wrench, tighten the bolts of the X Clamp (Figure E).
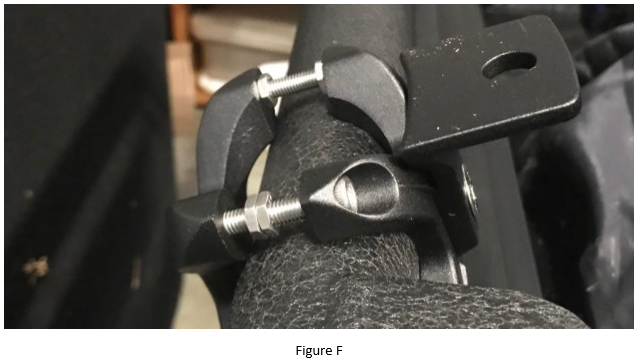
5. Using the smallest supplied bolt, connect the light tray to the X Clamp (Figure F).
6. Tighten the bolt that connects the light tray to the X Clamp using the supplied Allen bolt (Figure G).

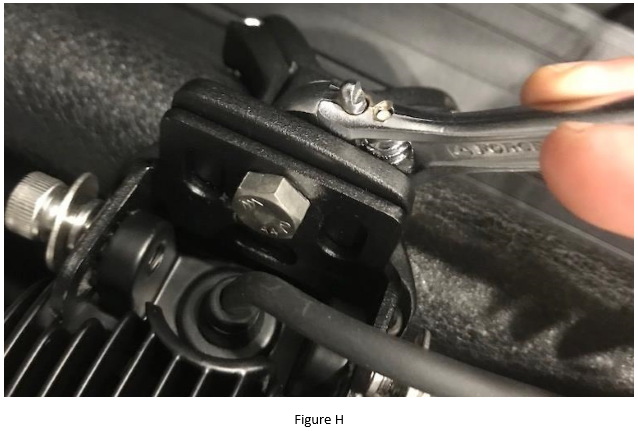
7. Connect the LED light to the light tray using a crescent wrench to keep LED light in place (Figure H).
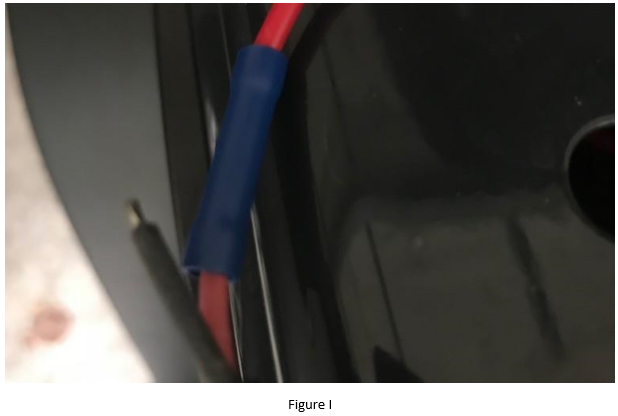
8. Connect the load wire from the light to the switch (not supplied) using wire connectors (not supplied) (Figure I). Note: Either purchase the wiring harness from the same supplier as the light for a quick connection or create a wiring harness using 16 gauge wires.
9. Connect the ground wire from the light (Figure J) to the chassis of the vehicle.

10. Connect the supply wire from the wiring harness and a ground wire to the switch (not supplied).
11. Do the same for the second clamp and light.
Installation Instructions Written by ExtremeTerrain Customer J. Sandlin 10/12/2017

