 FREE 1 to 3-Day Delivery on Orders $149+ Details

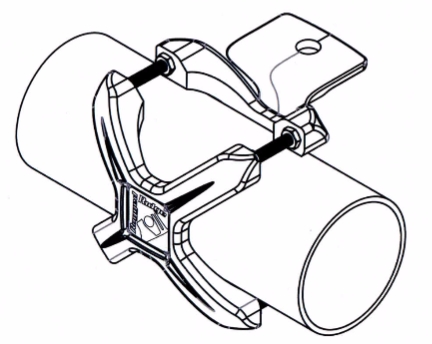
How to Install Rugged Ridge X-Clamp for Tubing & LED Light Kit on your Wrangler

Shop Parts in this Guide
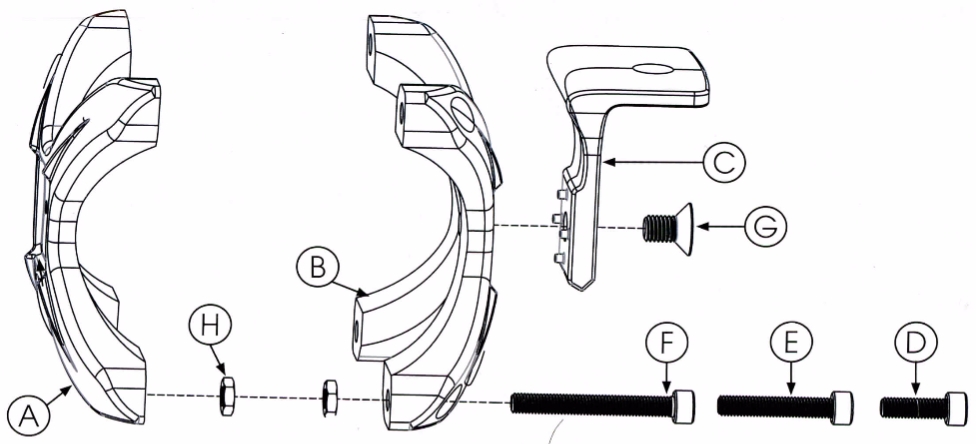
Contents:
• A- X-Clamp Front
• B- X-Clamp Back
• C- Mount Tab
• D- Short Cap Screw
• E- Medium Cap Screw
• F- Long Cap Screw
• G-Flat Head Screw
• H- Jam Nut
1. Disassemble the X-Clamp Front and X-Clamp Back by loosening the jam nuts then removing the 4 bolts and 8 jam nuts.
2. Determine the correct orientation to mount the X-Clamp by holding the X-Clamp Front and X-Clamp back to the tube. Rotate the X-Clamp pieces 90° to make sure you have the correct orientation.
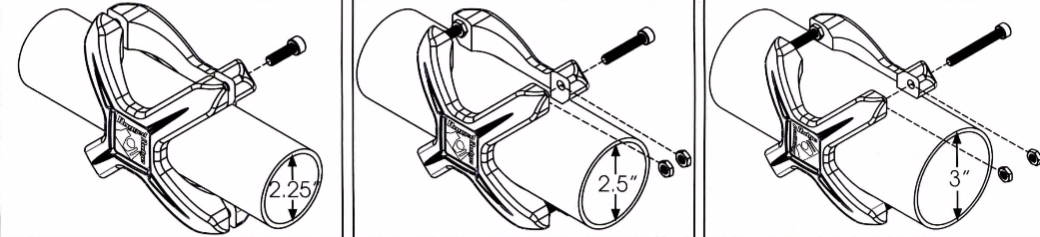
3. Select appropriate bolt length for your tube diameter. For X-Clamp 2.25"-3.0" , 2.5" and 3.0" diameter tubes require jam nuts.
For X-Clamp 1.25"-2.0" , 1.5" and 2.0" diameter tubes require jam nuts. Note: to prevent jam nut interference with the high point of tube, keep jam nuts separate on bolt shaft during install.
4. Attach X-Clamp to tube by gradually tightening all bolts evenly in an "X" pattern. Tighten to 3 ft-lbs. Do not exceed 3 ft-lbs.
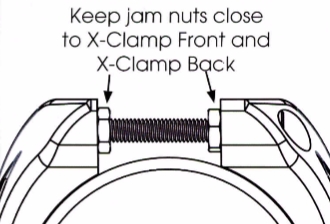
5. Tighten jam nuts to a snug fit. Do not over tighten. Make sure bolts are tightened before tightening jam nuts.
6. Attach mounting tab to X-Clamp Back. Tighten to 8 ft-lbs.
NOTICE: Apply red Loctite(R) or equivalent thread sealer before tightening threads of flat head screw.
