 FREE 1 to 3-Day Delivery on Orders $149+ Details

How to Install Rugged Ridge Spartacus HD Tire Carrier - Wheel Mount (07-18 Jeep Wrangler JK) on your Jeep Wrangler
Installation Time
2.5 hours
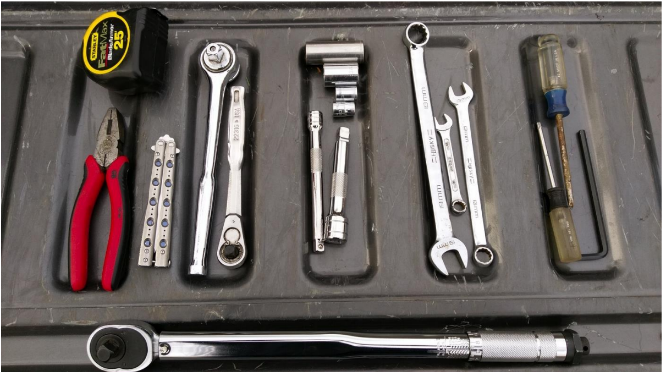
Tools Required
- 10mm Socket
- 13mm Socket
- 19mm Socket
- 3⁄4” Socket
- Socket Wrench
- 10mm Wrench
- 19mm Wrench
- 6mm Allen Wrench
- T20 Torx Driver
- Phillips Screw Driver
- Wire Cutters Crimpers/Linemen’s Pliers
- Tape Measure
- Pocket Knife
- Soldering Iron (optional)
- Heat Gun (optional)

Shop Parts in this Guide
Installation Notes, Pre-Installation notes (only when needed)
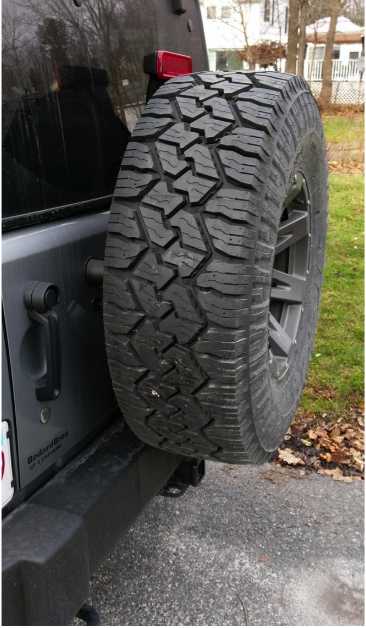
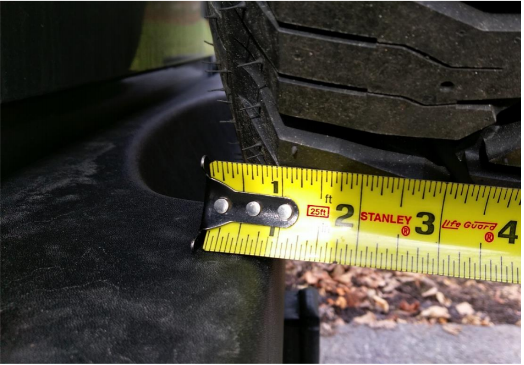
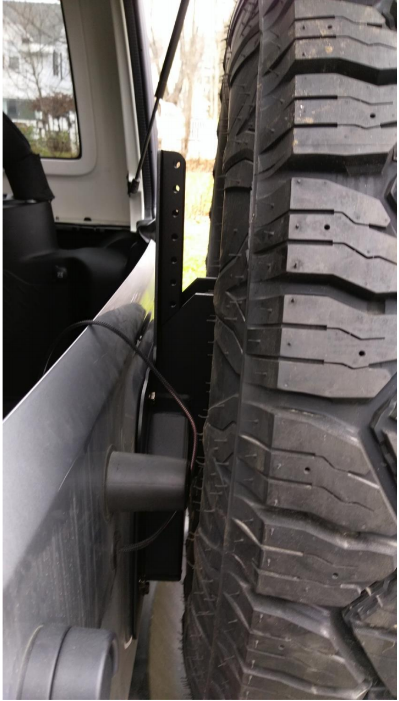
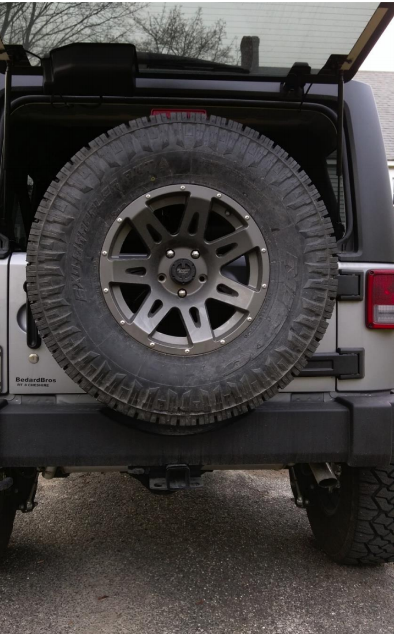
Note that before install with new oversized tires and wheels with appropriate offset that the tire is hitting the bumper slightly and needs to be raised quite a bit (hence the need for the upgraded part). I found it helpful to measure mounting surface and height of the stock carrier before install for reference. The new mount raises the tire ~ 3 inches. This will clearly leave room for 37’s if/when the time comes.
Installation Instructions:
1. Remove the spare tire.
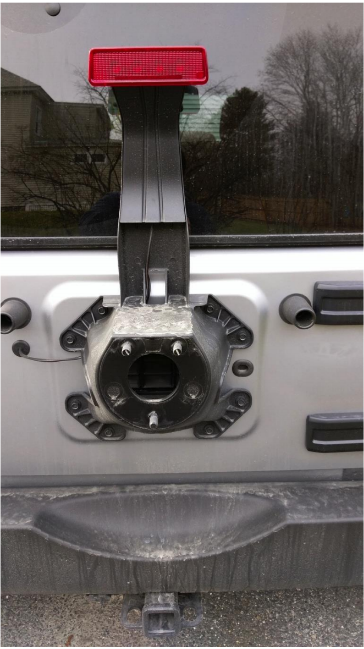
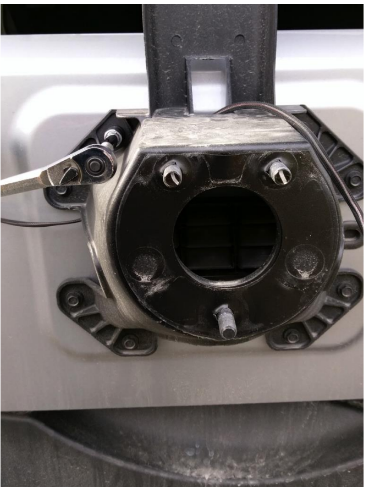
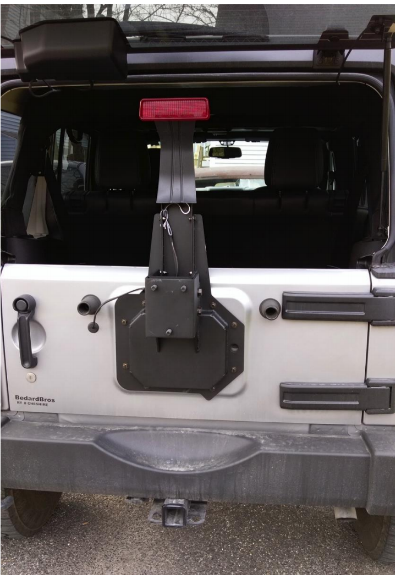
2. Open the tailgate and remove the 3rd brake light from the tire mount by removing the (4) T20 torx screws.
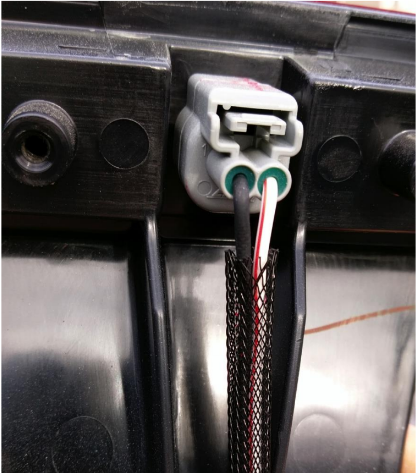
3. Unplug the 3rd brake light by pushing the tab on the connector and set the light assembly aside for reassembly later.
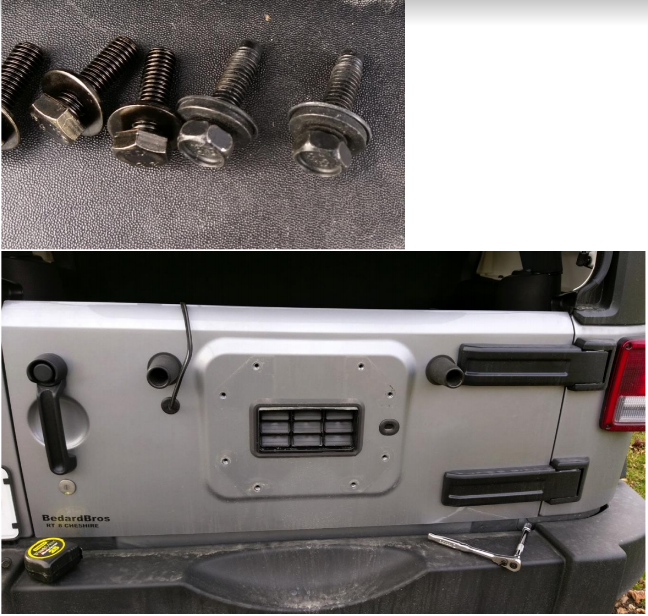
4. Using the 13mm socket remove the 8 bolts holding the factory spare tire carrier and then remove the tire carrier. Note that the supplied bolts are shorter than the factory hardware.
5. After cleaning mounting surface on the tailgate. Set the new tire carrier plate assembly in place loosely threading 4 of the supplied M8 bolts and washers on the left side of the mount. They are installed loose on this side so that you can install the spacers on the right (assuming you are not using the RR Spartacus Hinge Assembly (separately purchased).
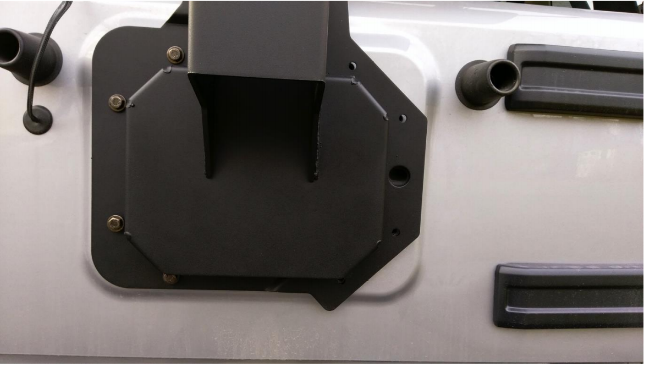
6. Install the remaining 4 bolts on the right, first installing the spacers behind the mounting plate. Then tighten all 8 mounting bolts.
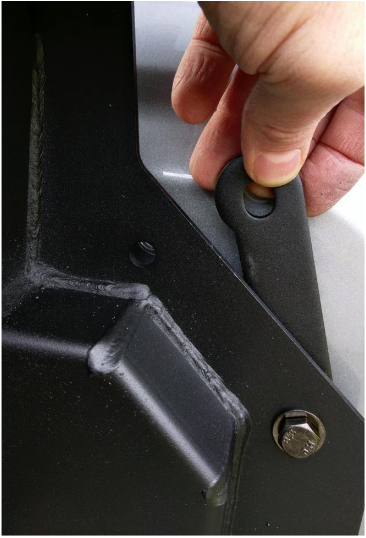

7. Slide the lug plate assembly onto the mounting plate assembly and loosely secure with the supplied M12 hardware. Do not fully tighten yet.
8. Insert the set screws into the welded nuts on the lug plate assembly, do not fully tighten yet.
9. Install the spare tire and secure with lug nuts tightened enough that the tire is flat to the mounting plate.
10. Move the spare tire into the desired position in/out and tilt. At this point a second set of hands is helpful for both moving the tire around and then securing it (next step).
11. Using the 6mm Allen wrench tighten the two set screws to keep the tire in position.
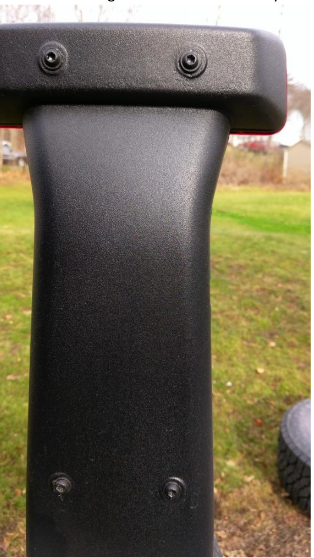
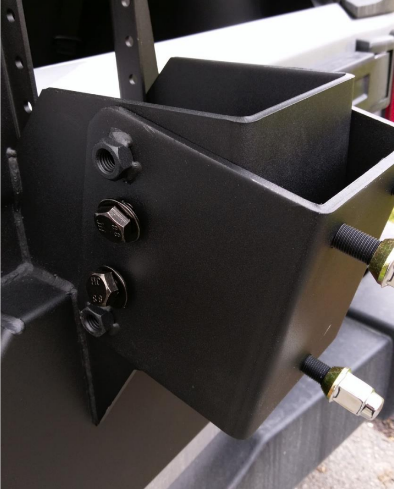
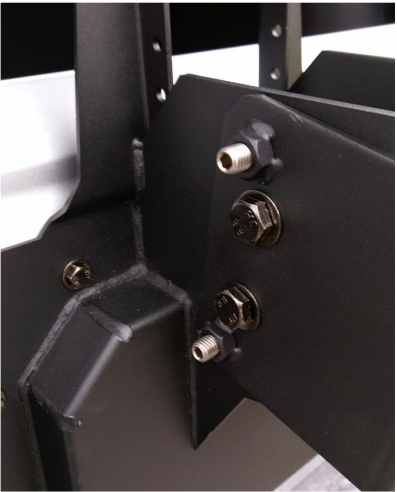
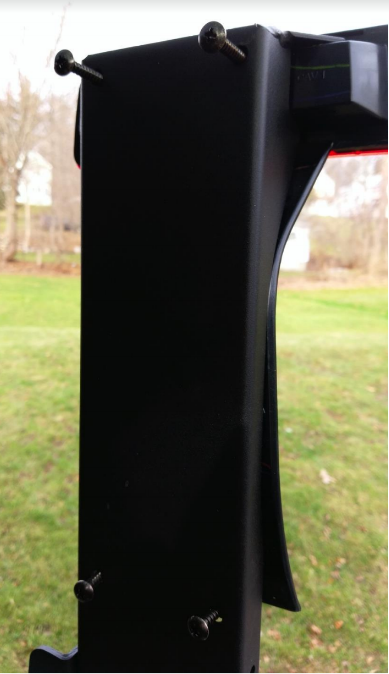
12. With the spare tire still mounted dry fit the 3rd brake light extension assembly to determine required height. Install using the supplied 10mm bolts, washers and nylon nuts (tire is removed in picture for ease of viewing).
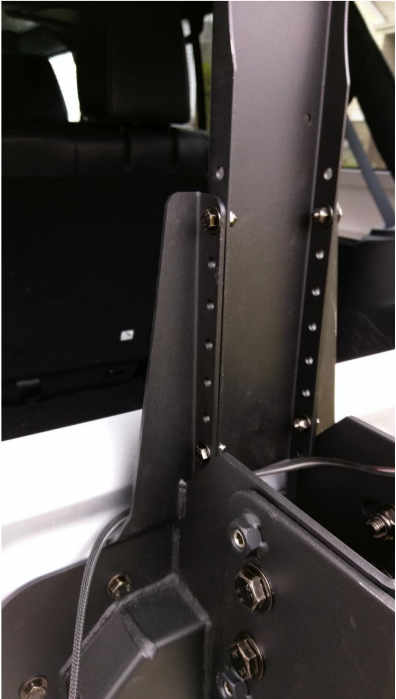
13. Carefully remove the spare tire so as to not disturb its positioning. Then using the 19mm wrench and socket tighten the M12 bolts holding the assembly together.
14. Check to determine if additional wire is required to complete 3rd brake light install by routing the cable as desired, plugging in the harness to the light and checking to see if light will reach mounting position. In most cases it would seem additional wire will be required.
15. The supplied instructions suggest removing the cover on the tailgate and trying to fish more wire through the grommet, however this may be very tight and may still leave you short on wire. Alternatively more wire can be added near the top of the 3rd brake light assembly-assuming shrink tubing or appropriate weatherproof connection is made.
16. Cut the wire where the additional wire length is to be installed.
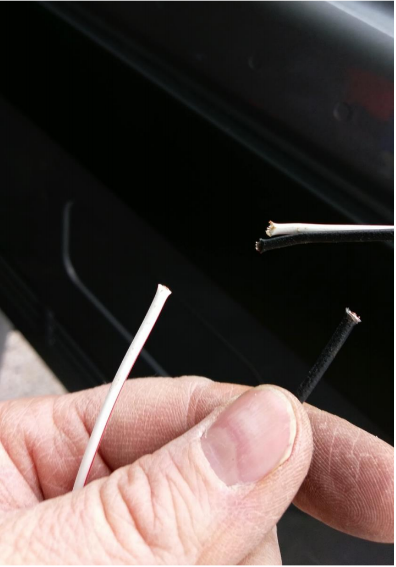
17. Strip wire ends that will be mating.
18. Rugged Ridge provides crimp connectors for splicing in wire. Alternatively you can solder the connections and cover with shrink tube for a more robust installation (pictured here). Remember to slip shrink tube over wire before soldering connections.

19. Twist wires together and solder the connections.

20. Slide shrink tube over newly soldered connections and apply heat to shrink/lock in place. Use care not to heat the OEM cable sleeve.

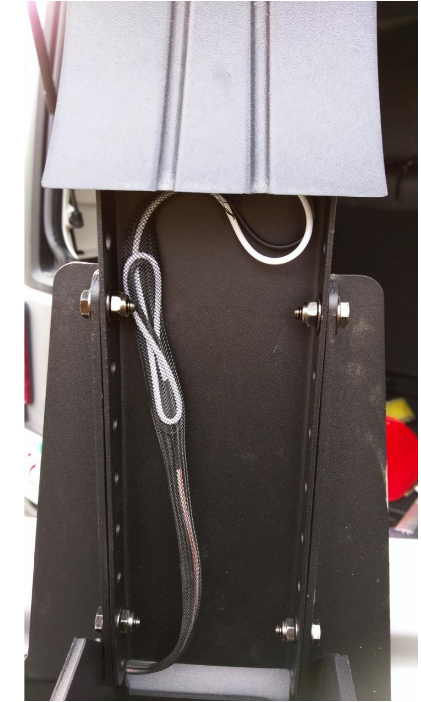
21. Route the now extended harness through tire carrier up to 3rd brake light and plug in the 3rd brake light. Tuck wire into housing groove and clip and zip tie cable as necessary to prevent additional vibration, strain, or friction. (Shown here with excess wire in a service loop tucked into OEM wire sleeve.) NOT SHOWN HERE: electrical tape can be used to provide additional protection to the newly extended wire.
22. Using supplied Phillips screws install the 3rd brake light into the extension bracket. The 2 longer screws are for the top, the two shorter screws for the bottom.
23. Reinstall the spare tire and torque lug nuts to 80 ft-lbs per supplied instructions.
Installation Instructions Written by ExtremeTerrain Customer Christopher Field 12/21/2015
