 FREE 1 to 3-Day Delivery on Orders $149+ Details

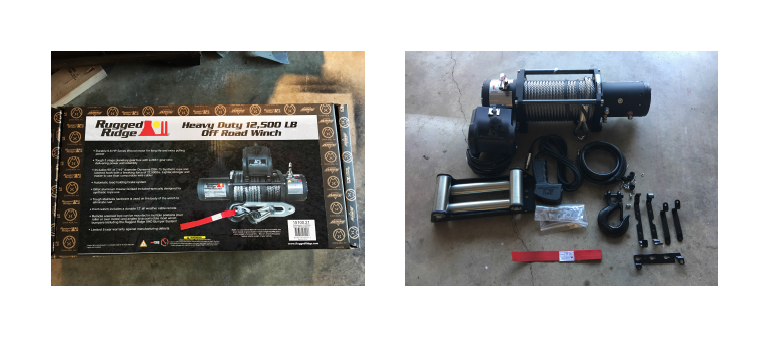
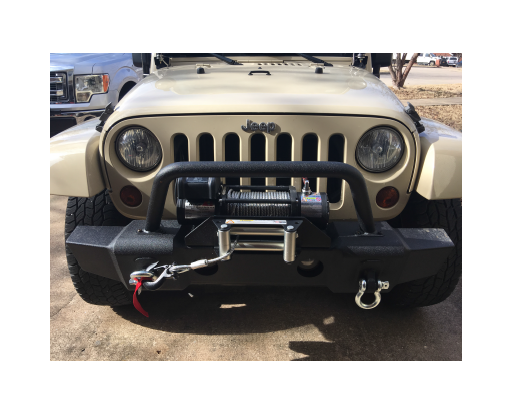
Rugged Ridge Spartacus Heavy Duty 12,500 lbs Winch w/ Steel Cable (87-17 Wrangler YJ, TJ & JK)
Installation Time
30 minutes
Tools Required
- 9/16” socket
- 1/2” socket
- 5/8” socket
- Socket wrench
- Torque wrench - optional
- Safety glasses
1. Park vehicle, turn off engine and engage the parking brake
2. Be sure to wear safety glasses for the entire install as loose debris and dirt on
the underside of the vehicle can dislodge and fall into your eyes
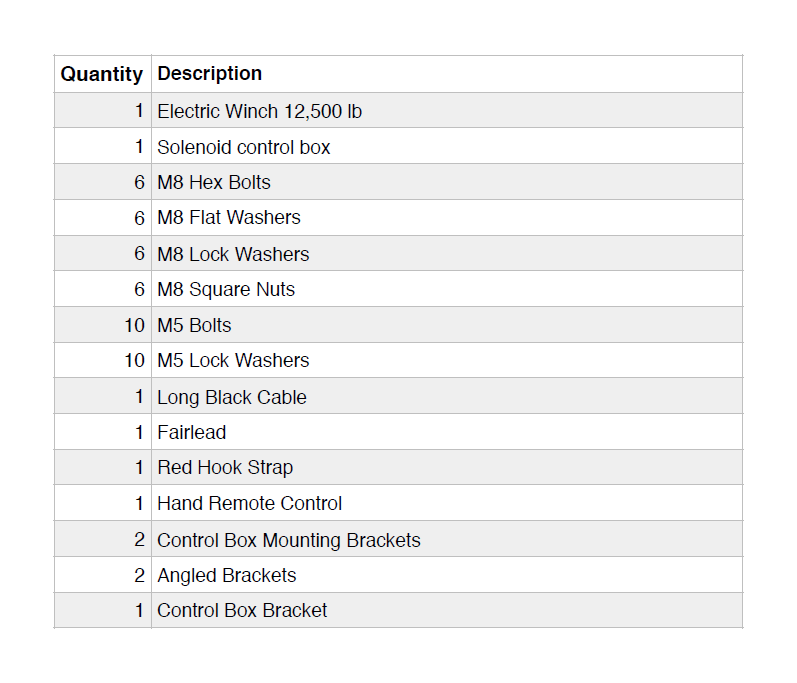
3. Lay out all parts from shipping box and organize what you need.
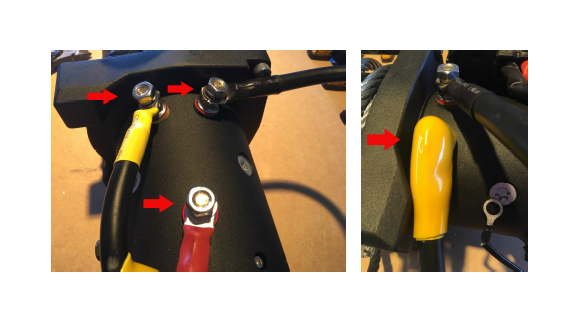
4. Begin assembly by connecting the wires from the control box to the winch
motor. Each wire has a corresponding color-coded connection on the motor.
**Before connecting any wires, be sure to slide the colored wire cover back
behind the wire terminal connection**
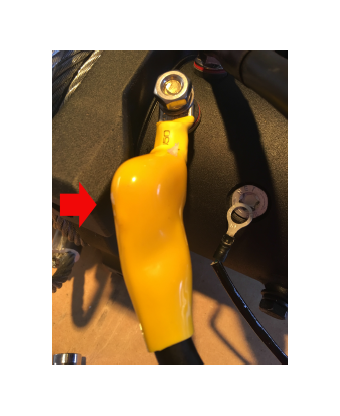
These covers easily slide back to reveal the terminal connection.
5. Connect all color-coded wires to the matching color-coded bases and leave
them a little loose. At this point, you need to decide where to mount your control
box BEFORE tightening the wires to the motor. The control box location will
determine in which position to direct the wires before tightening.
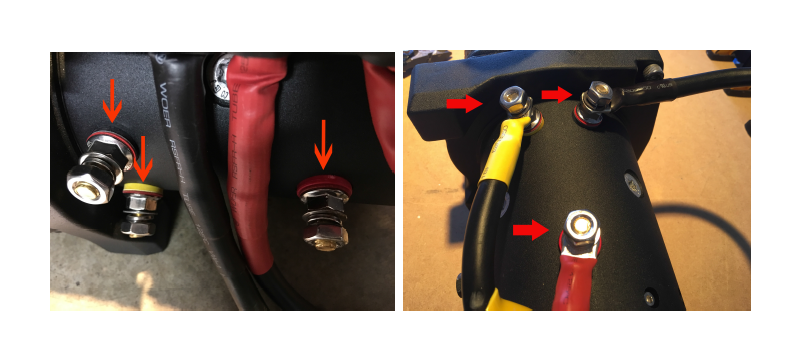
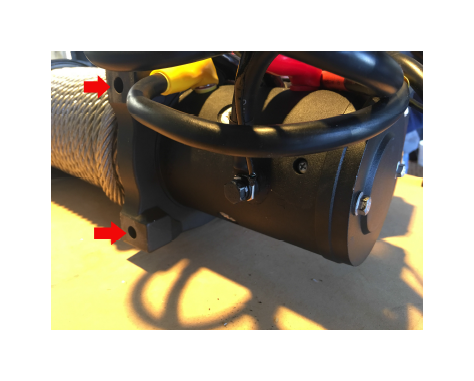
6. Connect the small ground wire and long black cable to the bottom of the motor.
Be sure NOT to connect the small ground wire to the upper black terminal.
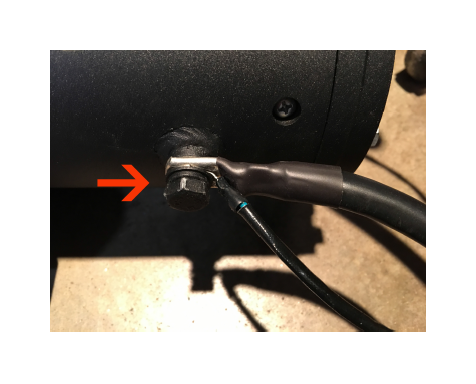
This is what it should look like.
7. Time to mount the control box to the winch. I chose to mount mine on the motor using the control box bracket.
This is where you will mount the bracket before mounting the control box. You will use the existing bolt on the left and add a M5 bolt with M5 lock washer on the right side.
8. After you mount the control box bracket, loosen the M5 bolts on the right side of the control box (2 total) and back them out about half way. Then slide the bolts into the existing holes on the control box bracket and tighten them down.
9. Now, go back and make sure to tighten all color coded wire going from the control box to the motor and slide the color-coded wire covers over the terminals.
TIME TO MOUNT THE WINCH!
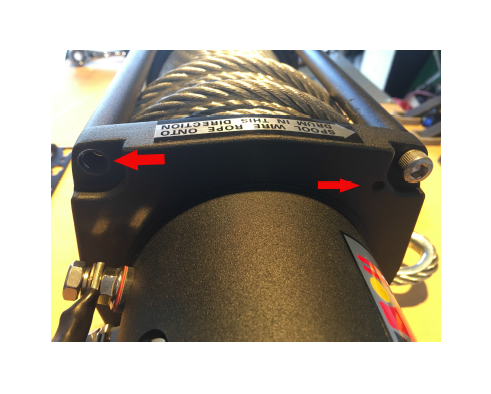
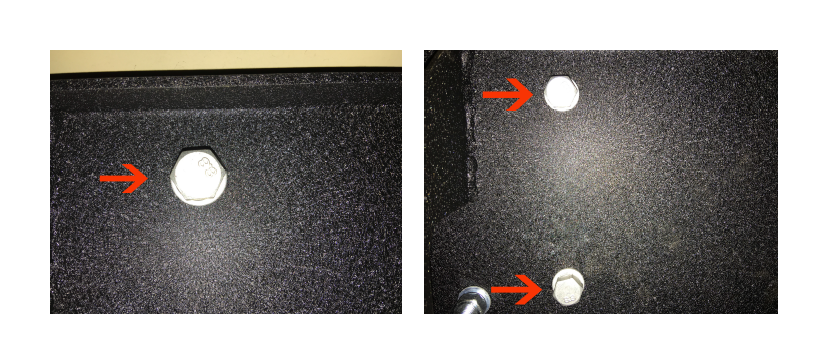
10. First, lay the winch on it’s side and grab the 4 M8 square nuts and slide them
into the slots on the bottom four corners of the winch.
There are cavities in the feet that accept the square nuts. Be sure and slide them all the way to the back of the opening to ensure they line up properly with the bolts.
11. Gently, set the winch on the mounting plate, mine is my winch bumper, and align the four holes on the bottom of the winch with the four holes in your mounting plate.
12. Go to the underside of your Jeep and insert the M8 bolts, M8 washers and M8 lock washers.
This is what it should look like. Be sure to hand tighten each bolt until all bolts are seated and threaded properly and then tighten them down. Be sure not to over tighten any bolts.
13. Time for the main wiring to the Jeep battery. For this step you can run your wires in any route you choose. I chose to go through the grill and up by the radiator to the battery.
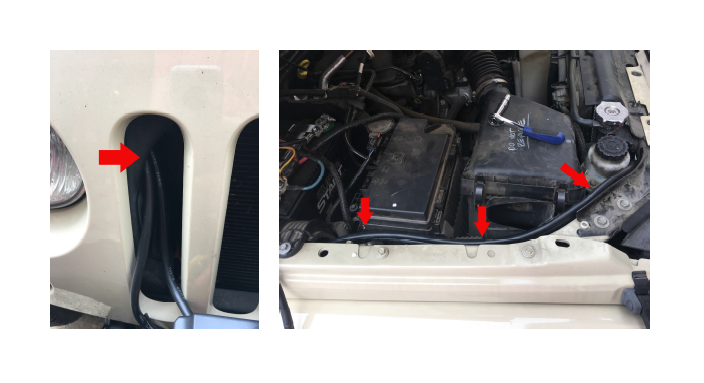
14. After you run your wires to the battery, make sure they’re not going to snag anything in the engine compartment and connect the wires to the positive and negative battery terminals.

Be sure to tighten the terminals back to the same torque they used before connecting the winch wires.
15. Mount the fairlead to the winch plate.
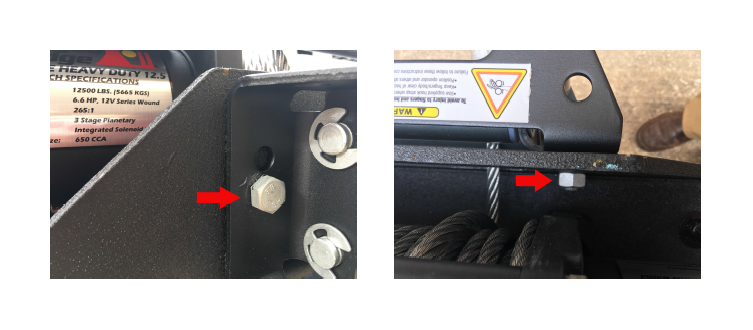
For this step, you will use 2 M8 bolts, lock washers and nuts.
You’re all set! Time to admire your new winch and go test it out!!!
*** Tip - go back to www.extremeterrain.com and pickup a winch cover to protect your investment***
