 FREE 1 to 3-Day Delivery on Orders $149+ Details

How to Install Rugged Ridge 3.5 in. Round LED Lights w/ Windshield Mounting Brackets on your Wrangler
Installation Time
45 minutes
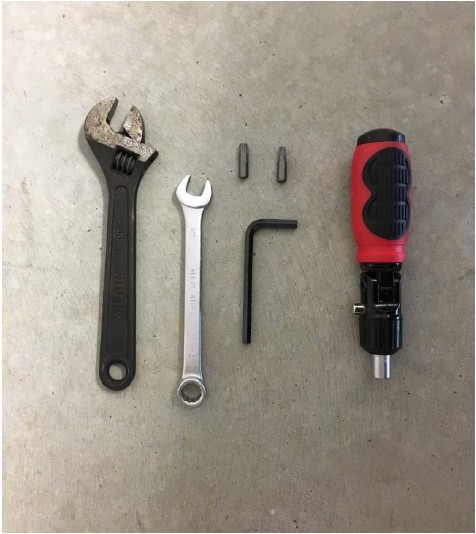
Tools Required
- Crescent Wrench
- T-40 Torx Screwdriver
- T-27 Torx Screwdriver
- ½” Open-ended Wrench
- 6mm Allen Key or Hex Wrench
- Towel or Rag (to protect work area on hood)

Shop Parts in this Guide
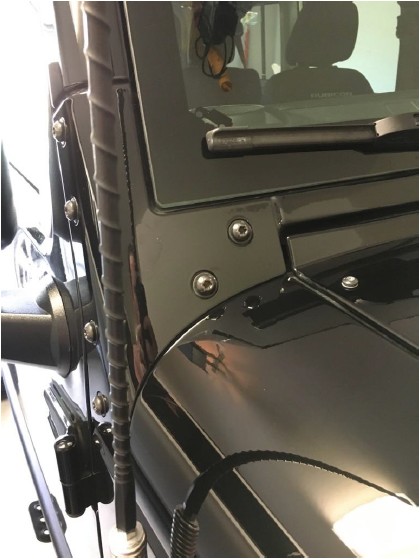
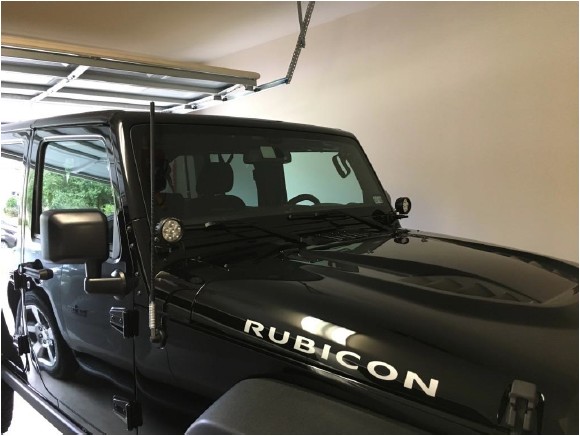
Factory / Before Picture:
Installation Instructions:
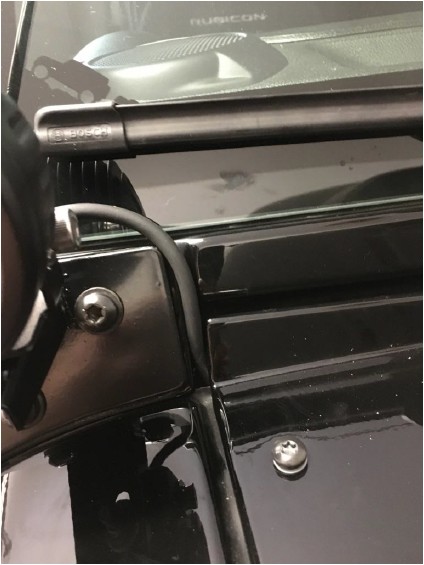
1. Remove factory bolts below windshield using T-40 Torx screwdriver

2. Clean area below where mounting brackets will rest if necessary
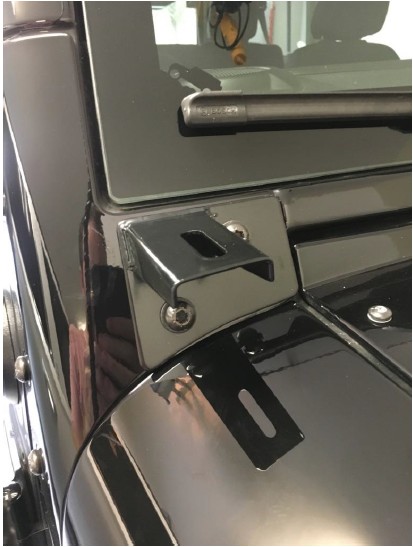
3. Install light mounting bracket using factory bolts and washers previously removed
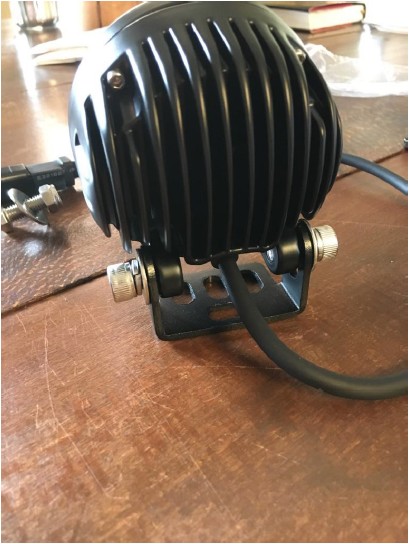
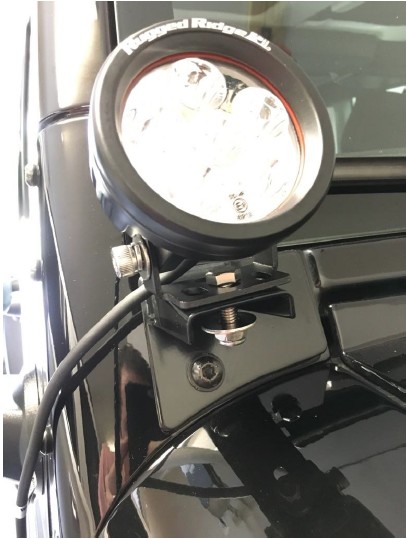
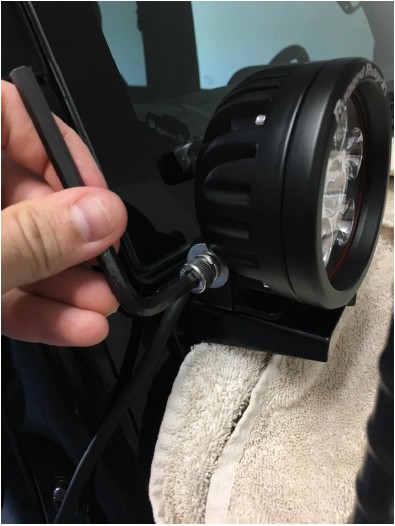
4. Remove fog lights from packaging and install brackets to lights with bolts, washers, and lock washers provided
Note: The bracket can be installed with tongue pointing forward or backward based on preference and washer should be installed inside of lock washer. Only hand tighten bolts at this point.
5. Tilt bracket on light and install bolt for installation to mounting bracket previously installed on Jeep
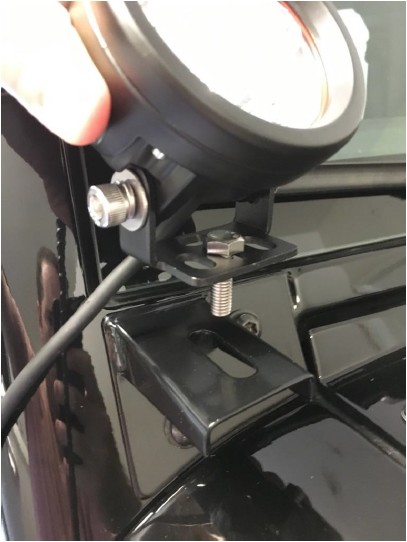
6. Install light bracket to mounting bracking using provided bolt, washer, and nyloc nut - snug up with ½” open-ended wrench on nyloc nut and crescent wrench on bolt paying attention not to over-tighten before adjustments can be made to light direction
Note: The provided washer should be below the mounting bracket and between bracket and nyloc nut
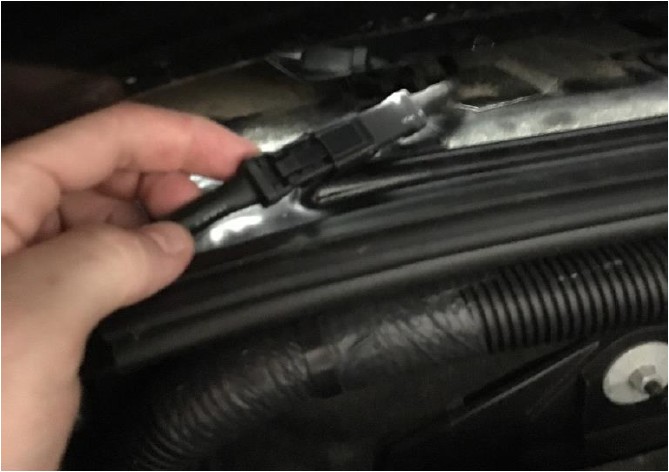
7. Remove two screws holding down center hood cowl using T-27 Torx wrench
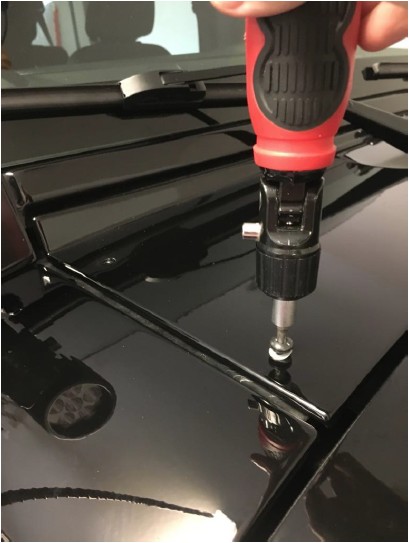
8. Gently lift cowl in order to feed light wire and quick connect female end under the hood cowl and to the engine compartment
Note: Some may elect to entirely remove cowl for install, but this is not necessary
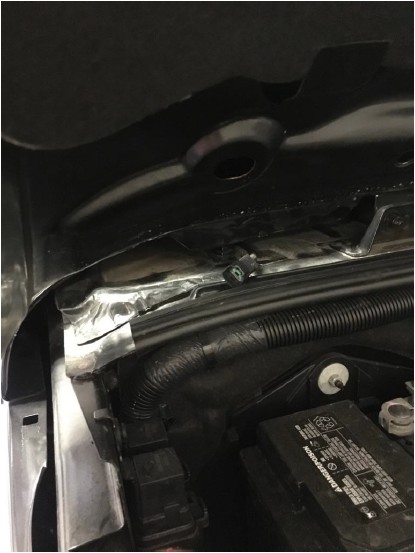
9. Wire included pigtail and quick connect male end to wiring harness (not included - see specific manufacturer's installation instructions)
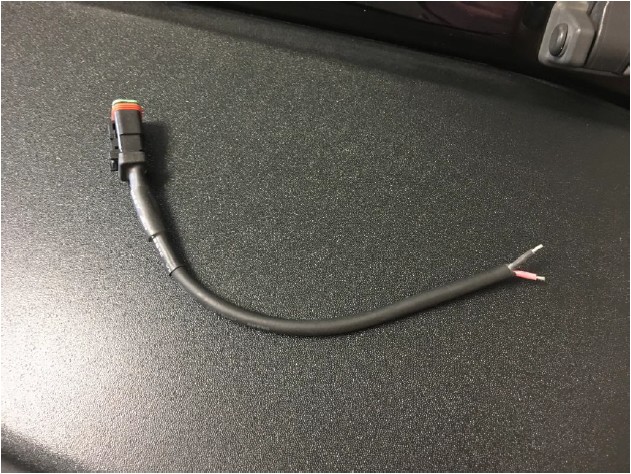
10. Connect wiring quick connects and route wires to engine compartment so as not to interfere with hood closure and secure wires as desired
11. Reinstall screws on cowl taking care not to pinch light wires - I have found that the best wire route is between the mounting bracket and the cowl and toward the back / vertical portion of cowl
12. Test lights to ensure they are in proper working order and troubleshoot wiring as necessary
13. Utilize the bolts on the light bracket and bolt between the light bracket and mounting bracket to make adjustments to light direction using towel or rag to protect the Jeep
14. Tighten down all bolts on the brackets once adjustments are complete
15. Repeat all steps on other side
Installation Instructions Written by ExtremeTerrain Customer Brian Dunn 06/19/2017


