 FREE 1 to 3-Day Delivery on Orders $149+ Details

How to Install a Rugged Ridge Performance Vented Hood on your Jeep Wrangler

Shop Parts in this Guide
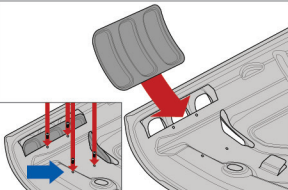
1. Before any priming or painting, remove the four bolts securing the side vents on each side of the hood. Remove side vents from the hood.
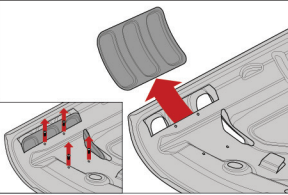
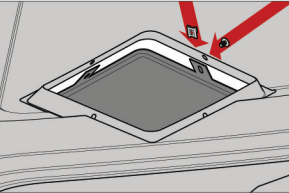
2. Remove top vents from the hood by removing screws. Remove J-clips
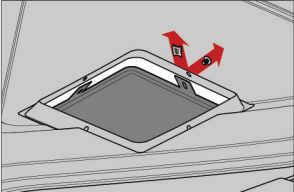
3. Once top vents are removed, bend/pull tabs on vents to create better fitment against hood.
NOTICE: This step will help ensure less likelihood of damage to paint of hood.
The hood is now ready for priming and painting.

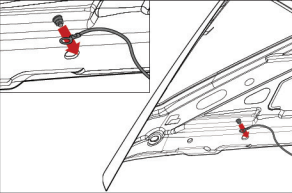
4. Remove ground wire attaching rear of factory hood to vehicle body. Not Applicable for all model years.
NOTICE: 2007-2012 JK owners skip to Step 6.
5. Separate washer fluid tube from spliced tubes connected to the nozzles.
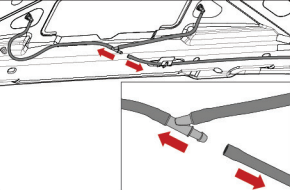
6. Remove washer fluid tube from nozzle(s) found on underside of factory hood. 2013 JK owners discard spliced tubing.
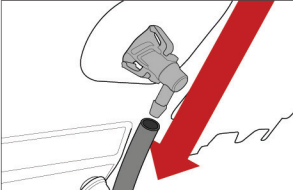
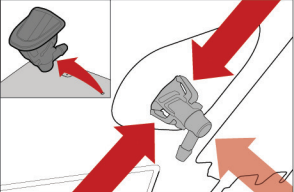
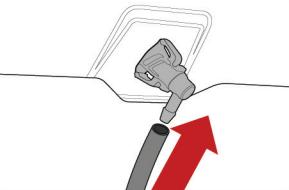
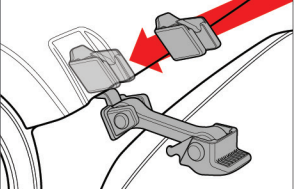
7. Compress and push washer fluid nozzle(s) outward to remove.
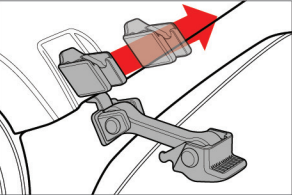
8. Remove the hood catch attached to factory hood.
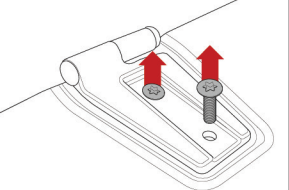
9. Remove torx bolts attaching factory hood to hinges of the vehicle body. Remove factory hood.
10. Once your hood is painted the color of your choice, slide your side vents back into place. Fasten side vents with bolts removed in Step 1.
NOTICE: Blue arrow indicates location for M6x25 Button Head Bolt.
11. Attach & fasten top vents removed in Step 2.
12. Attach your new JK Performance Vented Hood. Fasten hood with torx head bolts removed in Step 9.

13. Attach washer fluid nozzle to JK Performance Vented Hood. Make sure nozzle faces rear of vehicle.

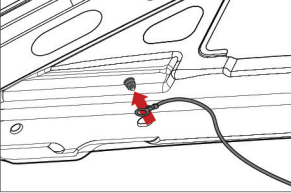
14. Attach supplied tube and connector to your vehicles washer fluid tube.

15. Attach supplied tube to washer fluid nozzle on your hood. Cut excess tubing if necessary.
CAUTION: Cutting/Sharp Edge Hazard: Cut carefully using gloves and eye protection.
16. Attach ground wire to hood. Not applicable for all model years.
17. Attach the hood catch removed in Step 8 to the hood.
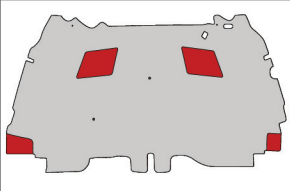
18. If you choose to re-attach the sound damping cover attached to your factory hood, we recommend you to cut out sections to improve heat reduction. Use the JK Performance Vented Hood as a template and trace cut-outs around all vents with a marker. Use scissors or a razor blade to cut areas traced. Securely attach sound damping cover to your Hood. Not applicable for all model years.
CAUTION: Cutting/Sharp Edge Hazard: Cut carefully using gloves and eye protection.
19. Your JK Performance Vented Hood is now attached, enjoy!


