3 Days Left! Guaranteed Free Delivery 12/24. Order by 3pm EST available on most items - Details

How to Install Rough Country Manual Transmission Shifter Adapter on your 2007-2013 Wrangler

Shop Parts in this Guide
Rough Country recommends a certified technician installs this system. In addition to these instructions, professional knowledge of disassemble/reassembly procedures as well as post installation checks must be known. Attempts to install this system without this knowledge and expertise may jeopardize the integrity and/or operating safety of the vehicle.
Please read all the instructions before beginning the installation. Check the kit hardware against the parts list. Be sure you have all the needed parts and understand where they go. Also please review the tools needed list and make sure you have needed tools.
This Kit is intended for use with Rough County’s 1 1/4” JK body lift to return the shifter back to the normal position and to correct any interference problems with the shifter contacting the body creating difficulty during shifting.
KIT CONTENTS:
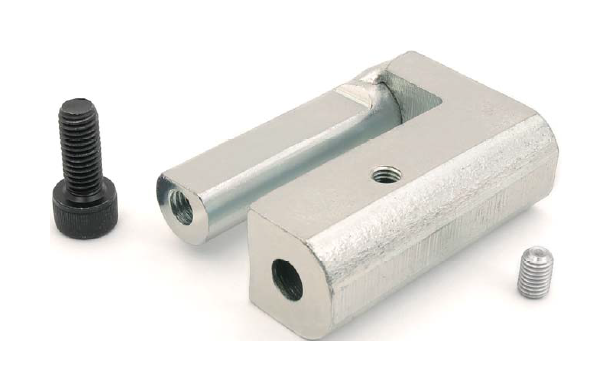
1-Shifter Extension
1-Poly Bag Containing:
1-1/4” Set Screw
1-8mm x 20mm Bolt
INSTALLATION INSTRUCTIONS
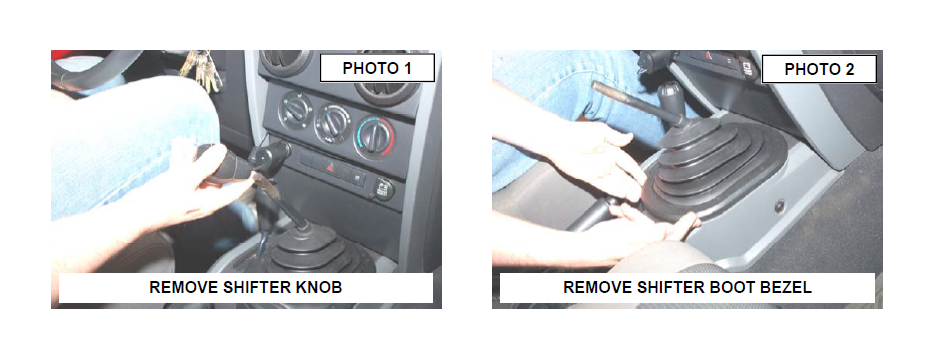
1. Pull the shift knob from the shifter rod. See Photo 1.
2. Remove the shifter boot bezel from the center console. See Photo 2. Note: There are two clips in the rear that must be released first then the bezel can be removed.
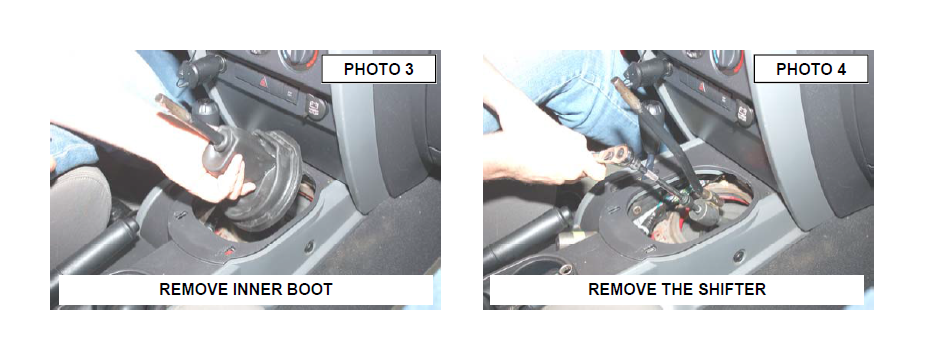
3. Remove the inner boot. See Photo 3.
4. Using a T-45 torque head bit, remove the shifter from the transmission stub shaft. See Photo 4. Retain the stock hardware for reuse.
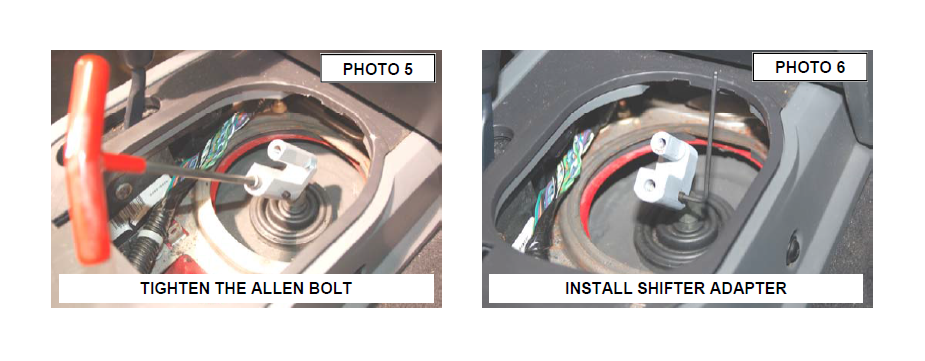
5. Install the shifter adapter, making sure the adapter is fully pressed down on the transmission stub.
6. Make sure the shift adapter is straight. Apply the thread locking compound and install the 8mm allen head bolt. Tighten using a 6mm allen wrench. See Photo 5.
7. Apply thread locking compound and install the supplied 1/4” set screw in the shifter adapter. Tighten the set screw using a 1/8” allen wrench. See Photo 6.
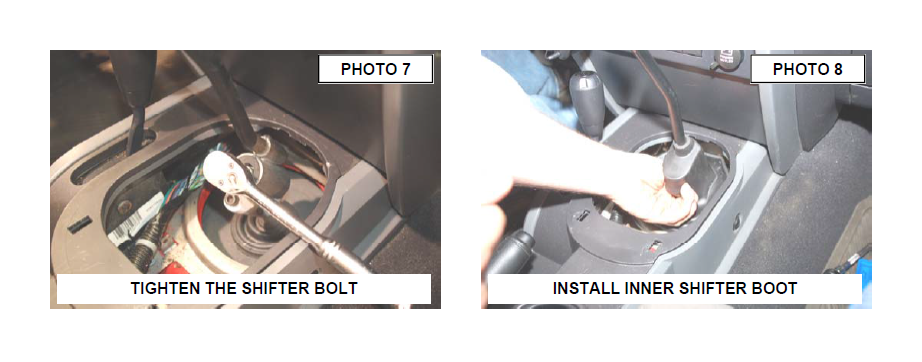
8. Reinstall the shifter on the adapter using the factory hardware. Tighten using a T-45 torque head bit. See Photo 7.
9. Replace the inner boot making sure the boot is pressed all the way down. See Photo 8.
10. Reinstall the outer boot.
11. Install shifter knob.
POST INSTALLATION
Re torque all fasteners after 500 miles. Visually inspect components and re torque fasteners during routine vehicle service.


