FREE 1 to 3-Day Delivery on Orders $149+ Details

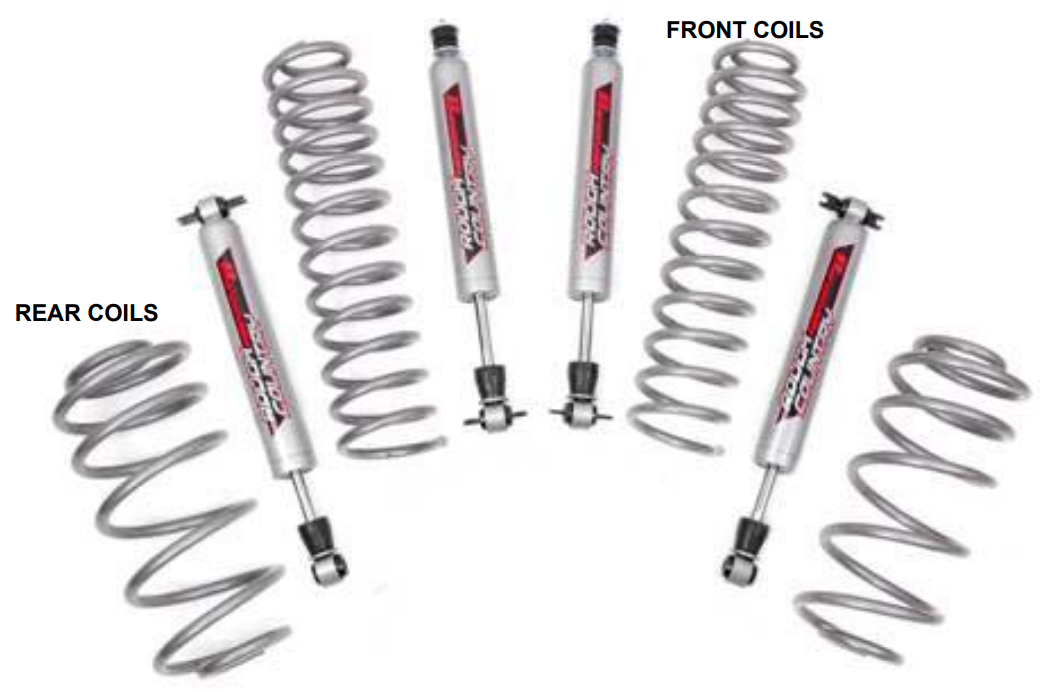
Installation Instructions for Rough Country 2.5 in. Suspension Lift Kit w/ Performance 2.2 Shocks (97-06 4.0L Wrangler TJ)
Tools Required
- Spring Compressor
- Silicone spray
- Torx key socket
- Floor jacks
- Wheel chocks
- Torque wrench
- 1/2 drive ratchet and sockets
- Heavy duty jack stands
- Safety glasses
Front Installation Instructions
1. The front-end components are installed first.
2. Place the vehicle on a level surface. Set the parking brake. Center the front wheels and chock rear wheels.
3. From inside the engine compartment, remove the upper stud nut, retainer and grommet from both of the front shocks.
4. Place jack stands on the frame rail behind the lower control arm mount on the frame and jack up the vehicle. Installation is done one side at a time.
5. Remove the front tires and wheels.
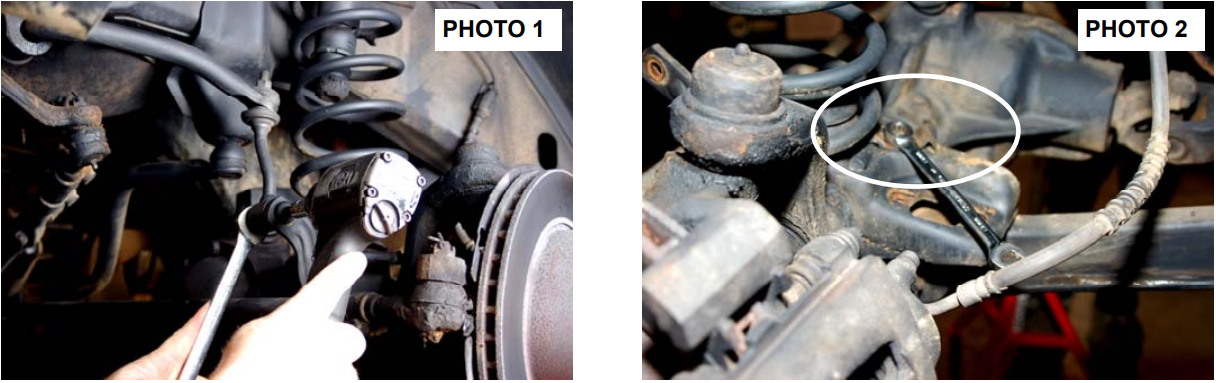
6. Remove the sway bar links from the axle using a 18mm wrench / T55 torx head bit to allow the axle to be lowered for coil spring removal. See Photo 1.
7. Place a floor jack underneath the axle for support and complete the removal of the front shock absorbers. Retain factory lower mounting hardware for re-use.
8. Remove the coil spring clip located on the bottom coil seat as shown in Photo 2 using a 13mm wrench on the driver side of the vehicle. Lower the axle and remove the coil spring.
9. Install the new front progressive rate coil spring. A coil spring or strut compressor may be needed for the new coil spring installation. Install the new coil spring (with the coil wraps that are closer together to the top) into the upper and lower spring pockets and carefully remove the compressor. Make sure the coil is seated properly in the coil seat by rotating the spring so the pig tail end fits in the spring pocket. Install the coil spring clamp and torque the spring clip bolt to 16ft.-lbs.
10. Install the front shock absorber in the factory upper &lower mounts. (Longer shocks are highly recommended for this lift).
11. Repeat installation on the opposite side of the vehicle.
12. Install the tires, wheels and lug nuts and tighten to factory specifications. Lower the vehicle to the ground
13. Reinstall the sway bar links in the factory location with factory hardware using a 18mm wrench and T55 torx head bit.
Rear Installation Instructions
1. Chock the front wheels. Jack up the rear of the vehicle and remove the tires and wheels.
2. Place jack stands under the frame rail to support the vehicle. Place a floor jack under the differential to lightly support the axle.
3. Remove the stock shock absorbers. Retain the hardware for reuse.
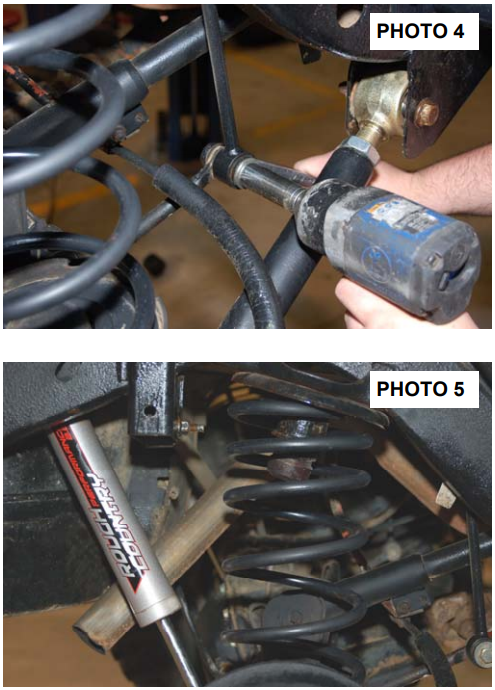
4. Remove the lower sway bar links from the sway bar using a 15mm wrench. See Photo 4 . Retain the factory hardware for re-installation.
5. Carefully lower the axle with the floor jack and remove the coil springs. NOTE: It may be necessary to use a coil spring or strut compressor to remove the stock coil springs. Be careful not to overextend the vent tube on the axle. It may be necessary to disconnect the vent tube during installation and reroute the vent tube after installation to ensure the line does not get damaged.
6. Install the new Rough Country progressive rate coil springs making sure the coil isolator is positioned in the upper mount. It may be necessary to use a coil spring or strut compressor to install the new coil springs. See Photo 5. Rough Country’s New RCX 2.2 series shock is also pictured.
7. Jack up the axle to lightly compress the coil springs.
8. Install the rear shock absorber in the factory mounts with the factory hardware using a 15mm & 18mm wrench for the lower and a 13mm socket for the upper. Tighten hardware. (Longer shocks are highly recommended for this lift).
9. Install the wheels and tires and lower the vehicle to the floor.
10. Reinstall the factory sway bar links with the factory hardware using a 15mm wrench and tighten.
Post Installation Instructions
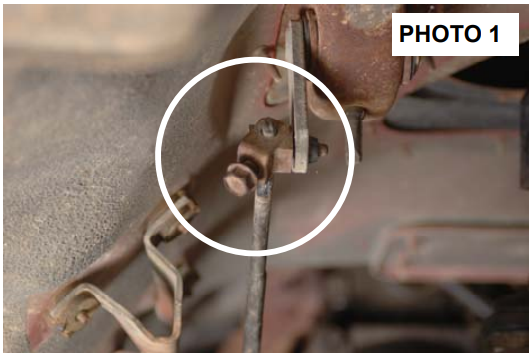
1. Check the transfer case shifter to see if it will move to 4L. If not, the linkage will need adjusting. Place the shifter in 4L, loosen adjustment bolt and push the linkage forward until it stops. Now re-tighten adjustment bolt. See Photo 1. Check to be sure 4WD works properly.
2. Rotate driveshaft and check for interference at differential yoke and cardan joint. If necessary, lightly dress casting(s) and/or U-joint tabs in order to eliminate binding
3. Have a qualified alignment center realign front end to factory specifications.
4. Install Warning to Driver decal on sun visor.
5. Adjust headlights to proper settings.
Maintenance Information
It is the ultimately the buyers responsibility to have all bolts/nuts checked for tightness after the first 500 miles and then every 1000 miles or 3 months. Wheel alignment steering system, suspension and driveline systems must be inspected by a qualified professional mechanic at least every 3000 miles.
Troubleshooting Tips
Problem: Driveline Vibrations
Possible Solution: Check all u-joints to insure that there is no wear on the existing hardware caps. Even a new vehicle can cause vibrations in the angle on the U-joint is changed after being run for even a short period of time.
Possible Solution: Driveline vibrations can be caused from the removal or addition of the hardtop which changes the rear vehicle weight, and the rear height, which affects the rear drive shaft pinion angle. If excessive vibration occurs, Rough Country’s adjustable eccentric upper cam-bolt kit will eliminate such vibrations by adjusting / rotating the rear pinion angle up or down as needed.
Problem: On 03-06 models equipped with the automatic transmission, the transmission skid plate may come in contact with the front driveshaft at full droop even when equipped with the 1” lowering spacers supplied.
Possible Solution: Lower the transmission skid plate more to create distance in between the driveshaft & skid plate or remove the skid plate from the vehicle.