 FREE 1 to 3-Day Delivery on Orders $149+ Details

How to Install a Rough Country 1.25 in. Body Lift w/o Shocks on your 2007-15 Jeep Wrangler JK 4 Door
Installation Time
3 hours
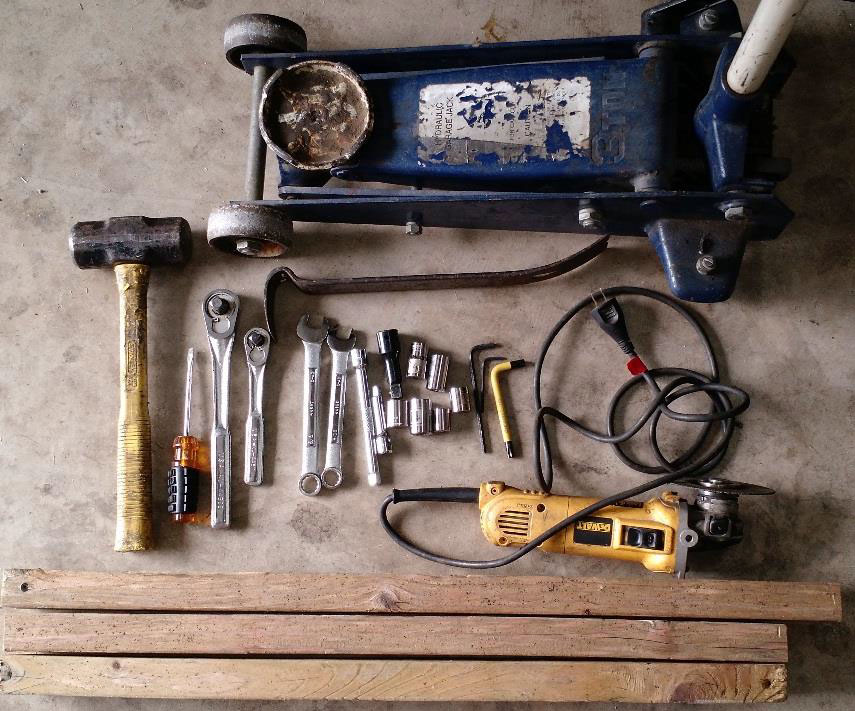
Tools Required
- Jack (Tall enough to reach body of jeep)
- Wheel Chalk
- 3/8 inch drive ratchet (Or air ratchet)
- Pry Bar
- Wood Blocks
- Flat Head Screwdriver
- Hammer
- Grinder/Cutoff Wheel
- Wrenchs (Sizes: 9/16, 5/8, 3/4)
- Sockets (16mm, 18mm, 9/16, 5/8)
- Long Extension
- Torx Wrench (Size: T45)
- Allen Wrenches (Size: 6mm, 1/8”)
- WD-40
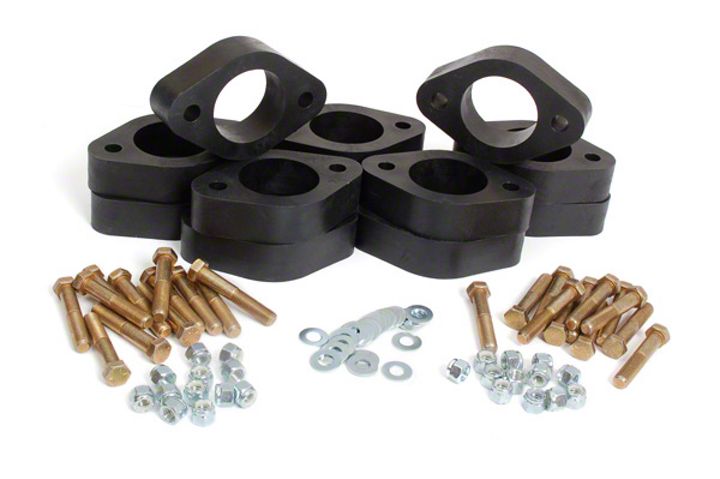
Shop Parts in this Guide
Tools
This installation was performed on a 2014 Unlimited Sport. Perform this installation on as level of a surface as possible. Reduce the possibility of shifting the body of the vehicle laterally as much as you can.
Installation Instructions:
1. Chalk the front wheels.
2. Start by removing the front grill. Using a flat head, pop the 6 clips up and out that hold it in place. Give it a gentle tug to release the three lower clips.
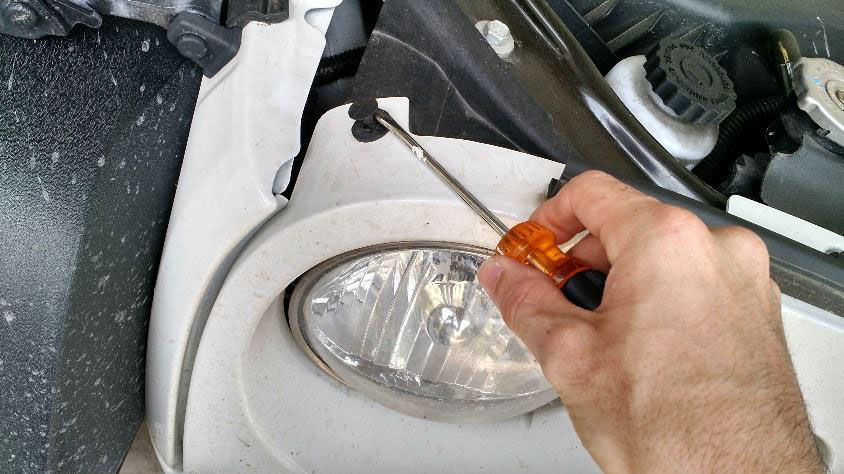
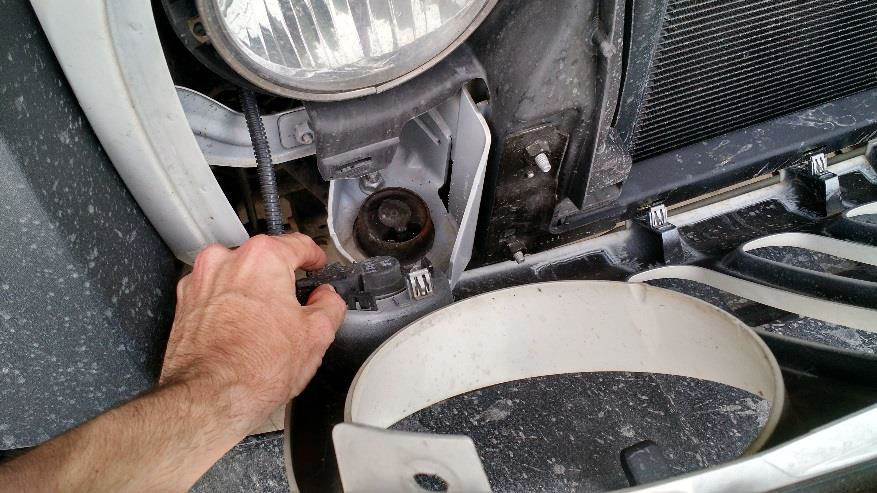
3. Disconnect the plugs to the parking lights on either side of the grill before totally removing from the vehicle.
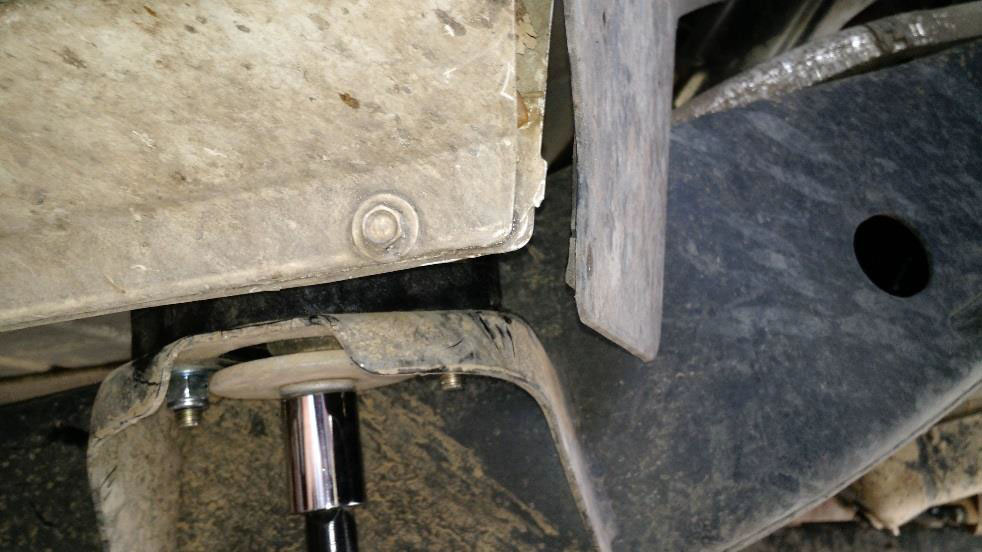
4. Remove the rear bumper now in order to have easier access to the rear most body mounts later. This also saves you from jacking up the passenger side and pressing your license plate holder onto the bumper and bending it. Ask me how I know.
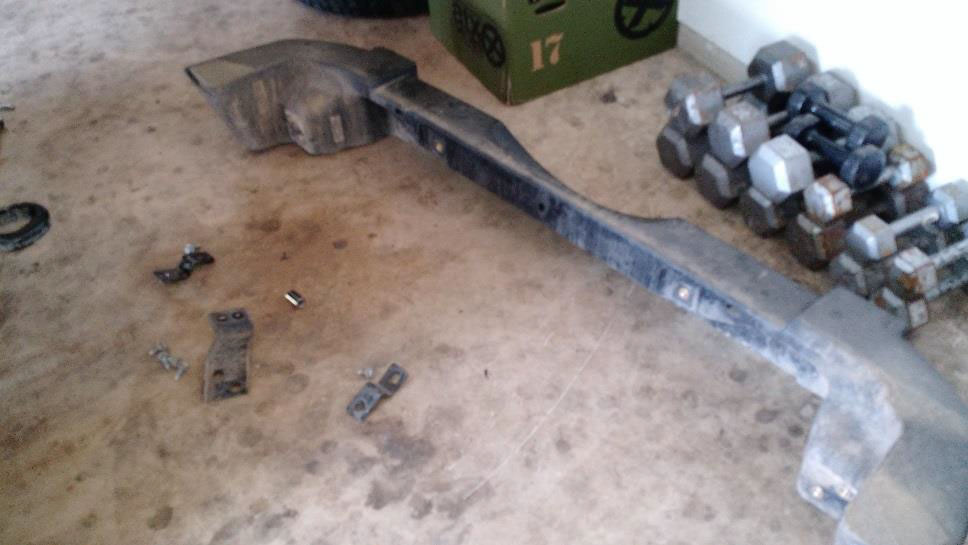
5. Using a 16mm wrench, remove the top and bottom bolts from the two inside brackets supporting the rear bumper.
6. Unbolt the side brackets, 4 bolts, holding the rear bumper on using an 16mm socket. Remove rear bumper/original hardware and set aside for reinstallation with the raised brackets.
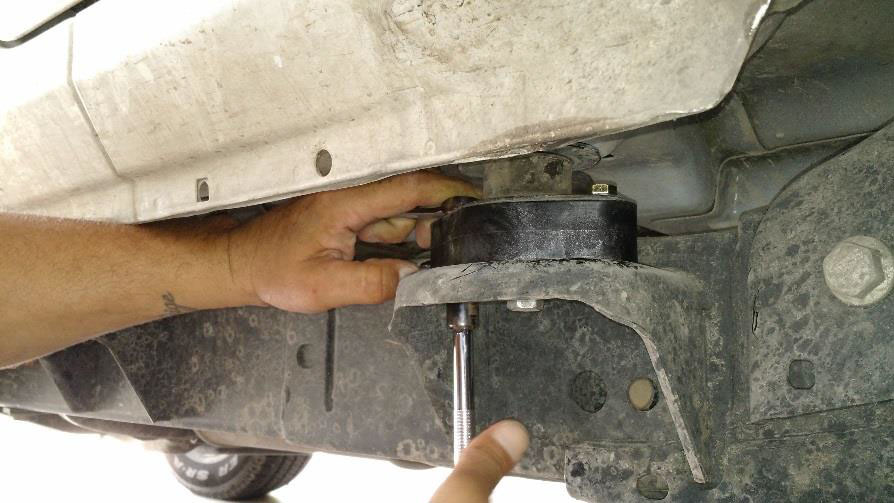
7. Using an 18mm socket, go around the entire body and loosen the big center stud bolts. Do not totally remove, just loosen to give you clearance when you jack up one side at a time. You’ll need the extension on the rear most center nuts. On this 2014 4 door, there are ten body mounts all together: 2 in the front by the grill, 3 along each side of the frame (6 total), and 2 in the very rear by the muffler.
8. Starting on the driver side, remove the two stud nuts from each body mount using a 16mm socket. The front body mounts are upside down compared to the rest of the body mounts. You’ll need the extension again for the rear most body mounts.
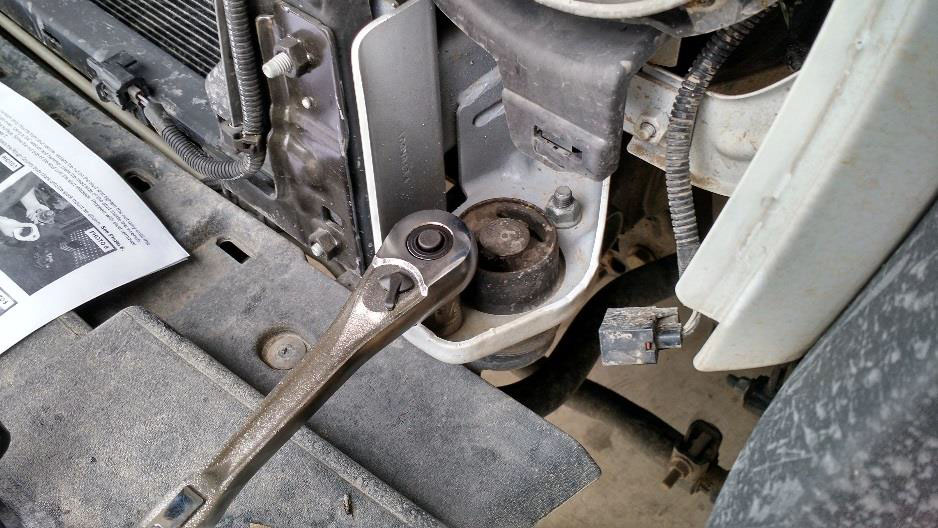
9. Remove all the center stud bolts from the same side, driver side, using an 18mm socket. If the bolts are dangling loose but you cannot remove, you may need to pry the bolts out. This is due to the little retainer clip used at the factory. The may have already rusted off too.
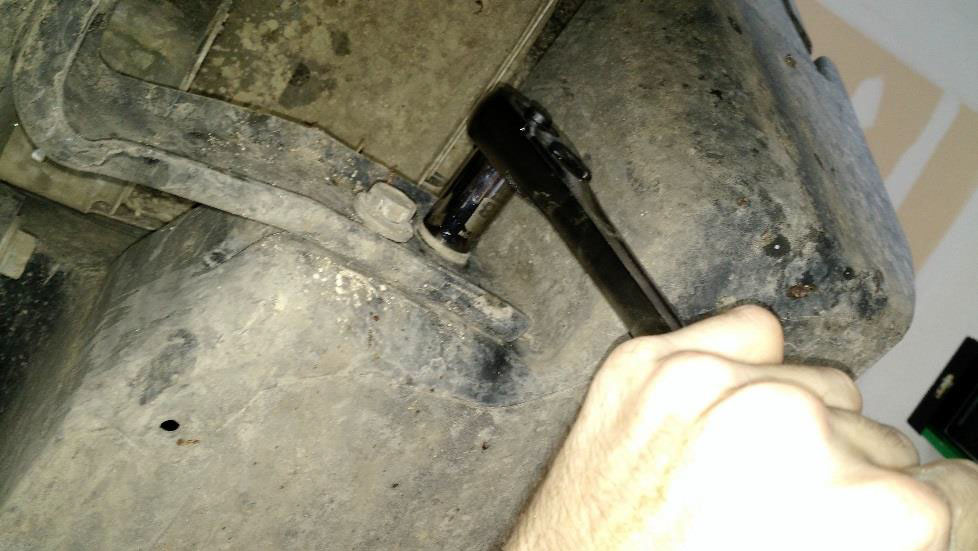
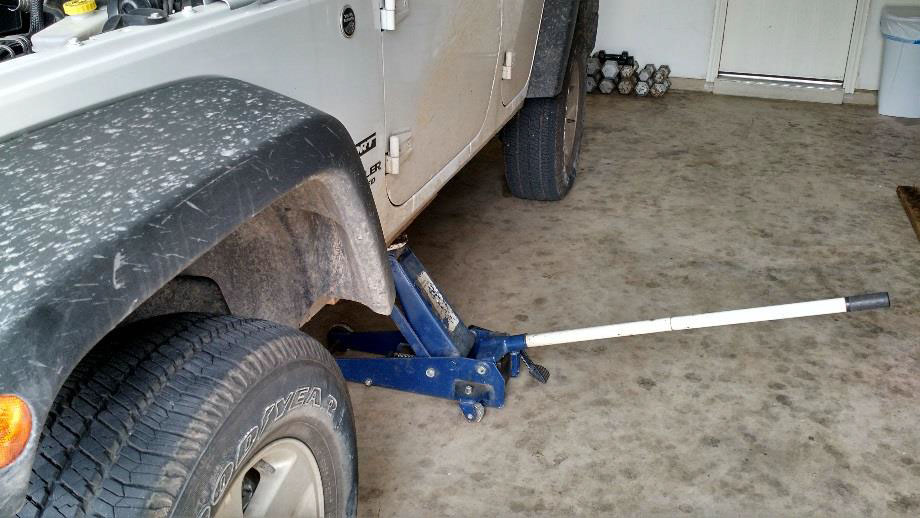
10. Use wooden blocks to provide a flat surface, distributing the pressure, and jack the body up. Do not jack it up on the pinch seam, but on the flatter part of the body just behind the pinch seam. The front of the body will raise before the rear of the body. You only want to jack the body up enough to slide the body mounts out. Do not jack the body way up or you risk damaging the mounts on the other side.
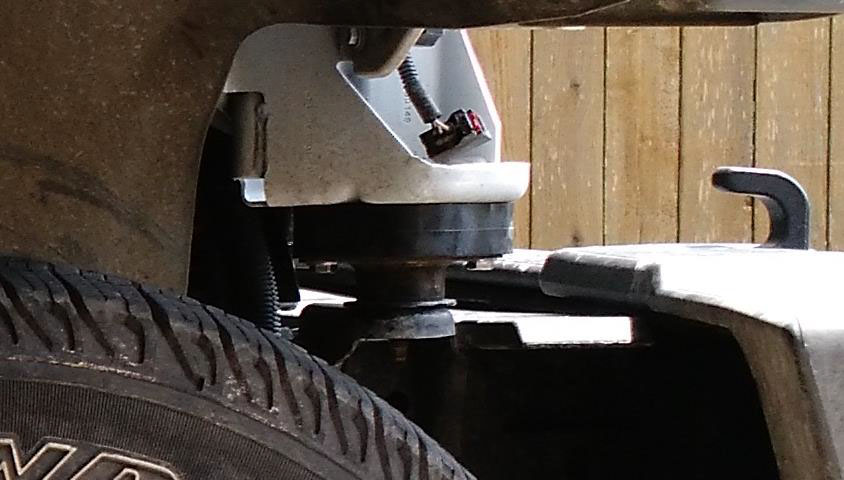
11. Use the hammer and the 3⁄4 wrench to hammer the studs out from the sides of each body mount. Place the closed end of the wrench on a flat surface with the stud head (opposite of the threads) through the closed end. Replace the nut on the stud and tighten until the thread is even with the nut on top. Strike the nut side of the stud, opposite of the wrench, a few good times (about 4) and the stud will break loose of the body mount. Repeat for all mounts.
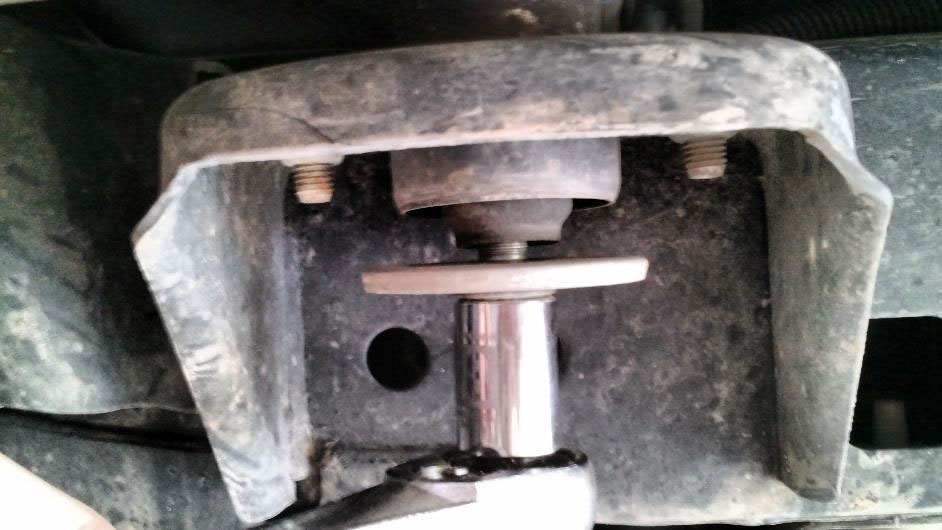
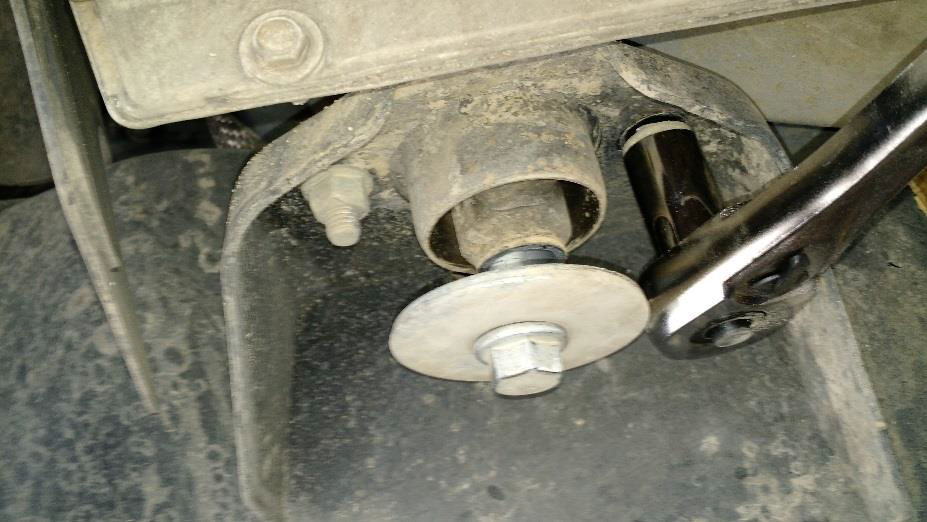
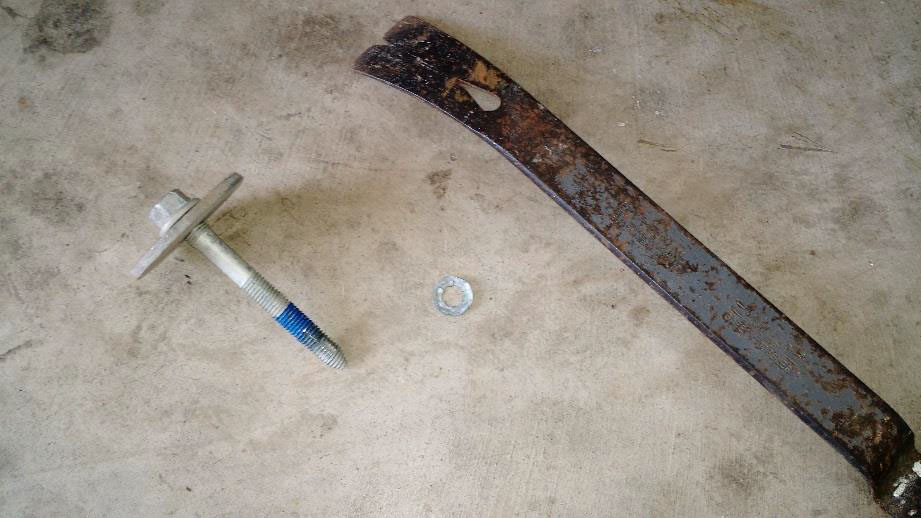
12. Replace the body mounts with the supplied blocks and the supplied 3/8”x2 1⁄4” bolt/washers and nuts. Use a 9/16 wrench on the top side and a 9/16 socket to tighten the new hardware to 40 ft/lbs.
13. The blocks will go on the frame side of the body mount except for the front two mounts. These front two will be opposite, on the body side.
14. Lower the jack enough to rest the body on the mounts. Hand thread the large center stud bolts on the driver side. Do not tighten them down as you need some slack to jack the passenger side up, and repeat the process..
15. Lower the jack, move to the passenger side and repeat the process of installing the body lift blocks.
16. Once you have all of the blocks installed on the passenger side you’re ready to lower the passenger side down onto the blocks and start tightening the large center stud bolts.
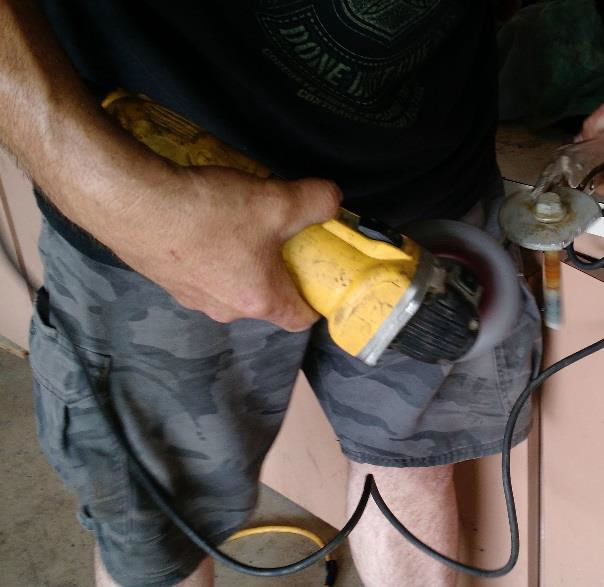
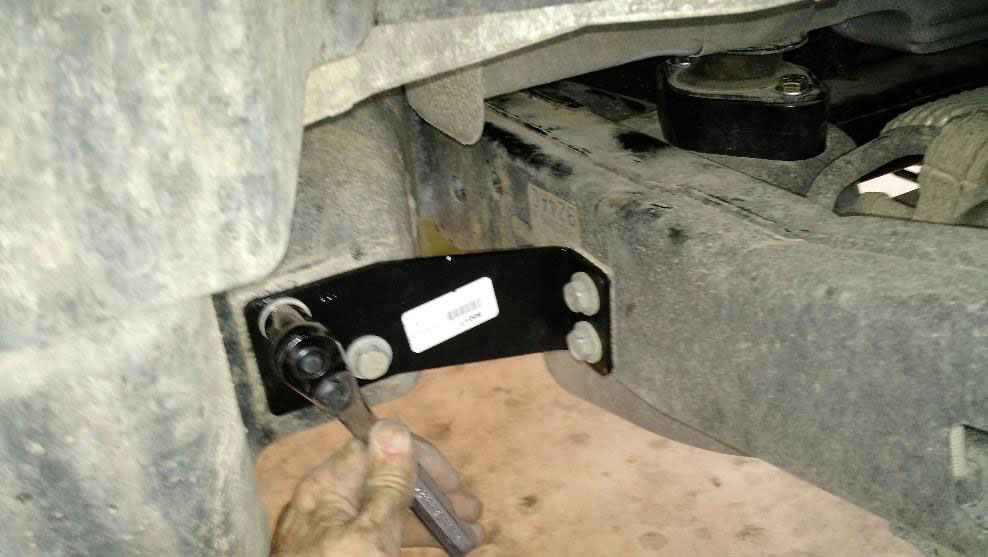
17. On the rear most body mounts you may need to grind the two sides of the large washer flat enough to clear the new hardware. Put the washers in a vice and grind the sides before reinstalling. Picture one shows the shaded area of the washer to be ground.

18. When tightening the rear most center stud bolts, line the ground down edges up so they don’t hit the new 3/8” bolts.
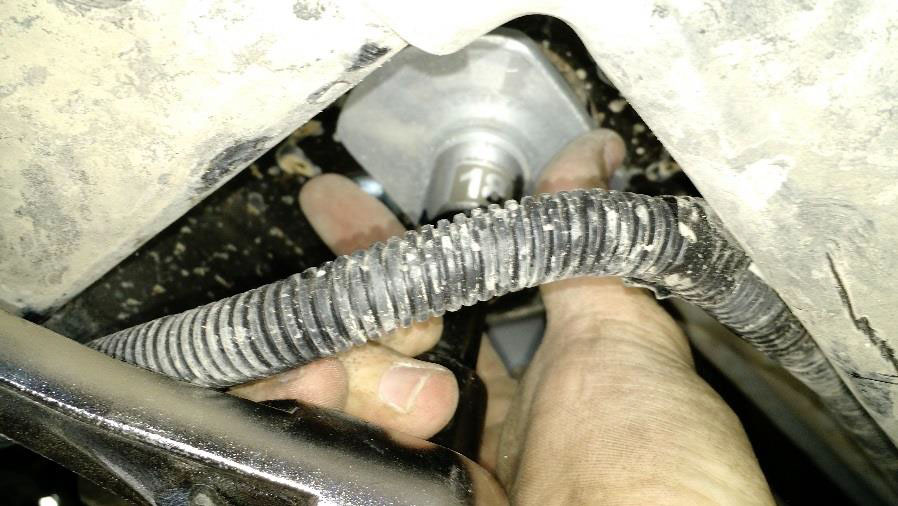
19. With all of the center stud bolts inserted and threaded by hand, lower the passenger side and remove the wood blocks. Tighten all the center stud bolts with an 18mm socket to 80 ft/lbs.
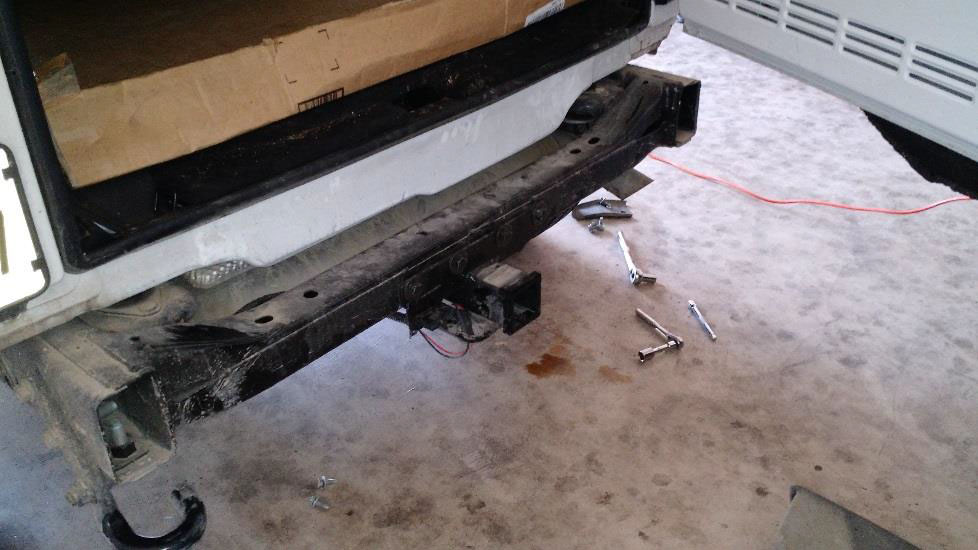
20. Reinstall the rear bumper using the supplied extension brackets and the original bolts. The center brackets top bolts are easier to hand tighten from the top, then tighten with a 16mm wrench from the bottom. Insert and tighten the each lower bolt for both center brackets using a 16mm wrench.

21. Use a 16mm socket to tighten the new side brackets using the original bolts.
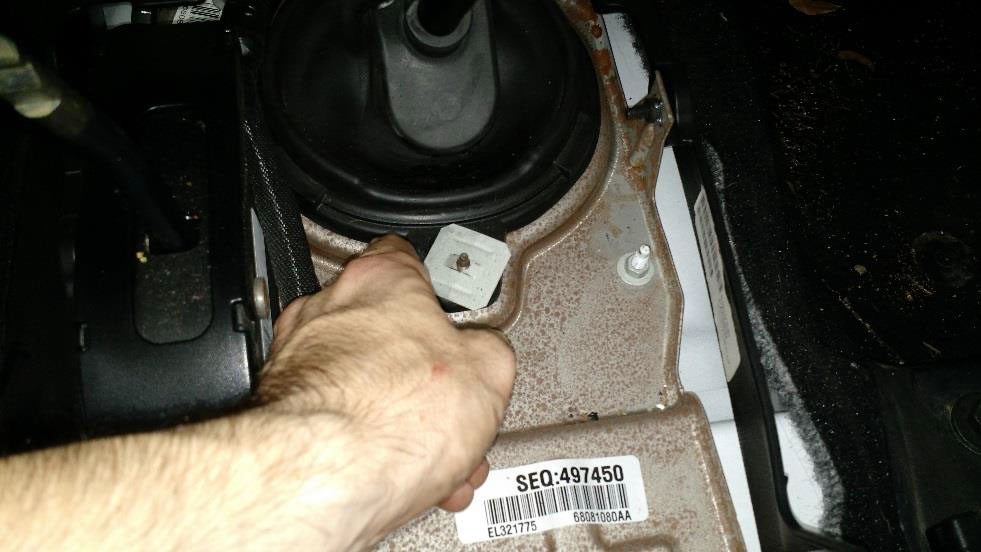
Installation Instructions for Manual Shifter Extension:
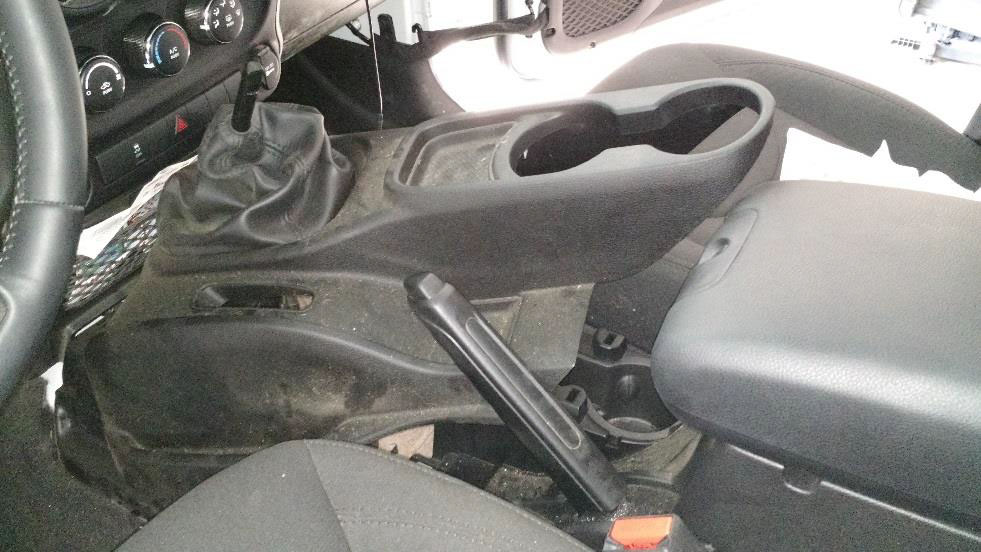
1. Remove the shift knob and 4wd shift knob. It just pulls off, no special tools or secrets required. The best way I can describe to do this is to sit on the center arm rest, put the shifter in the 4th gear position, place both hands on the knob like you are holding a rope in your hand, and pull the knob straight towards you like you are in a game of tug of war. Use the same technique for the 4wd shift knob.
2. With both knobs removed, remove the center shift boot bezel. On the new interior models like my 2014, you pull up on the very back of the cup holders. Pull up until the entire piece unclips.
3. Once that’s out of the way, unscrew the square clip holding the inner shift boot to the body.
4. Pull the boot up from the back and slide it off of the shaft.
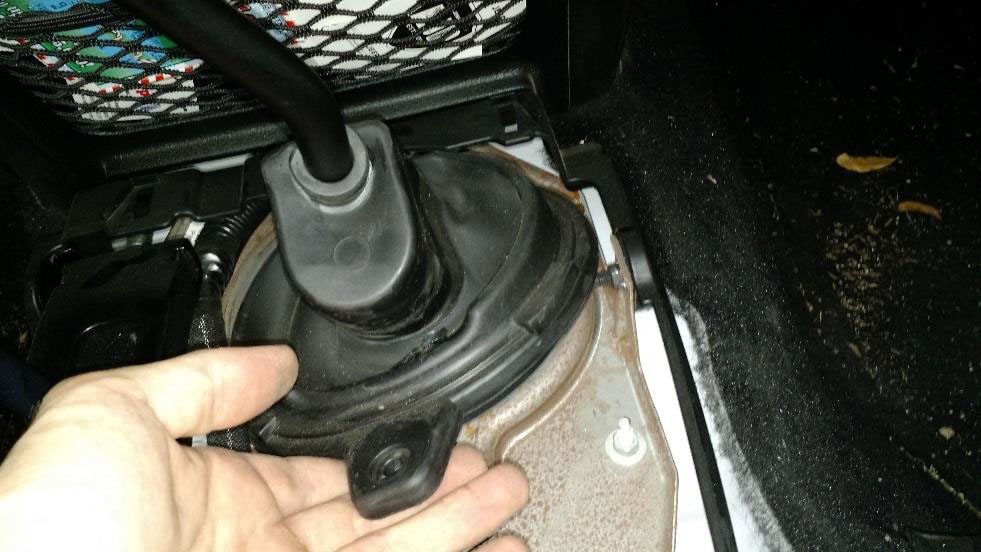
5. Remove the shifter with a T45 Torx wrench. Save the hardware for reinstallation on the extension.
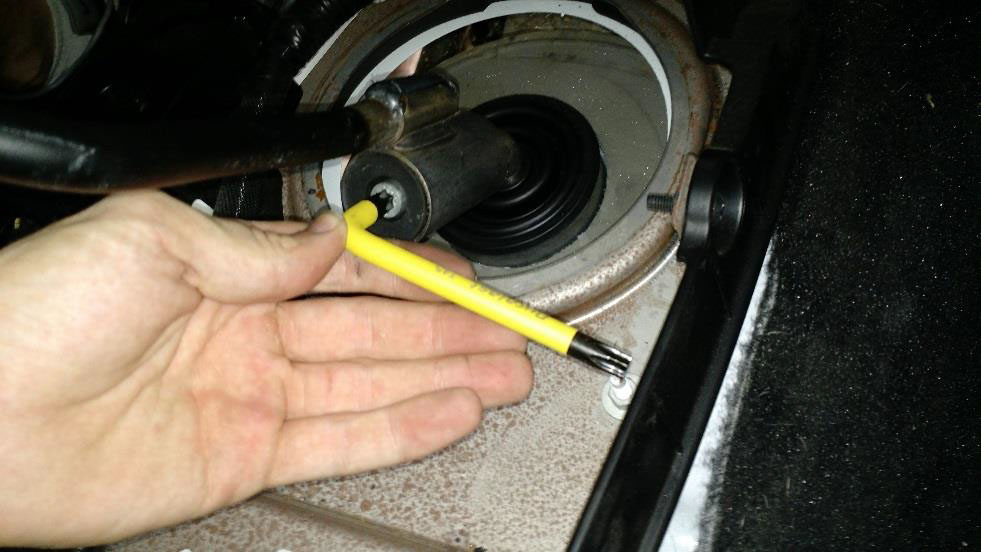
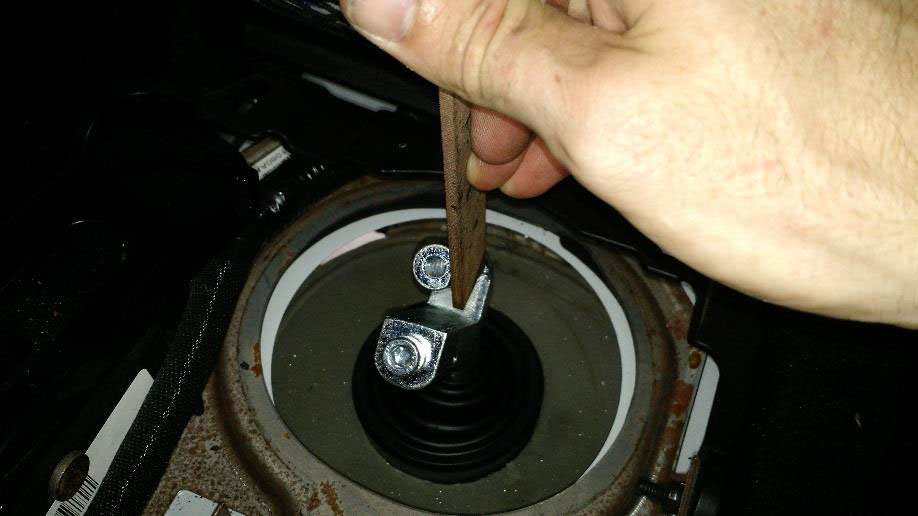
6. Install the extension onto the transmission stub. Try to slide it down all the way and remember lubrication is your friend.

7. Apply thread locking compound and tighten the 8mm Allen head bolt with a 6mm Allen head wrench. Tighten the set screw with the 1/8” Allen wrench.
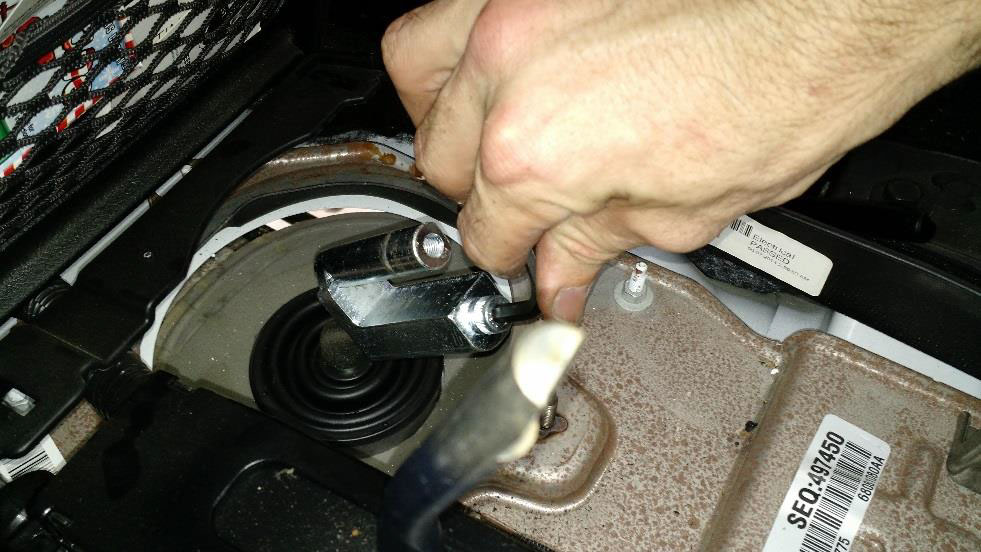
8. Install the shifter onto the extension using the T45 Torx wrench. Note: I needed to use a file (or use the grinder) on the flat side of the extension to get the shifter to fit down onto it.
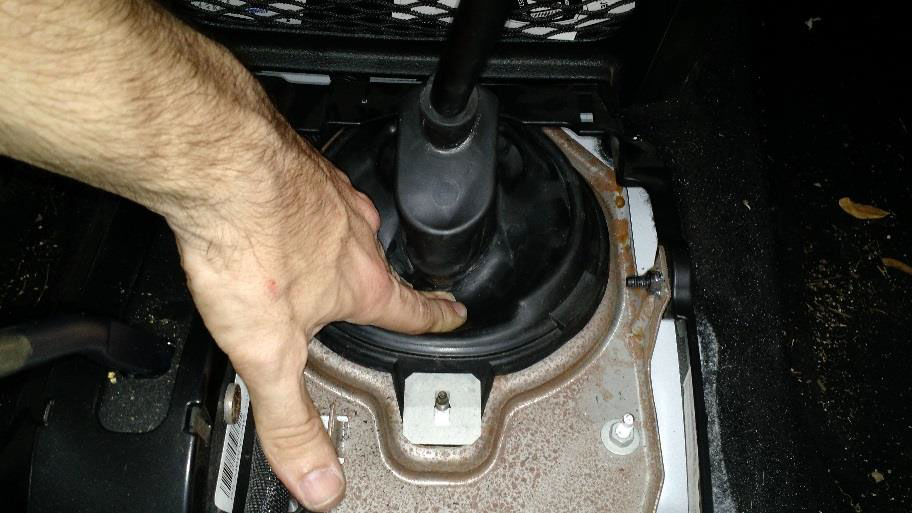
9. Reinstall the inner shift boot back down the shaft and on top of the extension. Push the folds of the boot down as far as possible. Reinstall square clip, outer boot/bezel, and shift knobs back in reverse order.
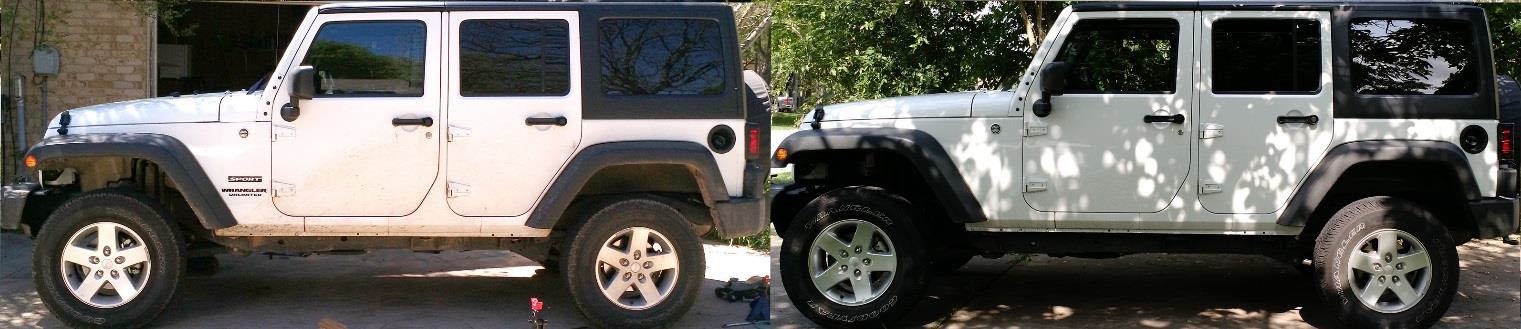
Before and After:
Final Notes:
- Check all bolts after 500 miles to make sure none have come loose.
- You have to shift very positively in 2nd gear and reverse. I have only had two instances of the shifter popping out of 2nd gear. I starting parking with the shifter in the 2nd gear position to mold the inner shift boot. This seems to have helped with the stiffness of shifting into 2nd gear.
- Looks like it might be time for some new wheels and tires from Extreme Terrain!
Installation Instructions Written by ExtremeTerrain Customer Erik Shrunk 5/8/2015
