

How to Install a Rough Country 1.75 in. Spacer Lift w/ Shocks on your 2007-2014 Wrangler JK
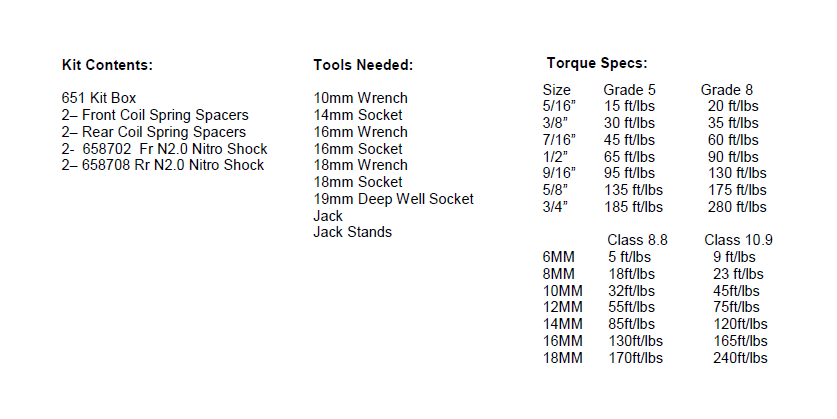
FRONT INSTALLATION INSTRUCTIONS
1. Jack up the front of the vehicle and support the vehicle with jack stands, so that the front wheels are off the ground. Chock rear wheels.
2. Remove the front tires/wheels, using a 19mm deep well socket
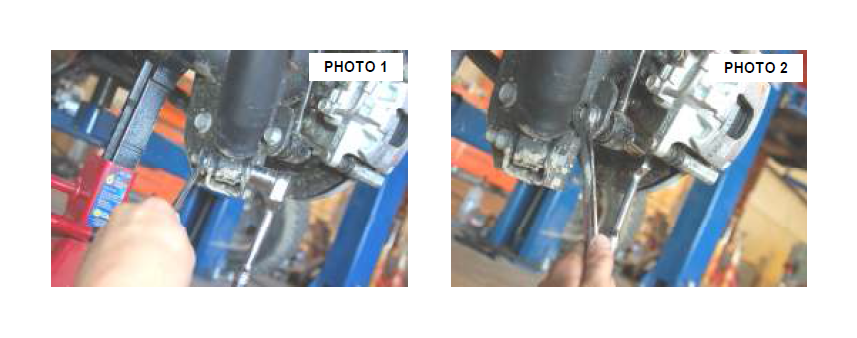
3. Using a 18mm socket and wrench remove the bottom sway bar bolts. Retain hardware for later use. See PHOTO 1
4. Remove the lower shock bolt using a 18mm socket and wrench. Using a 14mm wrench unbolt the top of the shock and remove. See PHOTO 2.
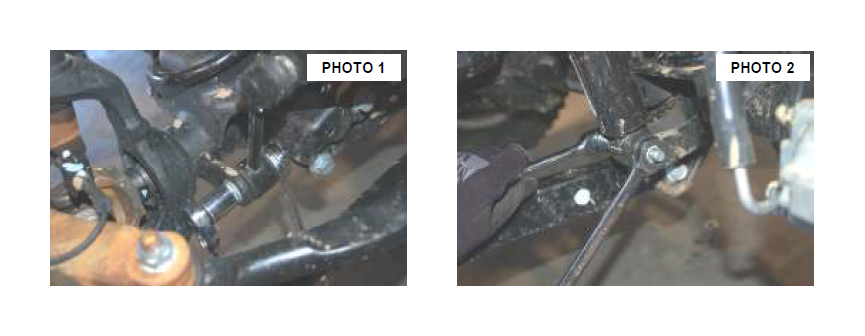
5. Push down on the axle to allow room for the coils to be removed. Remove coil springs, and factory spring isolator.
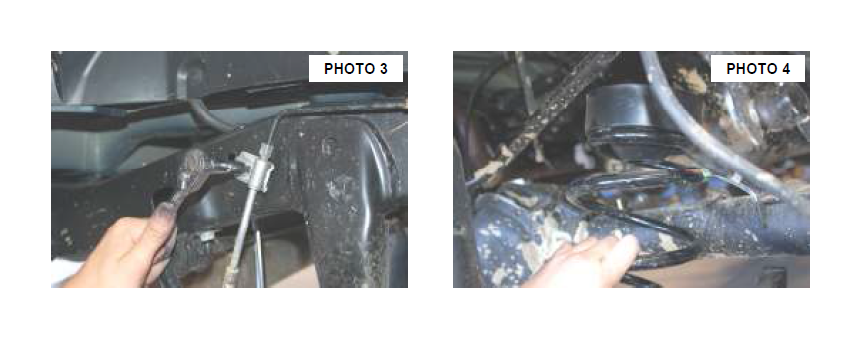
6. Install the spacer over the factory bump stop with the lip of the spacer pointing down. See PHOTO 3.
7. Reinstall the factory coil spring, and the factory spring isolator. Be sure to rotate the spring until the pigtail hits the stop. See PHOTO 4.
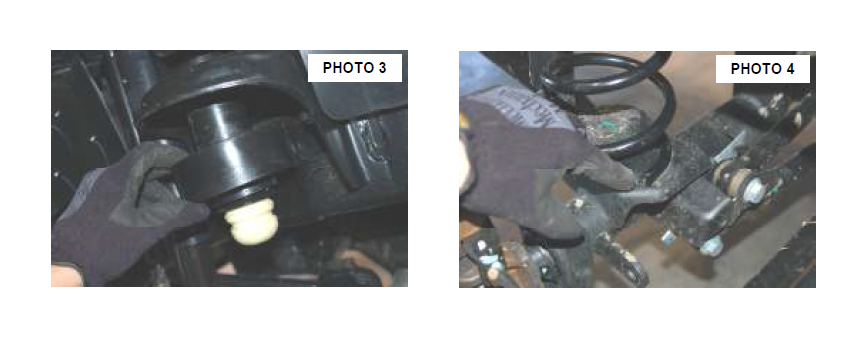
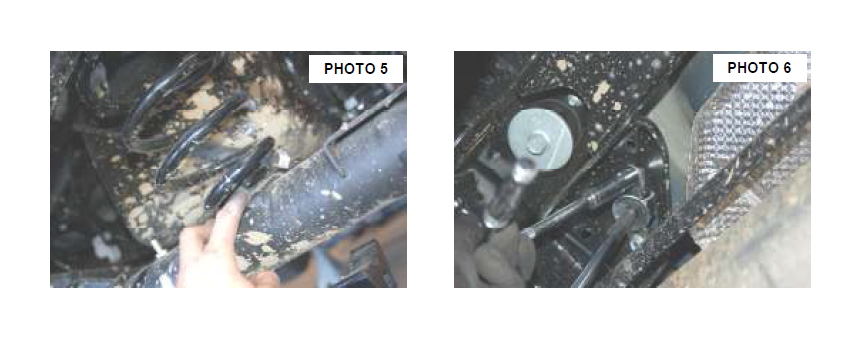
8. Install the front shocks at this time. When tightening the upper shock mount, using a 14mm wrench tighten until the bushing starts to bulge. Use the factory bolt in the lower shock mount using a 18mm socket and wrench. See PHOTO 5.
9. Reinstall the bottom sway bar bolt, using a 18mm socket and wrench.
10. Reinstall the front tires/wheels .
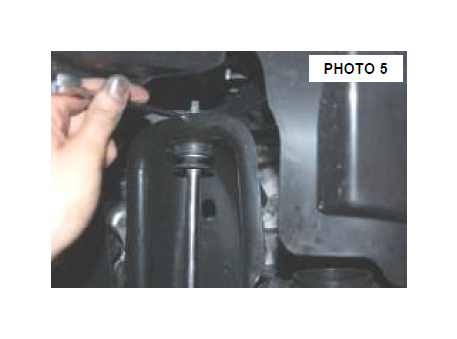
REAR INSTALLATION INSTRUCTIONS
1. Jack up the rear of the vehicle and support the vehicle with jack stands, so that the rear wheels are off the ground. Chock front wheels and remove the rear tires/wheels, using a 19mm deep well socket.
2. Remove the upper shock bolt using a 16mm socket and wrench. Remove the lower shock bolt using a 18mm socket and wrench and remove the factory shock. See PHOTO 1.
3. Using a 18mm socket and wrench remove the bottom sway bar bolts. Retain hardware for later use. See PHOTO 2.
4. Using a 10mm wrench remove the bolt holding the brake line to the frame. This is done to allow the rear axle to be lowered enough to remove the coil springs. See PHOTO 3.
5. Push down on the axle to allow the stock coil to be removed. Remove the stock coil spring and isolator.
6. Install the new coil spring spacer on top of the stock coil with the lip of the spacer pointing down. The factory coil spring isolator will be re-used. See PHOTO 4.
7. Install the top of the coil back into the coil seat. When installing the bottom of the coil into the seat rotate the coil until the pigtail hits the spring stop. See PHOTO 5.
8. Reinstall the sway bar link using a 18mm socket and wrench using the stock hardware.
9. Install the new rear shock using a 18mm socket and wrench on the bottom and a 16mm socket for the top, using the stock hardware. See PHOTO 6.
10. Reinstall the rear tires/wheels and Lower the vehicle to the ground
11. Reinstall the brake line bracket to the stock location with the stock bolt using a 10mm wrench
POST INSTALLATION INSTRUCTIONS
1. Check all fasteners for proper torque. Check to ensure there is adequate clearance between all rotating, mobile, fixed and heated members. Check steering for interference and proper working order. Test brake system.
2. Perform steering sweep. The distance between the tire sidewall and the brake hose must be checked closely. Cycle the steering from full turn to full turn to check for clearance. Failure to perform inspections may result in component failure.
3. Re torque all fasteners after 500 miles. Visually inspect components and re torque fasteners during routine vehicle service.
4. Readjust headlights to proper settings.
Maintenance Information
It is the ultimate buyers responsibility to have all bolts/nuts checked for tightness after the first 500 miles and then every 1000 miles. Wheel alignment steering system, suspension and driveline systems must be inspected by a qualified professional mechanic at least every 3000 miles

