FREE 1 to 3-Day Delivery on Orders $149+ Details

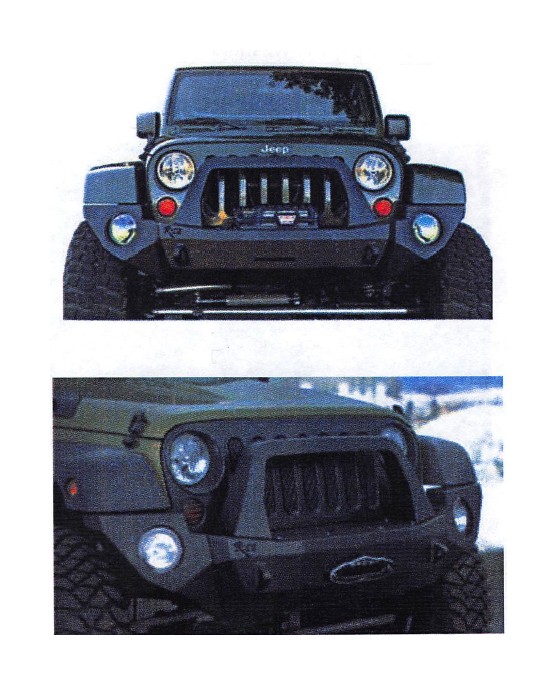
How to Install Rock-Slide Engineering Rigid Series Full Front Steel Bumper w/ Bull Bar on your 07-18 Jeep Wrangler JK; 2018 Jeep Wrangler JL
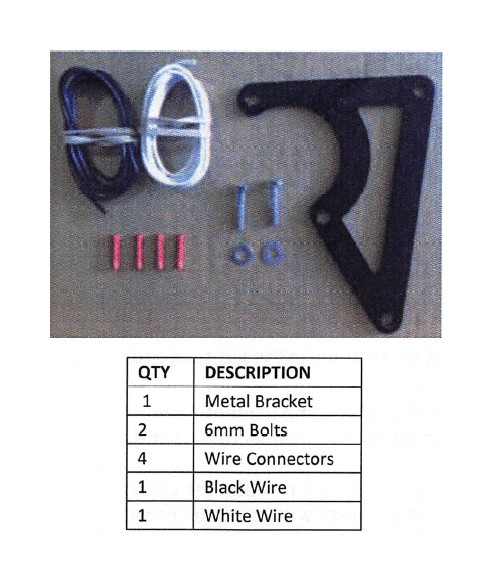
PARTS LIST
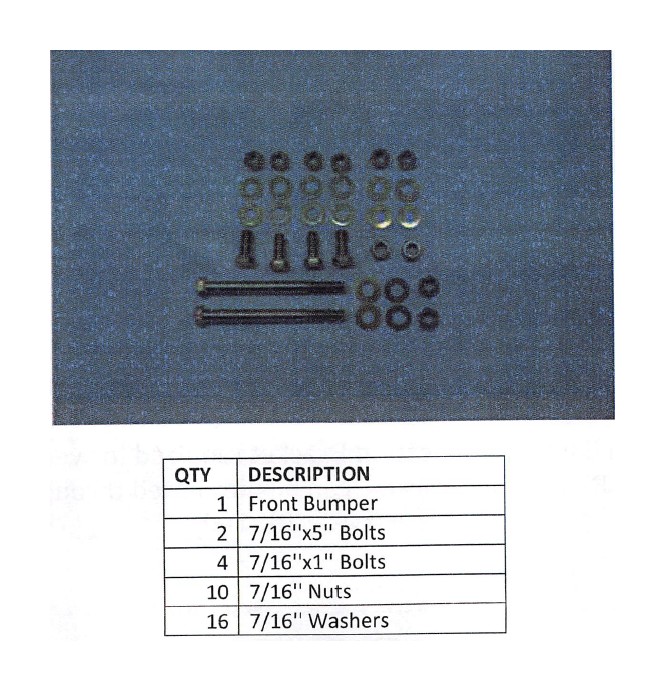
*If any parts listed are missing or damaged please call Rock-Slide Engineering @ 435-752-4580 prior to installation
**WARNING: MUST READ**
DO NOT REMOVE FRONT BUMPER UNTIL YOU HAVE DISCONNECTED THE LIGHT WIRE HARNESS AND LIGHTS. FAILURE TO DO SO CAN RUIN YOUR TRACTION CONTROL SYSTEM.
1. After you have disconnected the light wire harness and lights, remove the stock plastic bumper and skid plate.
Installing with winch
1. Mount the winch on the bumper before mounting the bumper onto the Jeep.
a. Use the hardware provided with the winch to secure it to the bumper
b. It is possible to install the winch after the bumper is installed. Some
of the largest winches (ex. Warn Powerplant) will need to be installed
after bumper is installed
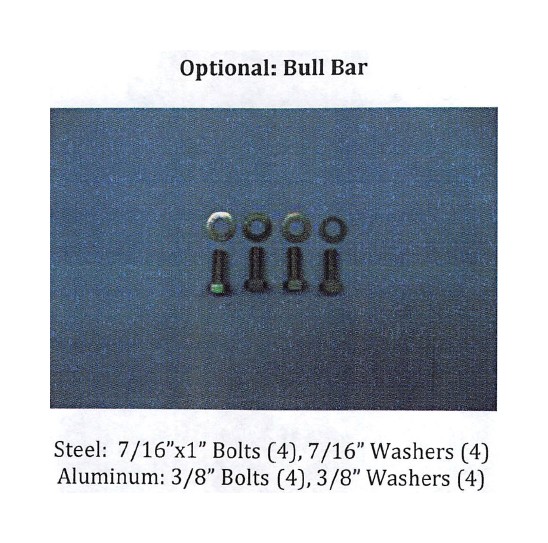
2. If optional Bull Bar is included, mount Bull Bar to bumper prior to installing.
a. Mount the R-SE Rigid Series Bull Bar using the following:
Steel: 4 7/16"x1" bolts, 4 7/16" washers
Aluminum: 4 3/8" x 1" Bolts, 4 3/8" washers
3. Secure the R-SE Rigid Series bumper using the following.
a. Use the factory studs on frame rail with included nuts and washers
b. 4 7/16"x1" bolts, 7/16" nuts, 16 7/16" washers
c. You will be using 2 washers per bolt and nut
4. Secure the winch plate by placing the following through the frame into the
winch plate.
Failure to secure the winch plate to the frame with the bolts provided will
cause winch plate to twist and cause your winch to malfunction.
a. 2 5"x7/16" bolts, 2 7/16" nuts, 4 7/16" washer
LIGHTS
For wiring you can use the stock light harness and use the stock light switch or you can follow the directions that came with the lights to hook up to the battery directly and use the switch they provide. To mount the light, bolt the mounting stud into to slot at the top of the light hole pocket. Adjust the angle of the light and then tighten the bolt securely. If the light has a grill, position the grill between the light and the inside of bumper. It may need to be turned to be right side up.
Rock-Slide preferred light for ease of installation and fit: KC Highlites Apollo Pro Series part #152
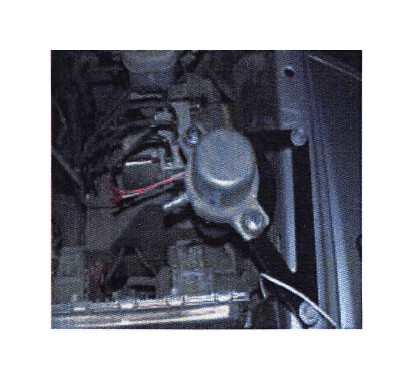
2010-2014 JEEP JK VACUUM PUMP RELOCATION BRACKETAC-CRL-100
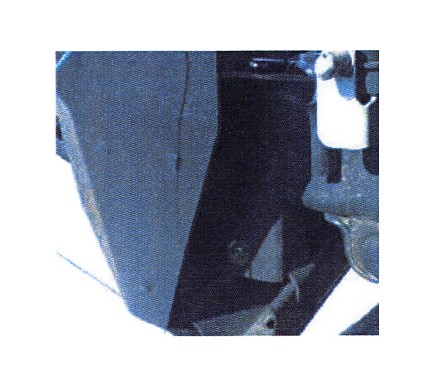
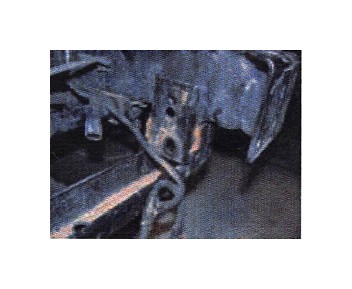
Remove Factory Bracket
1. Remove the pump and bracket from inside of the frame rail.
2. Disconnect vacuum pump hoses and vacuum pump wire from the vacuum pump.
3. Using a 10mm wrench remove vacuum pump from factory bracket.
4. Use a cut off wheel to remove vacuum pump bracket from the inside of the frame rail.
Make sure to remove the entire bracket so that the frame is the only thing left. The
measurement from frame rail to frame rail should be approximately 26 5/8".
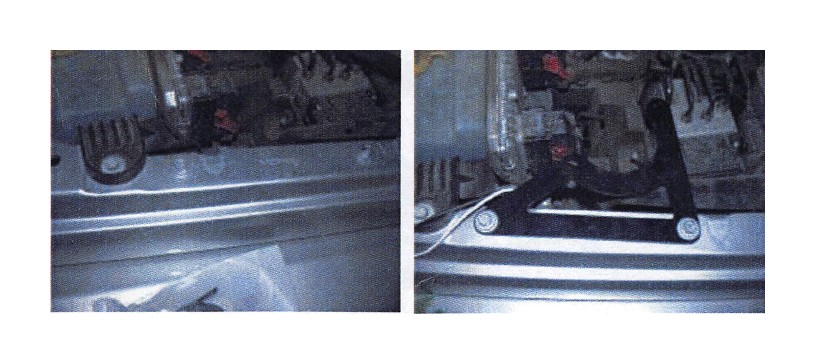
Installing the Relocation Bracket
1. Use a 10mm wrench to remove both of the bolts
2. Use the two factory bolts to mount the bracket to the vehicle near the front of the hood on the driver's side of the vehicle.
Installation of Vacuum Pump
1. Cut and extend the vacuum pump wiring harness.
2. With wire cutters, remove the section of the wire loom leaving 2" of wire after the connector.
3. Using the 4 connectors and wire in the kit, strip and connect the wires using a crimping tool.
4. Feed the wires up the engine compartment to where the bracket is located.
5. Feed and reconnect the vacuum connector clip and one-way valve onto the vacuum canister
6. Connect the electrical wiring and position the canister into the bracket
7. Bolt the canister to the bracket with the bolts provided. Position the wiring to not interfere with any other functions.
8. Use Zip ties to secure the wiring and vacuum hoses so they are not in the way of other components under the hood and so they will not come loose.