 FREE 1 to 3-Day Delivery on Orders $149+ Details

How to Install Rock Krawler Bomb Proof Adjustable Front Track Bar 2-4 in. Lift (07-18 Wrangler JK) on your Jeep Wrangler
Installation Time
2 hours
Tools Required
- Sockets: 7mm, 15mm, 19mm, 21mm (x2), 19mm, Socket Extension
- Socket Wrench
- Breaker Bar
- Torque Wrench
- 1 5/6" Crowfoot Wrench
- Large Adjustable Wrench
- Anti-seize
- Loctite
- Tape Measure
- Large Screwdriver
- Grease Gun (with 000 grease)
Note: You will need a friend to help tighten the jam nuts.
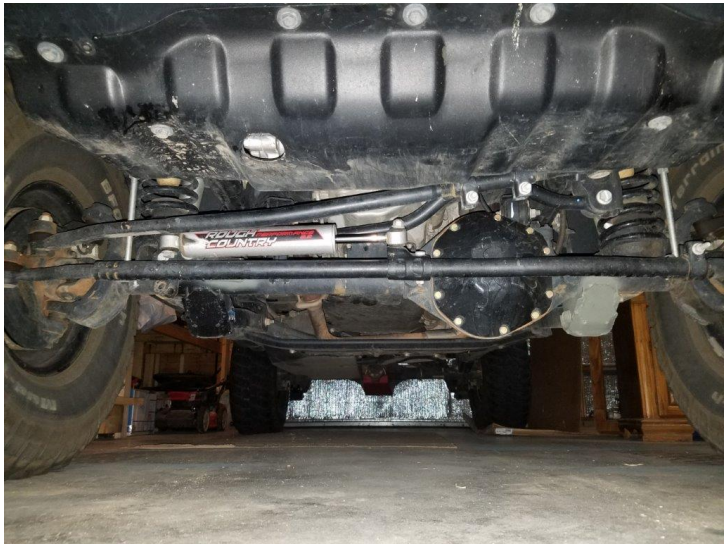
Before Picture
Installation Instructions
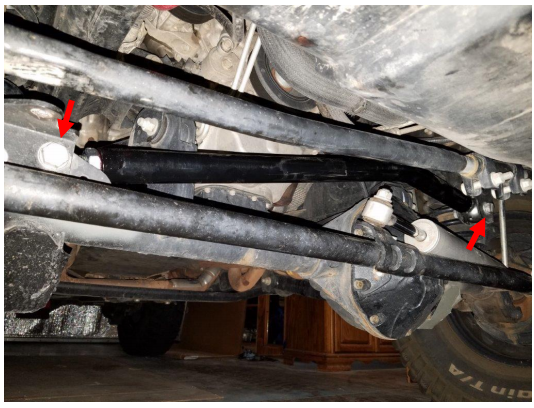
1. Start by parking on level ground with the steering wheel strait. Using 2x 21mm sockets and a breaker bar, remove the bolt attaching the trackbar to the frame.
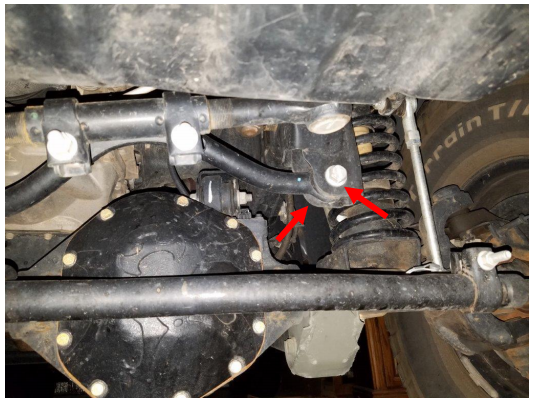
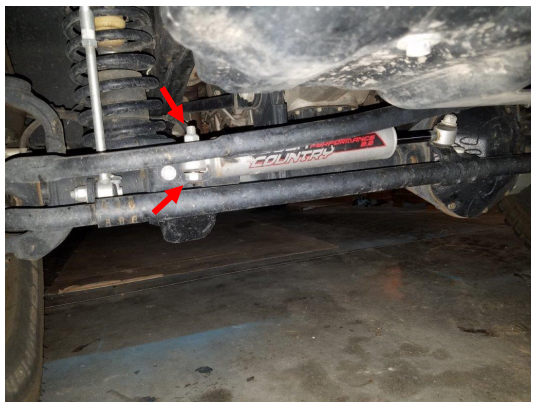
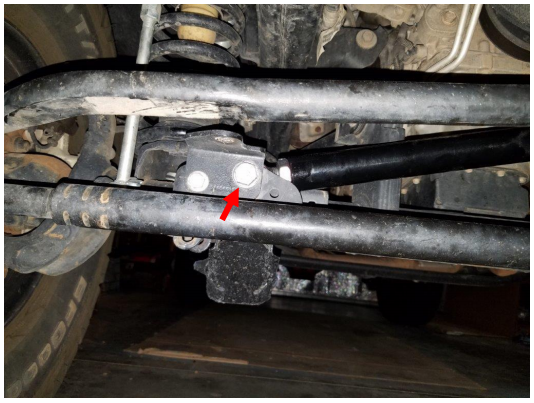
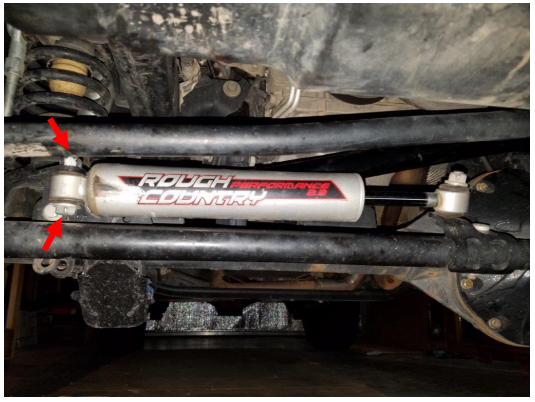
2. If you have a relocated steering stabilizer, you may need to move it before you can unbolt the other end of the trackbar. Use the socket sizes depending on your steering stabilizer. For mine I used 21mm and 19mm sockets to remove the bolt shown. Then you can rotate it out of the way.
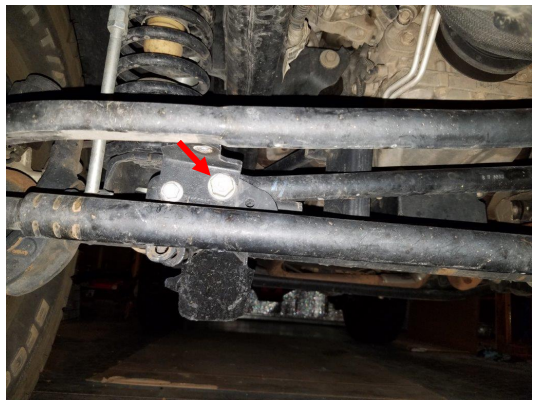
3. Now use a 21mm socket and socket extension to remove the axle side track bar bolt. Then remove your stock track bar.
4. Unscrew both ends and apply some anti-seize to the lower end of the threads. This will make it easier to adjust years down the road.
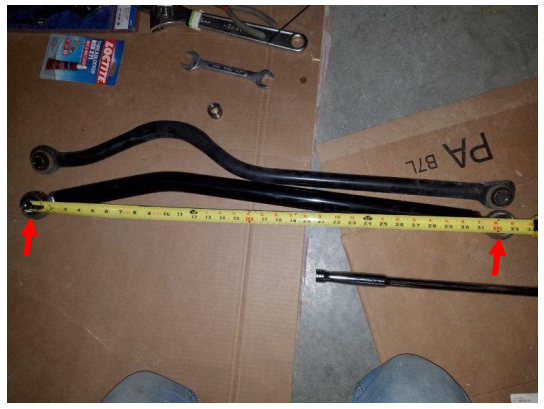
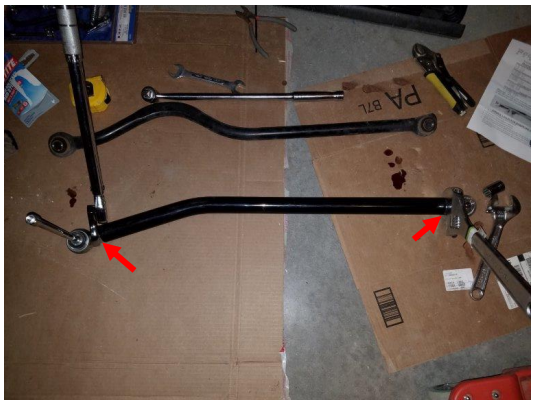
5. Next, adjust your new track bar to the desired length. This will depend on your lift height. Recommended starting lengths: 1.5” lift - 32 ½”, 2.5” lift - 32 9/16”, 3.5” lift – 32 5/8”. Depending on your lift height, choose your desired length and adjust the ends of your new trackbar. The measurement is taken from the center of each mounting hole. Then hand tighten the jam nuts to keep the ends from moving too much.
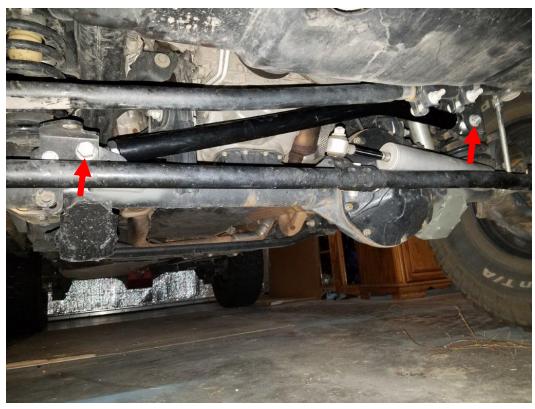
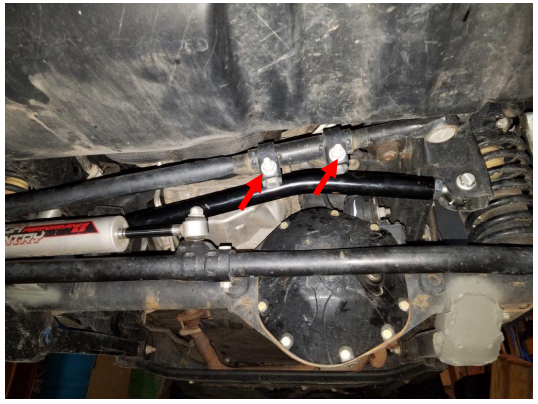
6. Now insert your track bar as shown. The bend should be above the front differential. Insert the bolts in each side but do not tighten.
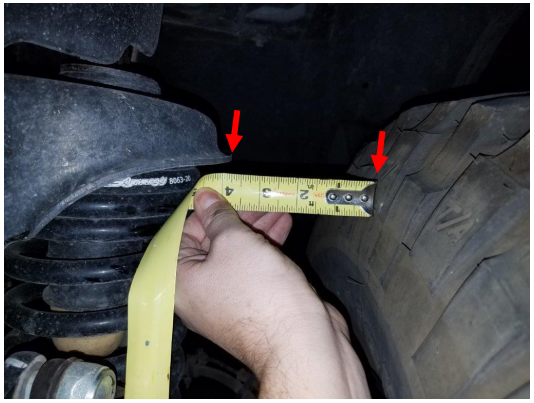
7. Now you need to determine if your trackbar is the correct length, and has centered your axel. Measure the distance from the inside of your front tire to the edge of the spring bucket. Measure at the same point on both front tires and compare. If needed adjust the track bar length so that these measurements match.
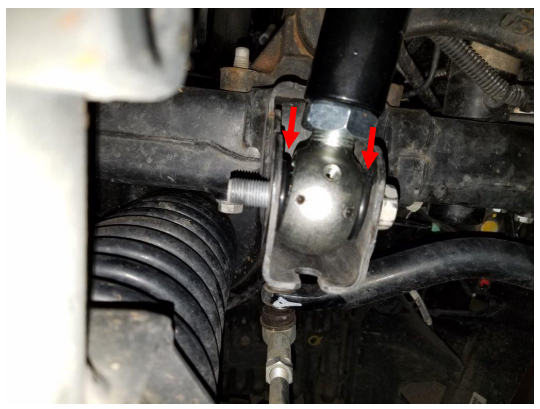
8. Then rotate your trackbar until both joints are aligned. Shown below you can see the joint is at an angle. This is NOT correct.
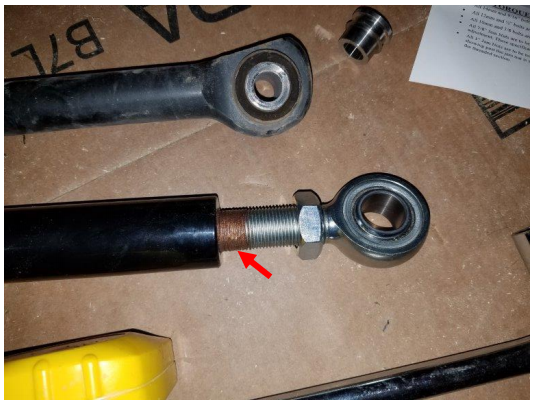
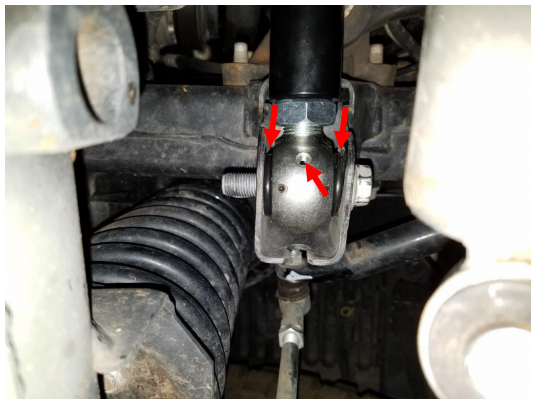
9. You want the joint to be aligned as shown below. You also want the grease fitting to be pointed down as shown. Hand tighten both jam nuts to keep the ends in place. Then remove the track bar to tighten the jam nuts.
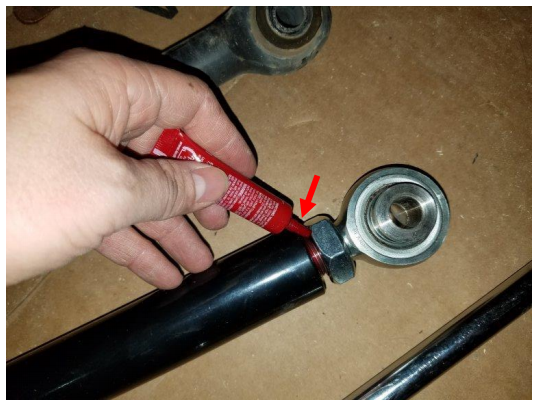
10. Loosen both jam nuts and apply Loctite to the threads.
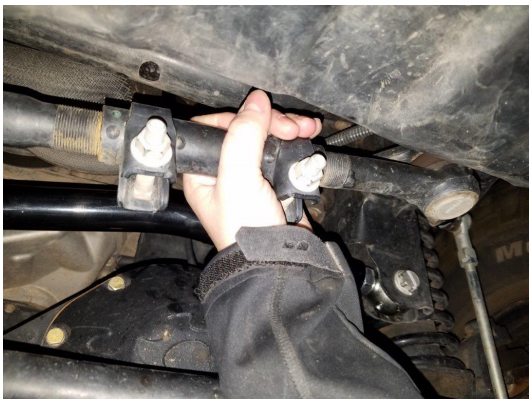
11. For this step you will need help from a friend. You will need a large adjustable wrench, 1 5/16” crowfoot wrench, torque wrench, and something to hold the joint in place (I used a 3/8” drive socket extension, but a large screwdriver would work too). Have a friend hold one end of the track bar while you hold the joint in place and tighten the jam nut. Torque them to 250 ft/lbs. The difficult part is getting it tight and keeping the joint from turning, but you need the joints to stay aligned.
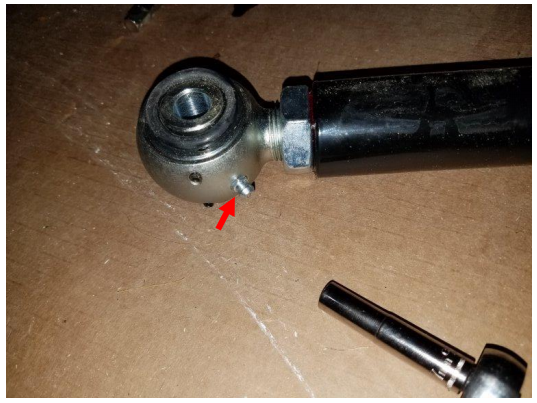
12. Using a 7mm socket, screw in the grease fitting. Be careful not to overtighten. The joint is supposed to come pre-greased, but I recommend putting some in it just to be sure. Use a grease gun with 000 grade grease.
13. Reinstall the track bar and insert both stock bolts.
14. Using a 21mm socket and the stock hardware, torque the lower trackbar bolt to 125ft/lbs.
15. Using 2x 21mm sockets, torque the upper trackbar bolt to 125ft/lbs.
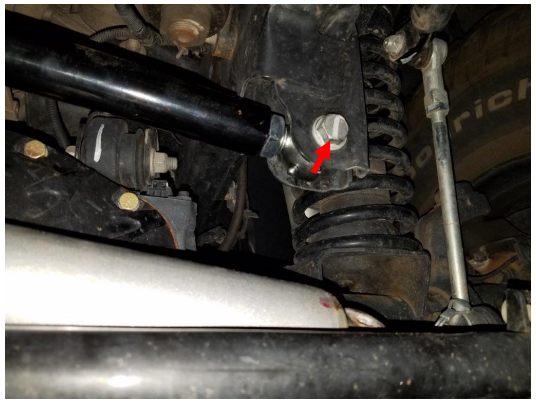
16. Reinstall the steering stabilizer if you removed it. Torque the bolt to 50ft/lbs.
17. Last you will probably need to re-center your steering wheel. Using a 15mm socket, loosen both bolts on the drag link clamp.
18. Adjust your steering wheel by rotating this clamp. Rotate it up to move the wheel left, and down to move the wheel right. Adjust the clamp until your steering wheel and front tires are both centered. Using a 15mm wrench torque both clamp bolts to 26ft/lbs.
19. After driving a few hundred miles check that all the bolts including the jam nuts are still tight.
After Picture

Installation Instructions Written by ExtremeTerrain Customer John Parker 12/03/2017

