 FREE 1 to 3-Day Delivery on Orders $149+ Details

How to Install Rightline Gear 4x4 Duffle Bag - 120 Liter Capacity on your Jeep Wrangler

Shop Parts in this Guide
The correct attachment of this product is critical and beyond the control of Rightline Gear. The safe use and long life of this product depends entirely on your good judgment and following these directions.
Pack The 4x4 Duffle Bag
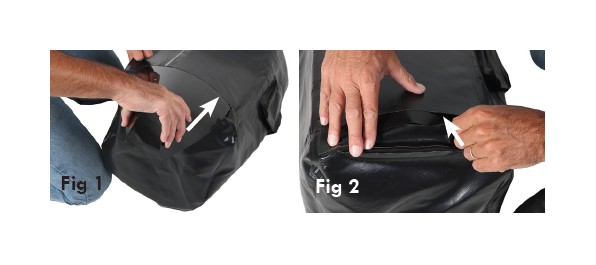
1-Slide the hard plastic insert into the bottom of the bag after turning the bag inside out (Fig 1). Make sure to bend the insert to allow it to slide in more easily (Fig 1).
2-Fold the lip over the end of the insert (Fig 2) and turn the bag right side out.
3-Pack the Duffle Bag full, placing items with sharp or pointed edges in the middle and softer items around them.
4-Close the zipper and secure the hook-&-loop-close zipper cover.
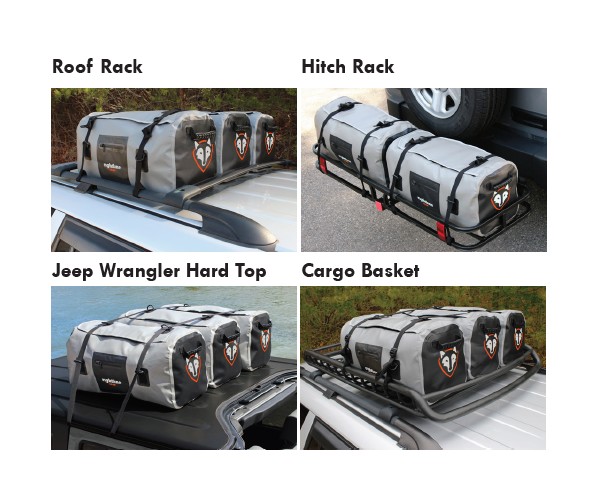
Select The Location For The 4x4 Duffle Bag(s)
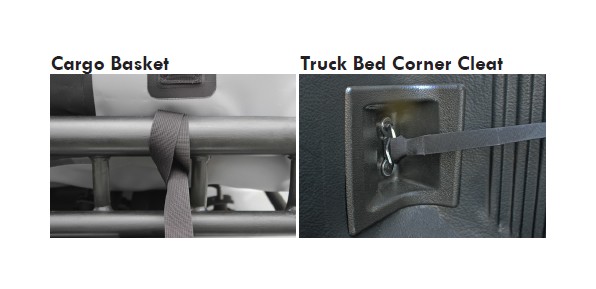
(2) Attachment straps secure the 4x4 Duffle Bag(s) to a roof rack, a hitch rack, a Jeep Wrangler’s hard top, a cargo basket, or a truck bed. The Duffle Bag(s) can also be stowed in a vehicle’s rear cargo area.

Attach The 4x4 Duffle Bag(s)
WARNING: DO NOT TIE THE ATTACHMENT STRAPS TO THE D-RINGS; DAMAGE TO THE BAG MAY RESULT. THE D-RINGS FUNCTION AS GUIDES FOR THE STRAPS TO PASS THROUGH.
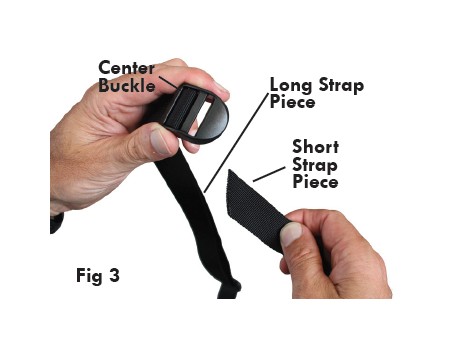
1-Unthread the short strap piece from the center buckle on the first attachment strap (Fig 3).
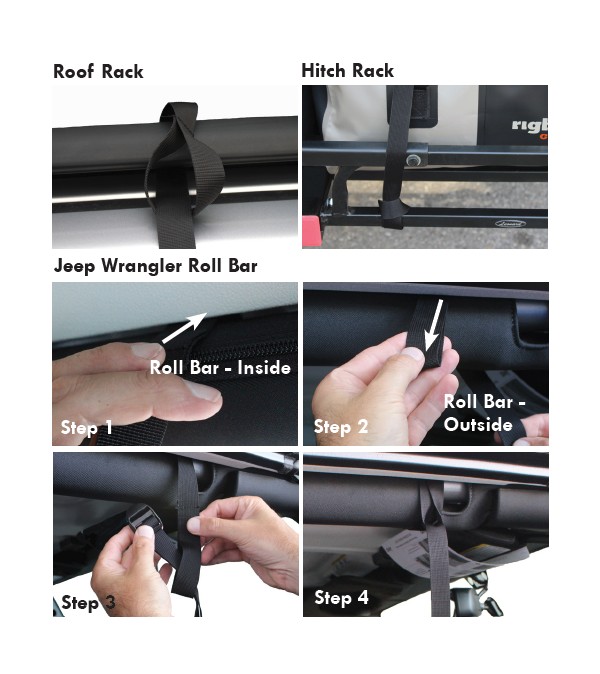
2-Wrap the short strap piece around its Attachment Point, thread its end through its loop, and pull tight. Secure the long strap piece to the opposite side attachment point by the same method.
Attachment Points
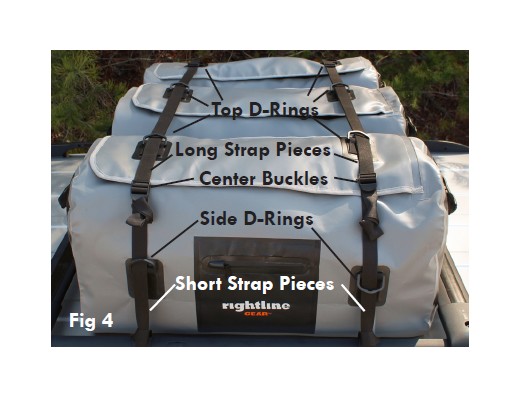
3-Run both strap pieces up through the side D-rings of the outermost Duffle Bag(s). Run the long strap piece through the top D-rings of the Duffle Bag(s) (Fig 4). Make sure the strap pieces are not twisted.
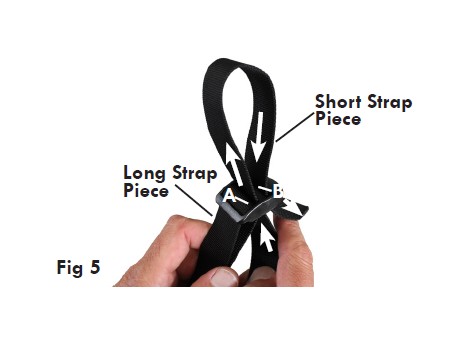
4-Thread the short strap piece up through slot A and down through slot B of the center buckle and tighten (Fig 5).
5-Repeat steps 1-4 for the second attachment strap.
Final Strap Adjustments
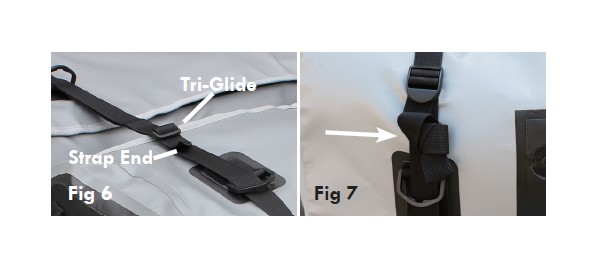
1- Secure the excess length of each long strap piece by moving the tri-glide to the strap’s end (Fig 6).
2-Tie off the excess length of each short strap piece (Fig 7).
3-If either strap piece is too long, cut off the excess length and melt the cut end to prevent fraying.
3-Re-tighten the straps after a few miles and check them regularly throughout the trip.
NOTE: IF A STRAP MAKES A NOISE WHILE DRIVING, LOOSEN THE STRAP, RE-POSITION IT SLIGHTLY, AND RE-TIGHTEN IT.

