FREE 1 to 3-Day Delivery on Orders $149+ Details

How to Install Rhino-Rack Heavy Duty RLT500 Trackmount 2 Bar Roof Rack - Black (07-17 Wrangler JK 2 Door) on your Jeep Wrangler
Installation Time
2 hours
Tools Required
- Masking tape
- Tape measure
- Marking pen
- Power or battery drill
- 6.5mm drill bit
- T40 Torx key
- C840 (optional - sold separately)
WARNING!
Hardtop must be removed from vehicle to fit the track system
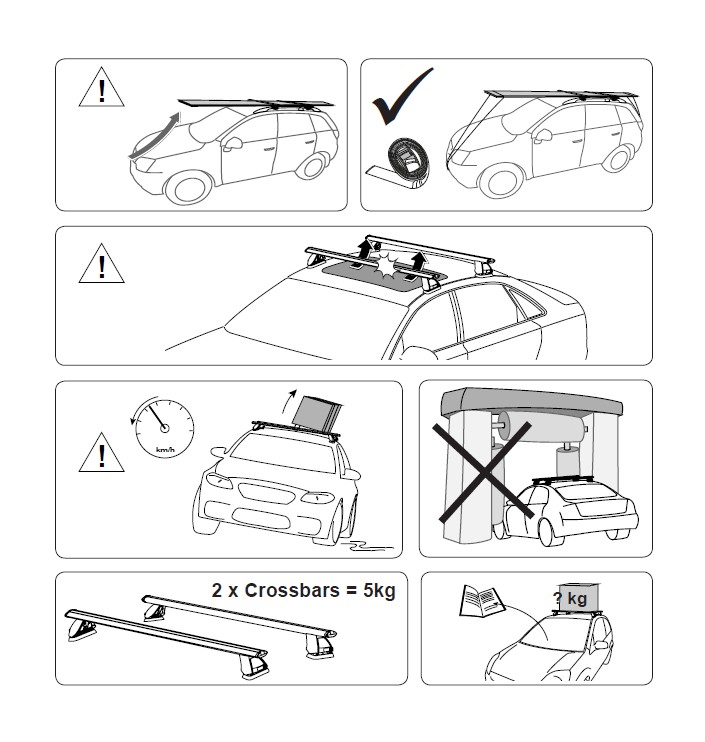
Maximum carrying capacity: 45kg (99Ibs) including weight of the roof racks 5kg (11Ibs). Load must be evenly distributed over the crossbars.
Use only non-stretch fastening ropes or straps.
Recommendations:
All bolt connections must be checked after driving a short distance when you first install your roof racks. Bolt connections should be checked again at regular intervals (once a week is enough, depending on road conditions, usage, loads and distances travelled). You should also check the condition of your roof racks each time they are re-fitted. Always make sure to fasten your load securely. Please also ensure that all loads are evenly distributed and that the centre of gravity is kept as low as possible. Long loads (e.g. canoes and kayaks) must be secured front and rear with non-stretch fastening ropes or straps.
Roof racks must be removed when putting vehicle through an automatic car wash.
Caution: The handling characteristics of the vehicle changes when you transport a load on the roof. For safety reasons we recommend you exercise extreme care when transporting wind-resistant loads. Special consideration must be taken into account when cornering and braking.
Off-road use: Maximum permissible load is 45kg (991bs) on 2 crossbars including weight of the roof racks, 5kg (11Ibs). When roof racks are to be used in off-road conditions, please build a safety factor of 1.5 into this load limit. 30kg (661bs) for off-road use. Although the roof racks are tested and approved to AS1235-2000, off-road conditions can be much more rigorous. However, increasing the number of crossbars does not increase the vehicles maximum permissible roof loading.
Note for Dealers and Fitters:
It is your responsibility to ensure these fitting instructions are given to the end user or client.
Place these instructions in the vehicle's glove box after installation is complete.
Remove hardtop.
Refer to vehicle manufacturer's manual for removing the hardtop.
Masking tape.
Apply masking tape to curved outer surface of hardtop.

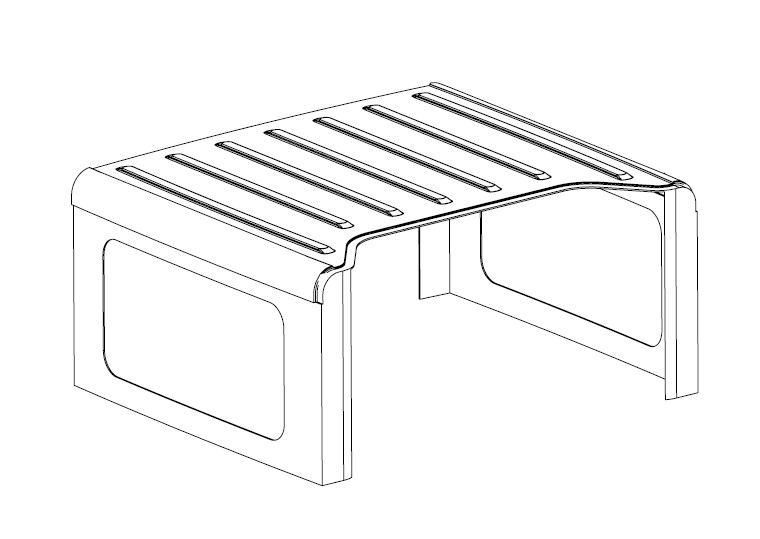
2dr hardtop
Track positioning.
Edge of track can be used to mark a straight line.
a. Measure 24mm from tangent of hardtop radius front and rear. Mark drilling centerline.
b. Front of track. Measure 160mm from front where the rubber seal meets.
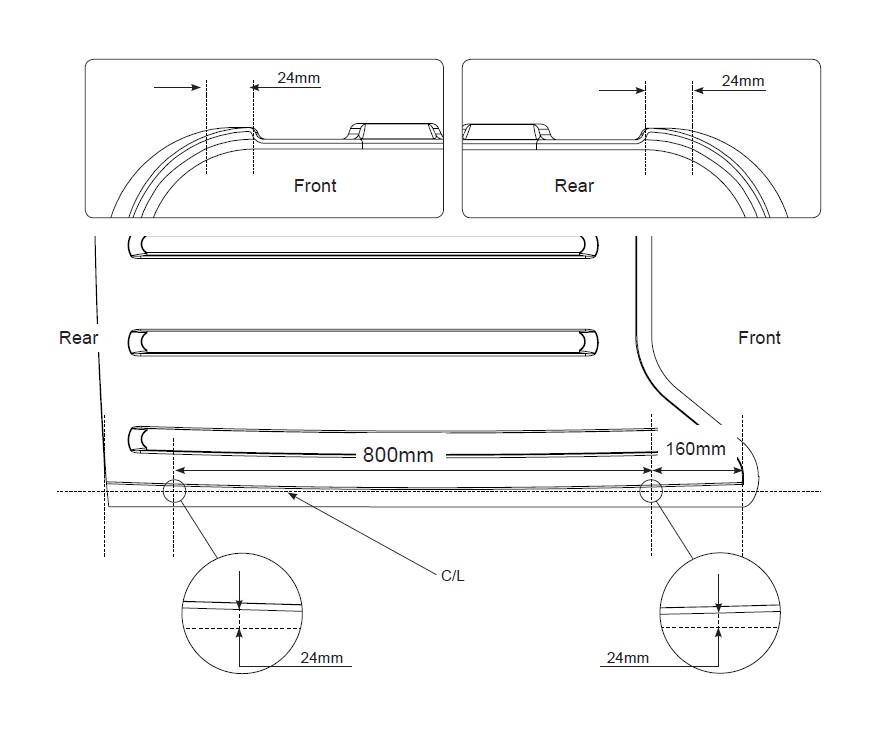
2dr track mounting holes.
Drill 4 holes through hardtop at measurements shown.

4dr hardtop
Track positioning.
Edge of track can be used to mark a straight line.
a. Measure 16mm from tangent of hardtop radius at front, front edge of track hangs over on inside a little. Measure 26mm from tangent of hardtop radius at rear. Mark drilling centreline.
b. Front of track. Measure 140mm from front where the rubber seal meets.
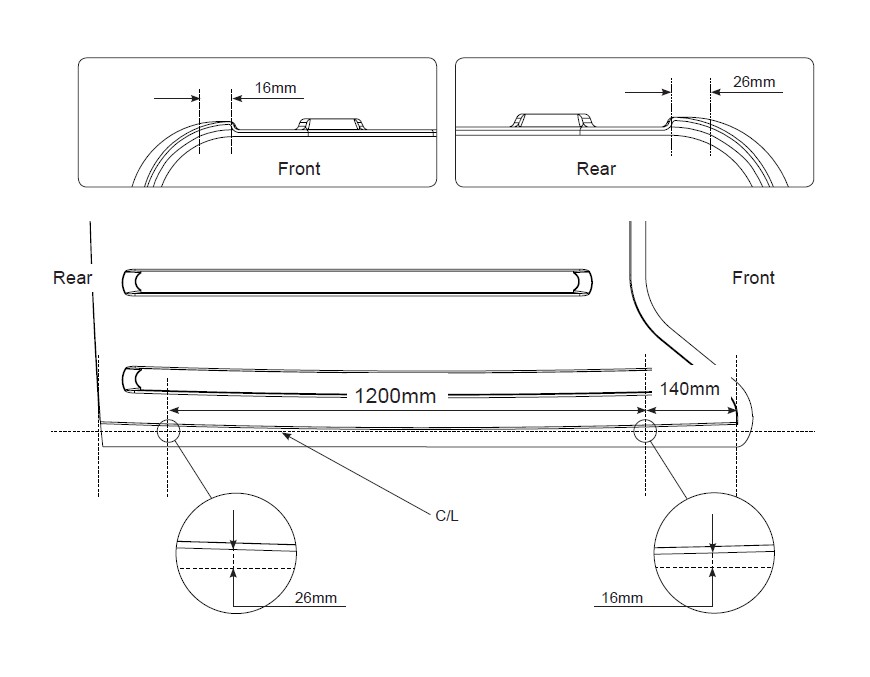
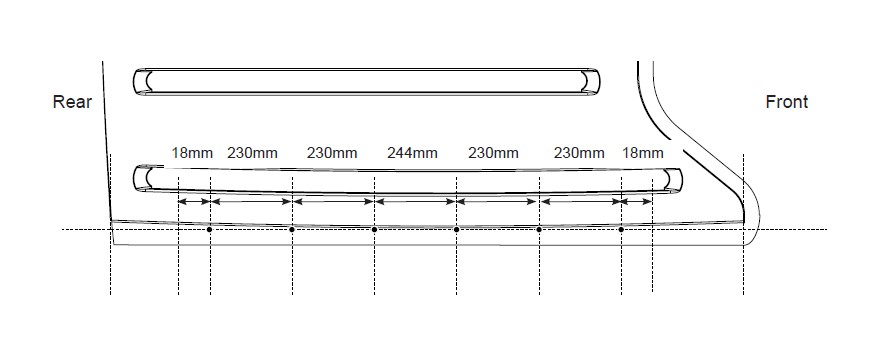
4dr track mounting holes.
Drill 6 holes through hardtop at measurements shown.
Drilling of hardtop.
Drill through perpendicular to the surface using a 6.5mm drill bit. Remove masking tape. Clean hardtop.

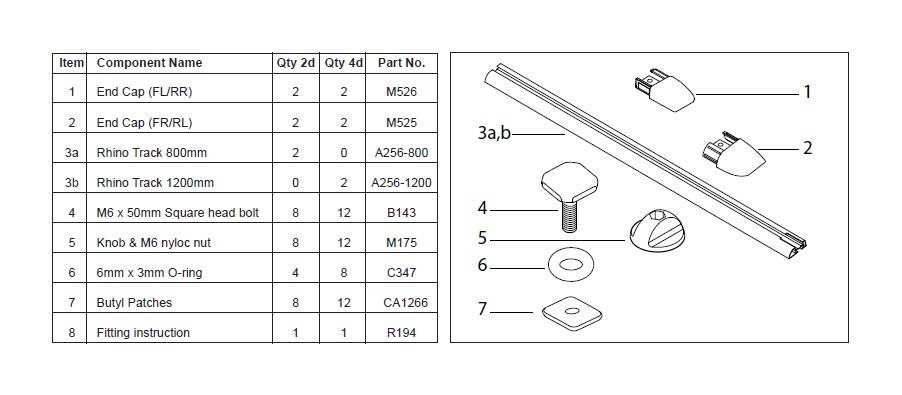
Attach 0-rings
Install rubber 0-rings onto each square head bolt. Locate bolts in the C-groove on underside of track.
1:Remove the backing tape from the Butyl Patches.
2:Place over holes drilled. Once in place remove the rest of the protective tape from the top of the patches.
This patch will provide the water tight seal
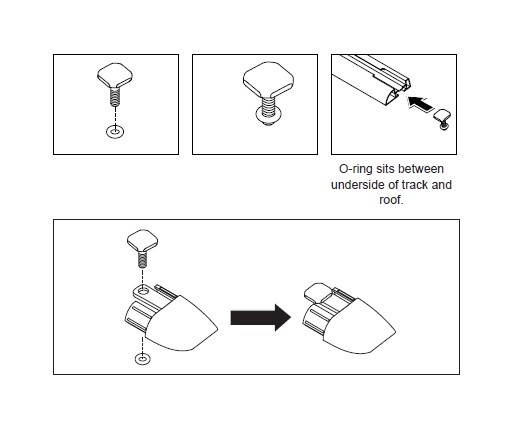

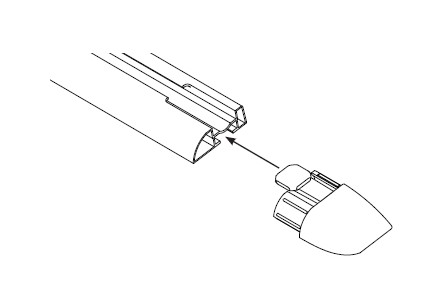
End caps.
Insert end caps into each end of the track.
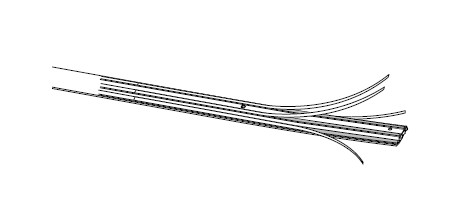
Backing tape.
Peel white backing tape off underside of track.
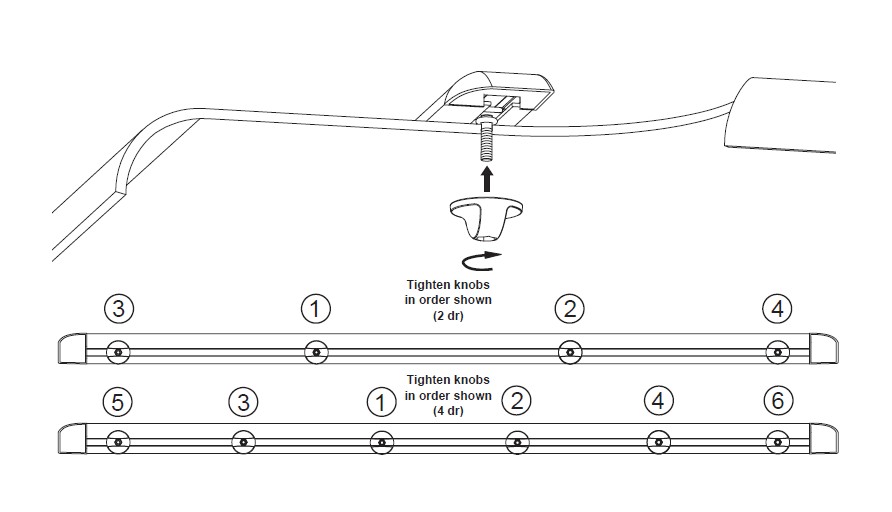
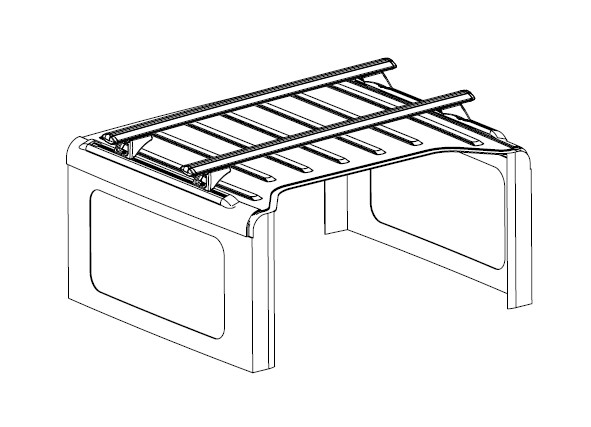
Attach track.
Align each bolt so that it drops into its corresponding hole.
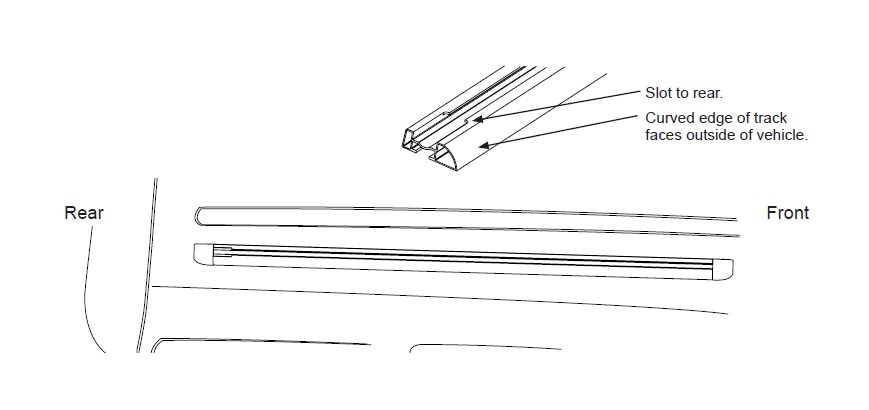
Fasten Track.
Finger tighten all square head bolts to locate the track. Once all threads have engaged start tightening from the centre and work towards the ends. DO NOT OVER TIGHTEN.