 FREE 1 to 3-Day Delivery on Orders $149+ Details

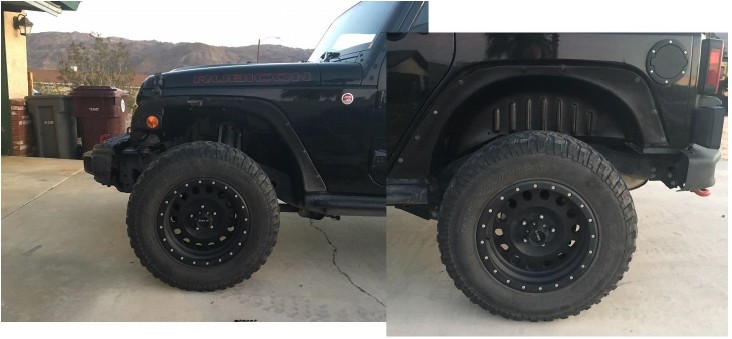
How to install RedRock 4x4 Inner Fender Liner Kit - 4-Piece on your Wrangler
Installation Time
1 hours
Tools Required
- 10mm and ½ inch socket
- Channel lock pliers
- Ball peen hammer
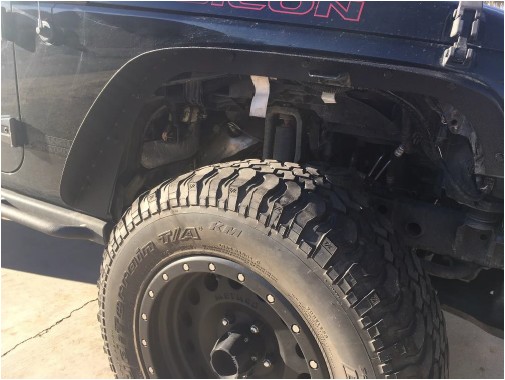
I wanted to make this installation guide to illustrate how easy these fender liners are to get in, and get done.
I was not using anything prior to installation, and wanted to protect my engine from debris. These liners were just the ticket.
Installation Instructions:
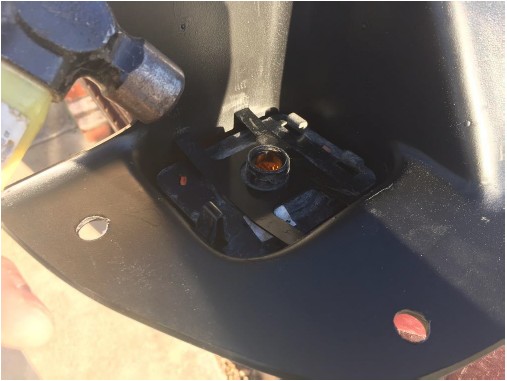
1. The first thing I did was to install the marker lights for the front of the vehicle. I had previously taken them off the stock fenders, and had them ready for installation. I took the provided Side Marker Retainers and slightly bent the four tabs on each so that they would insert into the recess on the liner where the marker light goes, then I carefully tapped them into place with the ball peen hammer, being careful not to crack the marker light housing.
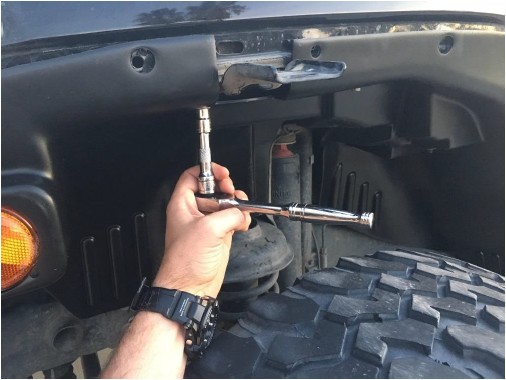
2. Once the marker lights were installed, I was ready to install the liners. Using the provided hardware (bolts and push rivets) I installed the front liners. Before attaching the liners I ensured that the electrical cord was attached to the marker light, and then, using the 10mm socket and wrench, I loosely installed the three factory bolts that were originally holding the original liners in place. It is important to leave them about half tightened so that you can move the liner to ensure that the holes in the body line up with the holes in the liner. Once I had the liner aligned up I used the ½ inch socket and wrench to loosely install two of the provided bolts in the middle two holes in the top of the liner. Once they were in place I took the provided push rivets and inserted them into each of the remaining holes securing the liner in place, and then tightened the two bolts.
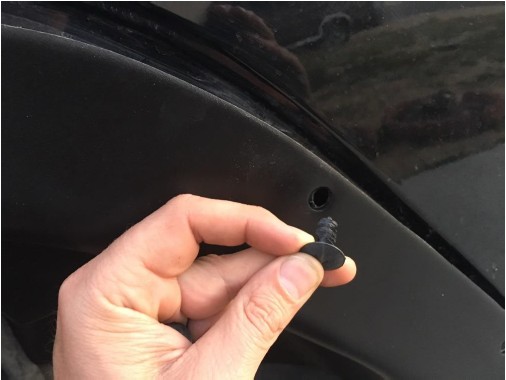
3. After the front liners were installed I moved my attention to the rear liners. They are very much the same installation as the fronts, minus that there is not a light fixture to worry about. I loosely installed the two provided bolts into the top holes in the rear liner, and then aligned the remaining holes in the liner. I used the rest of the provided push rivets to secure the rear liner, ensuring that the two rivets were inserted inside the wheel well (there are two additional holes there as well). The last step I did for the installation was secure the axle vent hose, which is located on the passenger side rear liner area. I secured a bolt to secure the hose to the rear most mounting hole.
Installation Instructions Written by ExtremeTerrain Customer Terry Hunt 03/09/2017

