 FREE 1 to 3-Day Delivery on Orders $149+ Details

How to Install RedRock 4x4 Front Bumper w/Grille Guard - Winch Mount on your 07-18 Jeep Wrangler JK; 2018 Jeep Wrangler JL
Installation Time
2 hours
Tools Required
- 19mm socket
- 19mm box wrench
- #5 allen wrench
- 13mm box wrench
- Ratchet
- Ratchet extension
- Torque wrench - optional
- Safety glasses

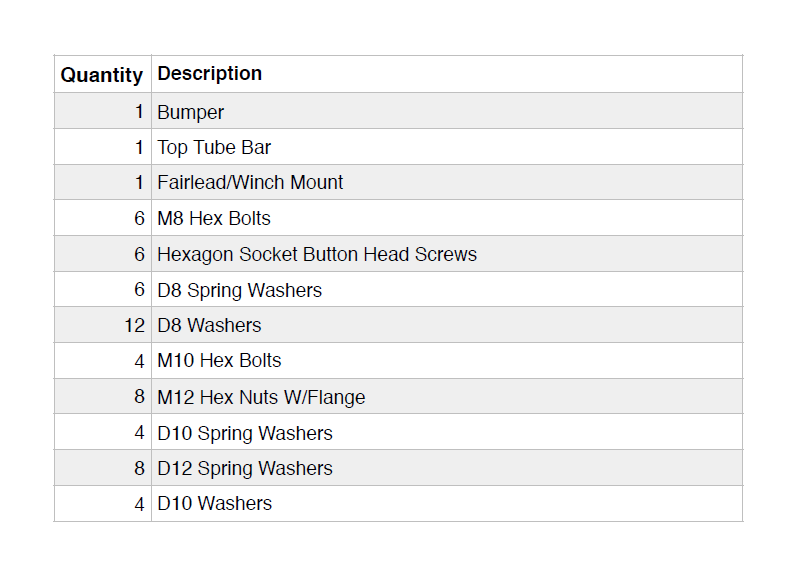
Shop Parts in this Guide
Parts list included
1. Park vehicle, turn off engine and engage the parking brake
2. Be sure to wear safety glasses for the entire install as loose debris and dirt on
the underside of the vehicle can dislodge and fall into your eyes
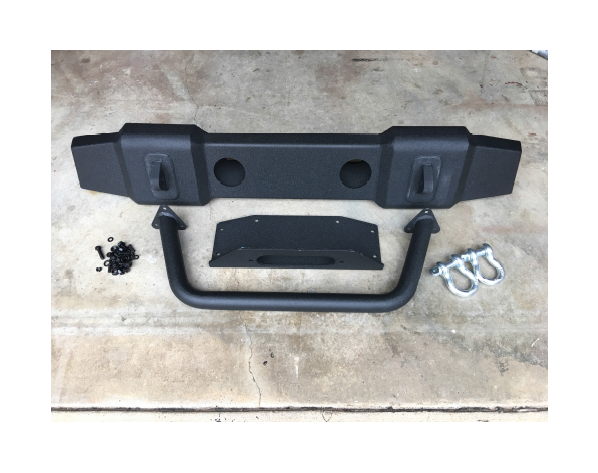
3. Lay out all parts from shipping box and organize what you need.
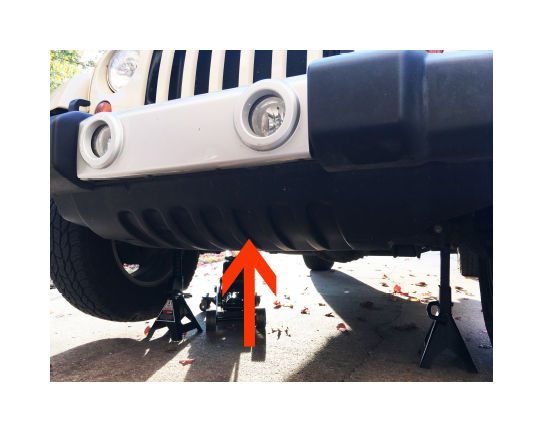
4. Jack up the Jeep using your jack of choice and jack stands for safety. This is not necessary, but it make the installation a lot easier.
5. Remove the Jeep front valance from the body.
This is the valance. It’s removed by removing the plastic retaining plugs. They are difficult to remove and I used a small pry bar to do the job.
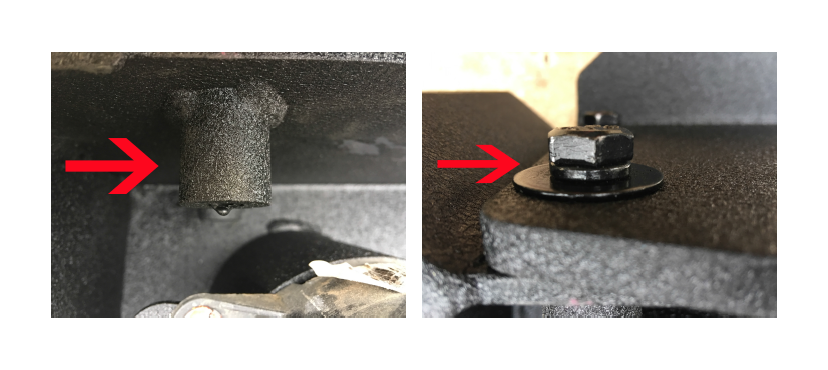
6. Once that’s removed, you will start removing the bumper by removing the four 19mm bolts per driver and passenger sides. There are two nuts on the outer frame and two bolts on the inner frame, just outside the fog lights.
For this step we will start with the outer nuts.
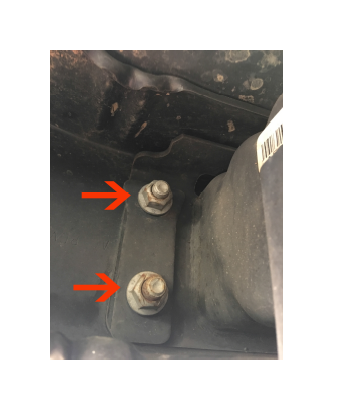
This is a picture of the outer nuts. They have a decent bit of torque, but you shouldn’t have any problems breaking them free.
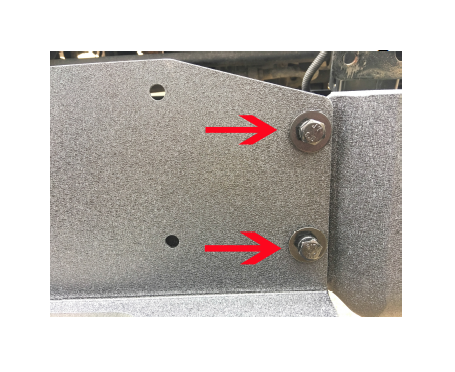
7. Next, remove the inner bolts on the Jeep bumper that are located outside the fog lights. Before removing the inner nuts, disconnect the fog lights from their factory harness and tuck the wires into the backside of the bumper so you don’t damage them during the bumper removal.

Tip: The lower nuts are difficult to see, so make sure you scoot back far enough to get a better view of the bolts when removing them.
8. After you remove the final nuts, keep you hand on the bumper while you slide out from beneath the Jeep. At this point you will lift the bumper off of the Jeep frame and notice that there are two more retaining plugs holding the fog light wires to the bumper. Pry those off and the bumper will be free for removal.
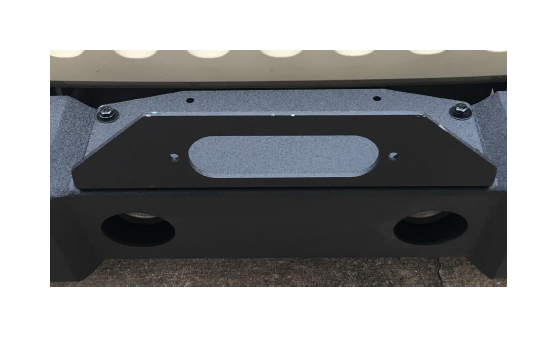
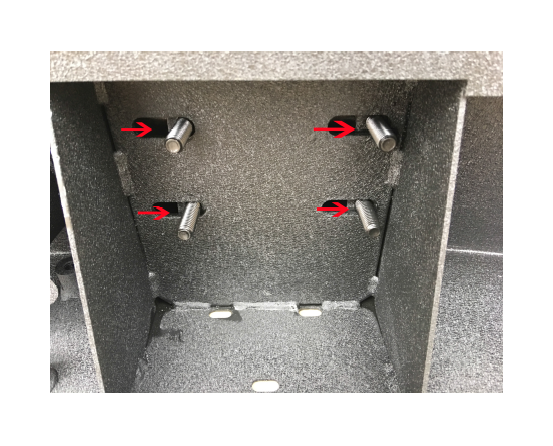
9. For the next steps, we need to mount the top tube to the bumper as well as the winch/fairlead mount. This would be extremely tricky to do once the bumper is mounted due to the lack of room to work with.
Lay your bumper down and grab the 4 M10 hex bolts and your winch plate. You are going to align the plate with he pre-drilled and tapped holes on the top of the bumper and face the fairlead mount outwards, towards the front of the bumper as show below.
This is what it should look like when the fairlead is oriented in the correct way.
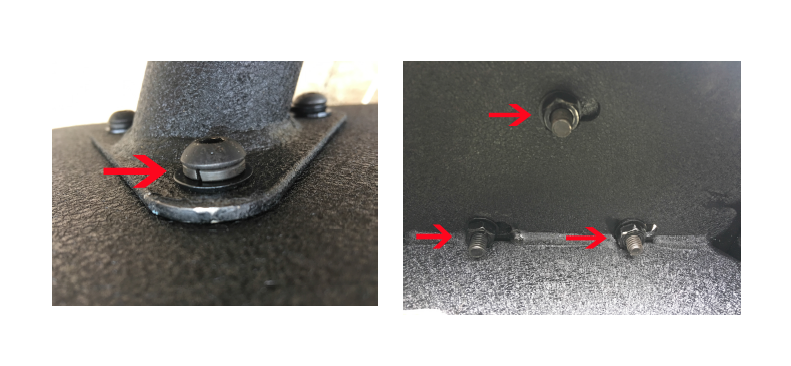
These pre-tapped retaining collars are on the back of the bumper and they are what you screw the bolts into to mount the winch plate.
Be sure and use the M10 hardware configuration shown above.
Here’s another view from the top showing where the bolts attach to the bumper for reference.
10. Time to mount the top tube to the bumper. You will need the M8 hardware, along with your #5 allen wrench for this step. Align the top tube with the predrilled holes in the bumper and start attaching your hardware.
Pictured above is what it should look like once you have the tube attached with the M8 hardware attached from both sides.
*** Side note: the bumper does come with pre-fabricated holes for fog lights and I would recommend installing them before mounting the bumper ***
11. Time to mount this bumper! This is going to take 2 people! The bolts that are attached to the bumper are a great idea, in theory. The problem is that they are free-floating. So, when you try to lift this beast to set it on the bumper and align the bolts at the same time, all 4 free-floating bolts don’t want to cooperate.
I recommend having a friend hold the bumper while you reach under, from the ground, and align the bolts in the bolt holes in the bumper.
Here is what the back side of the bumper looks like with the installed bolts.
As you can see, the bolts float freely….. I tried using masking tape to hold them in place, but it came down to a call to a buddy to help out and that works best! Way less frustrating.
Once you get the bumper aligned, use the M12 nuts w/flange to secure the bumper to the Jeep frame and you’re finished!!!
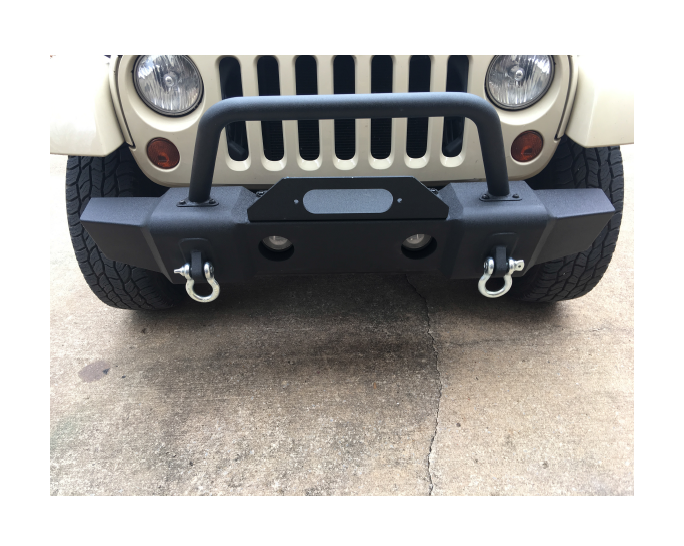
Time to check out your upgrade pictured below.
Now it’s time to go back to XT and purchase a winch to mount on this beast!!!

