FREE 1 to 3-Day Delivery on Orders $149+ Details

How to Install RedRock 4x4 8-Piece Crawler Light Guard Set (07-18 Wrangler JK) on your Jeep Wrangler
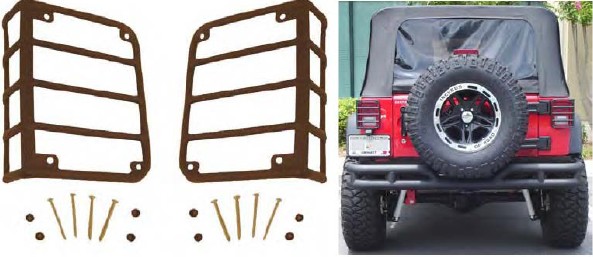
(1) Driver’s side rear guard (1) Passenger’s side rear guard
(8) Black plastic taillight lens spacer (4) Small 2” Philips head screw
(4) Large 2” Philips head screw
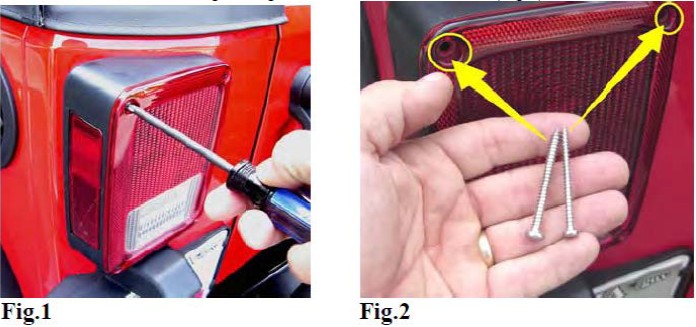
Step 1: Select driver side or passenger side lens. Instructions will be the same. Remove original screws (Fig.1). With the screws removed be careful not to change the position of the taillight assemble. Note the size difference of the two screws. The large size goes to the outside of the lens (Fig.2).
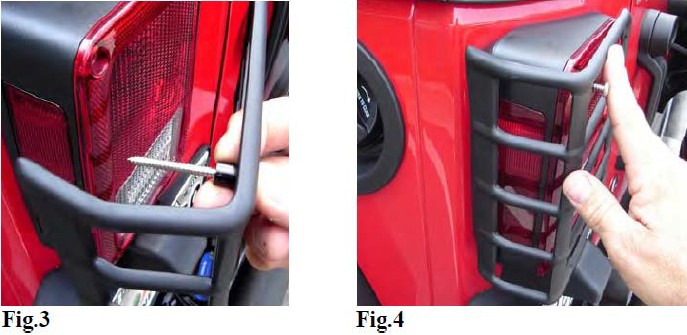
Step 2: Insert the Large 2” replacement screw through the front side of the new taillight guard starting with the outer top mounting hole. Place one of the black plastic lens spacer over the large 2” screw from the back side of guard (Fig.3). Insert screw and assemble into outer top hole (Fig.4).
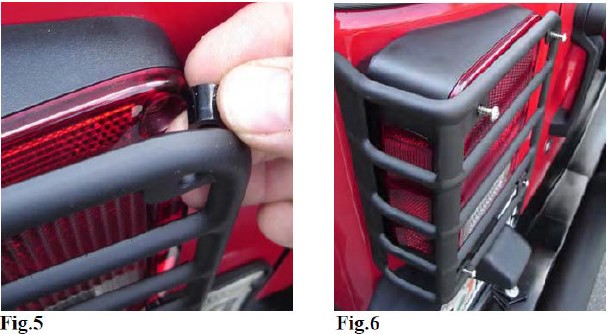
Step 3: Start outer top screw but do not tighten. Leave loose to allow for the fitment of the remaining 3 screws and spacers. Move to the inner top screw location and insert a Black Plastic Lens Spacer behind guard and into lens mounting opening (Fig.5). Insert Smaller 2” Philips Head Screw through the front of the guard and into the lens assemble (DO NOT TIGHTEN). Follow the same procedure for the outer lower and inner lower mounts. Remember that the larger 2” Philips head screws go to the outside. Confirm fitment of cover and proper placement of Black Plastic Spacers prior to tightening (Fig.6).
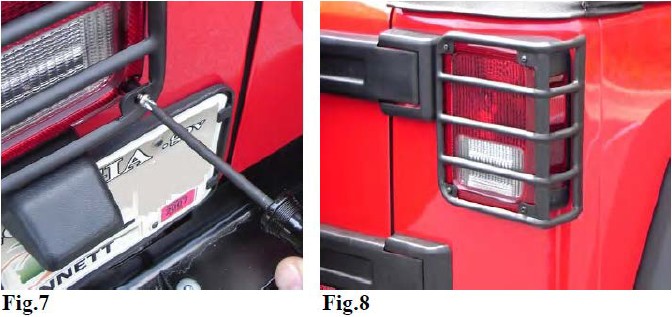
Step 4: With all screws and spacers properly positioned, proceed to tighten screws. DO NOT OVER TIGHTEN, it is possible to crack the factory lens if excessive force is used during the installation and the tightening of the replacement screws (Take Your Time) (Fig.7).
Step 5: Repeat steps 1-4 for opposite side (Fig.8).