 FREE 1 to 3-Day Delivery on Orders $149+ Details

How to Install RedRock 4x4 12,000 lb. Winch on your Jeep Wrangler
Installation Time
60 minutes
Tools Required
- Open Ended Wrench: 10mm, 12mm, 13mm 16mm, 18mm and 19mm
- Needle Nose Pliers
- Cutter Pliers or Strong Scissors
- Philips Screwdriver
Installation Notes: Review all instructions before starting your install. Depending on your knowledge level, you may want to have the RedRock 4x4 12,000 lb. Winch installed by a qualified technician.
Before Install
Installation Instructions:
1. Remove the Negative battery terminal. Loosen the 10mm nut on the side of the terminal using a 10mm open ended wrench. Move the terminal to the side to prevent it from touching the negative battery post. Important: Do not start your install until you’ve removed the negative battery terminal.
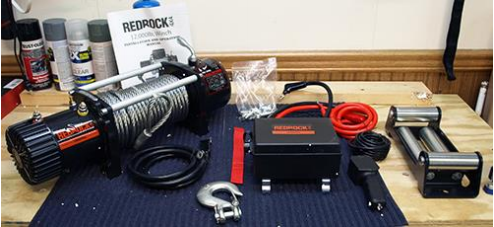
2. Remove all components from the product packaging and lay them out.
3. Take a Philips screw and place a lock washer over it. Slide the screw through the bottom back bracket of the Solenoid and loosely screw it to the C bracket.
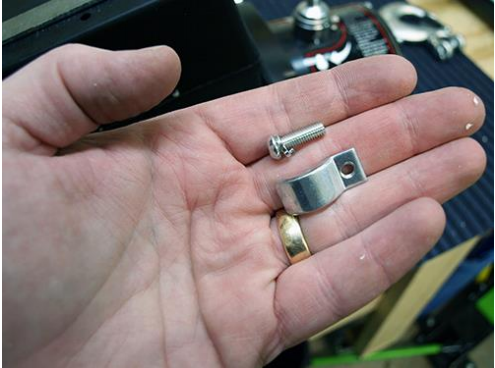
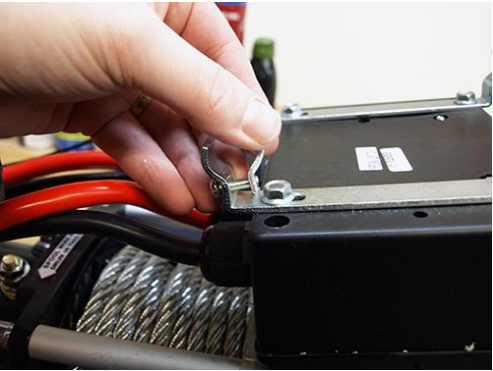
Repeat step 3 on the other bottom bracket.
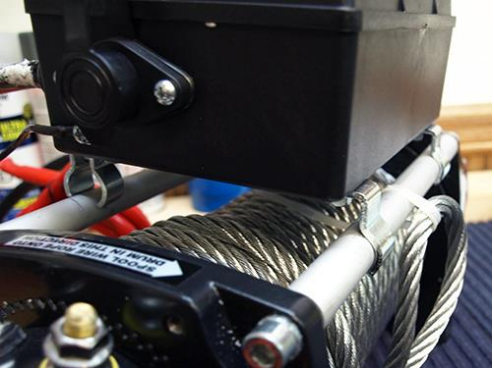
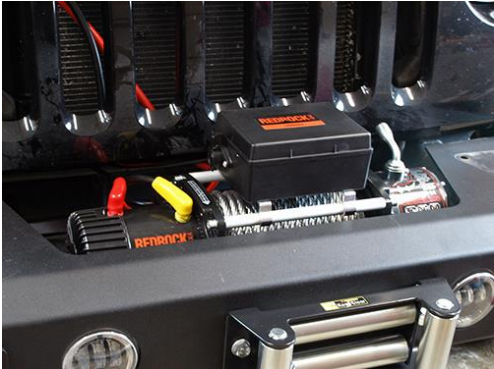
4. Place the Solenoid on the Tie Bar/Rail.
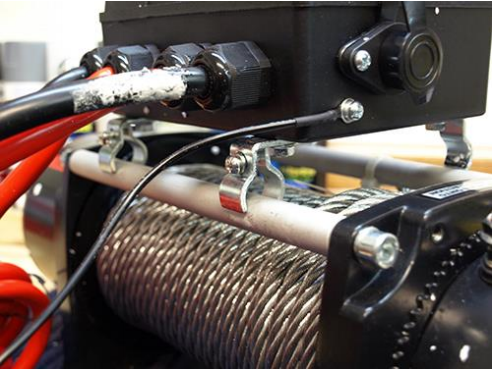
5. Push the front of the Solenoid bracket onto the front of the Tie Bar/Rail and then push down on the back of the Solenoid. Tighten the Philips screws once the Solenoid locked into place on the Tie Bar/Rails.
6. Remove or loosen the three (3) 13mm nuts at the top of the winch motor end. Each connection is color coded with the cable wire boot coming from the Solenoid.
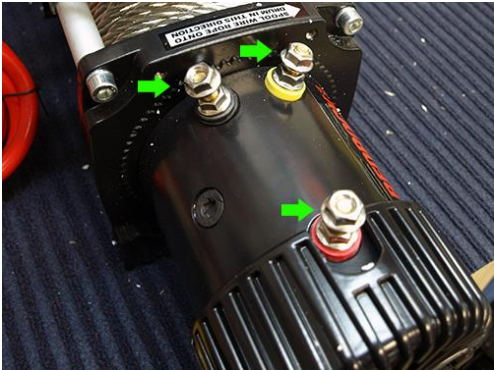
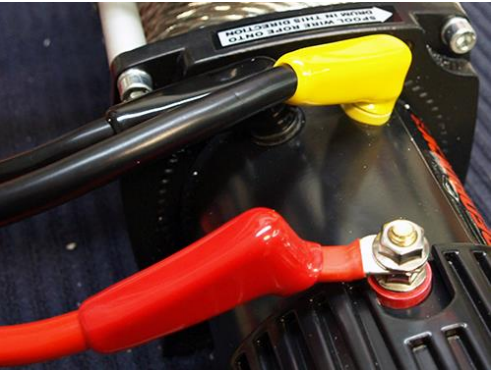
7. Place the black cable with the black boot from the Solenoid on to the color-coded black post of the motor end. Tighten down with a 13mm open ended wrench. Then slide the wire boot over the post.
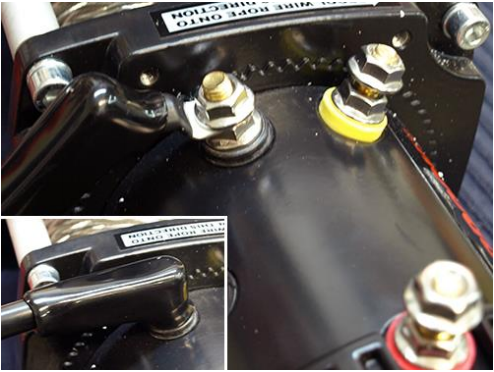
8. Repeat step 7 for the other connections on the winch motor end.
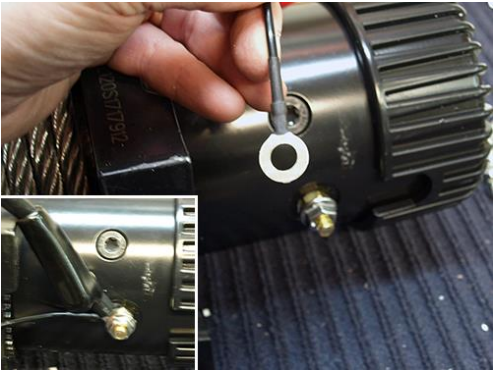
9. Place the winch on its side. Remove the nut from the bottom post and slide the small black cable coming from the Solenoid to this post. Now place the Long Black Ground Wire onto the same post. Screw the nut back on and tighten down using a 16mm open ended wrench. Then slide the wire boot over the post.
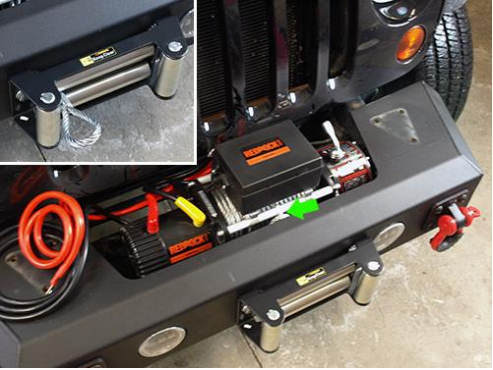
10. Attach the Roller Fairlead to your bumper or winch plate using the supplied 18mm bolt, washer and 19mm lock nut.

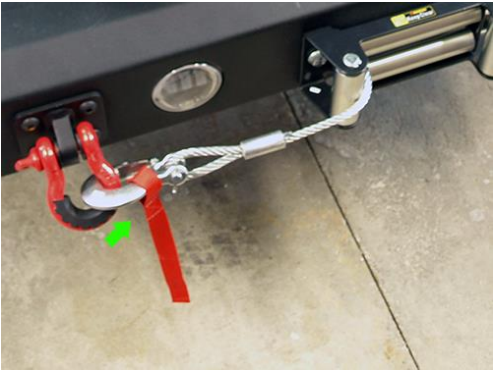
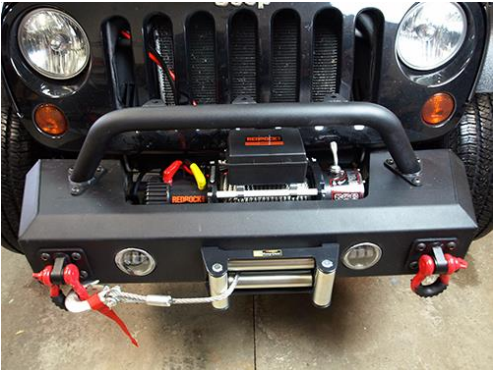
11. Place the winch on your bumper or winch plate. Before securing the winch cut the large zip tie holding the steel cable to the Tie Bar/Rail. Move the Clutch handle on the winch to Free Spool. The steel cable will loosen. Slide the cable through the Roller Fairlead and set the clutch back to Engaged.
12. Remove the Cotter Pin from the Safety Hook using a needle nose pliers and remove the large pin from the hook.
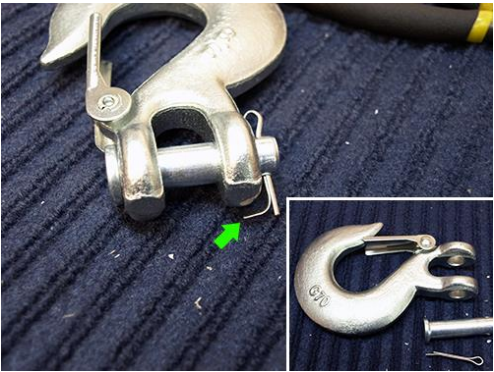
13. Slide steel cable loop between the Safety Hook opening and then slide the large pin back through the hook. Slide the Cotter Pin through the hole of the large pin and bend the longer end using a needle nose pliers to the side as shown below.
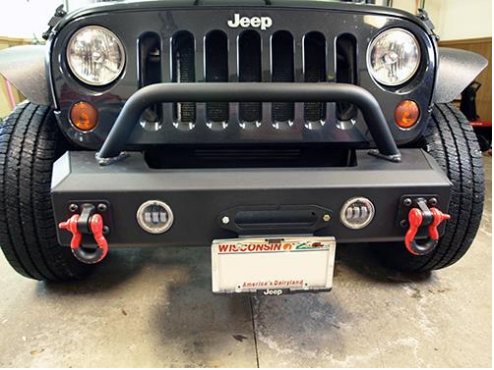
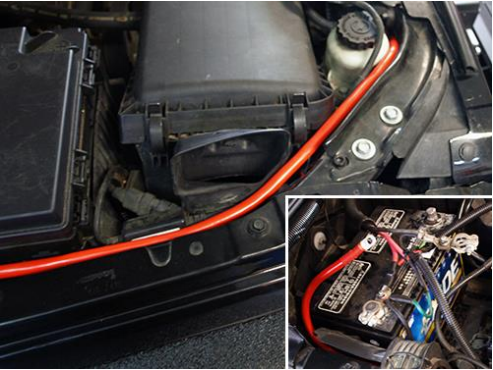
15. Run the red power wire and the black ground wire through or under the grille as shown in the picture blow. Find a safe location to run the wires past the radiator and into the engine bay. Secure the wires using zip ties to prevent them from moving.

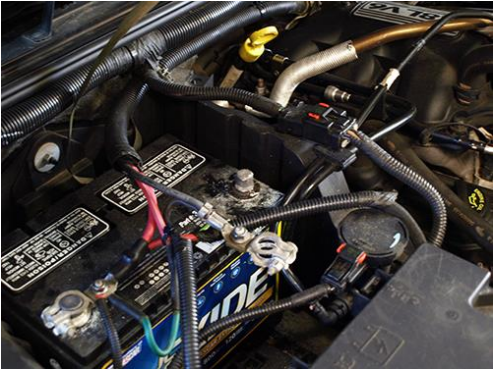
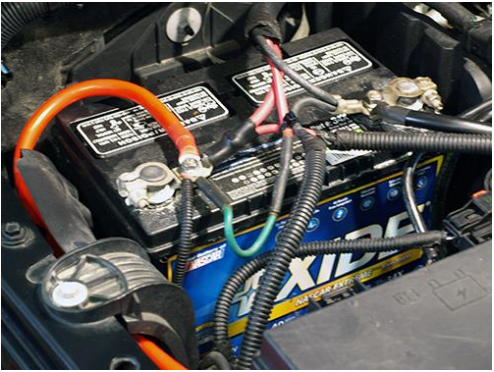
16. Run the red power wire to the positive battery terminal and the black ground wire to the negative battery terminal.
17. Remove the small 10mm nut on the top of the positive battery terminal and place the red power cable over the screw post. Tighten the 10mm nut. With the negative battery terminal still disconnected. Remove the 12mm nut from the top and place the black ground wire on the screw post. Tighten the 12mm nut and place the negative
terminal back on the negative battery terminal. Tighten the 10mm nut on the side of the negative terminal.
18. Move the winch to align the feet with the predrilled holes on your bumper or winch plate. Place a lock washer and washer on each of the four (4) 16mm blots. Secure the winch to the bumper or winch plate from beneath using a 16mm open ended wrench. Note that there are threaded holes for the 16mm bolts on the feet of the winch.
After Install
Installation Instructions Written by ExtremeTerrain Customer Brian Voelzke 01/22/2019
