 FREE 1 to 3-Day Delivery on Orders $149+ Details

How to Install Rear Seat Recline Kit on your Wrangler
Installation Time
1 hours
Tools Required
- Ratchet
- Extension
- 18mm Socket
- Breaker Bar
- Impact Wrench (optional)
- Adjustable Wrench
- 1/2" Drive Tools Recommended
Shop Parts in this Guide
Kit Contents:
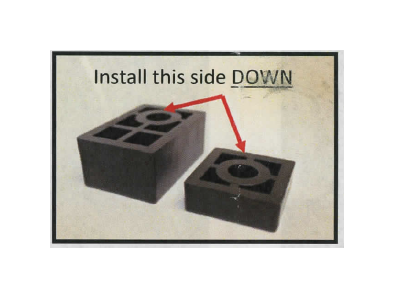
• 4 Rectangular Spacers
• 3 Square Spacers
• 4 New SEM Bolts
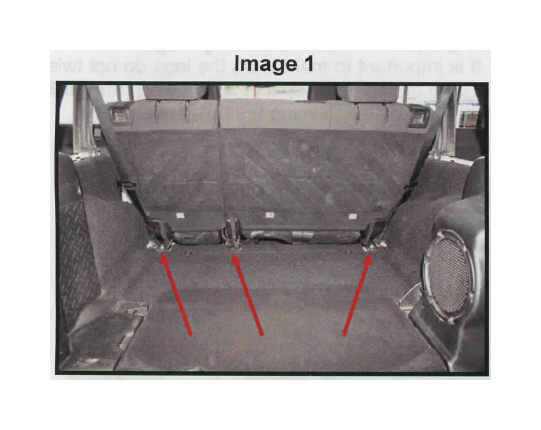
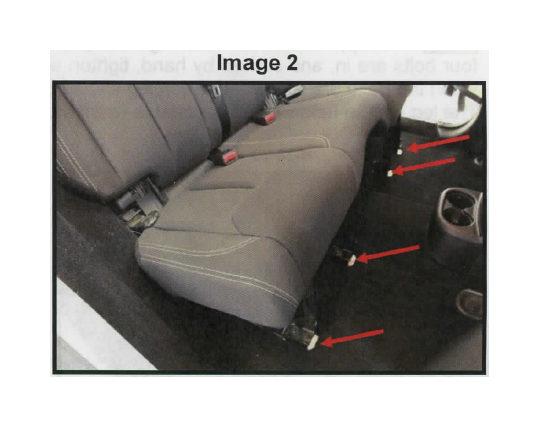
1) Loosen the three (3) fasteners (2 nuts, 1 bolt) behind the rear seat as shown in Image 1. DO NOT remove, just back off about 1/4". These are the seat bracket mounts, NOT the two seat belt mounts on either side. Then remove the four (4) bolts securing the four (4) legs to the floor as shown in Image 2. You will need a breaker bar (or impact wrench) to get these loose.
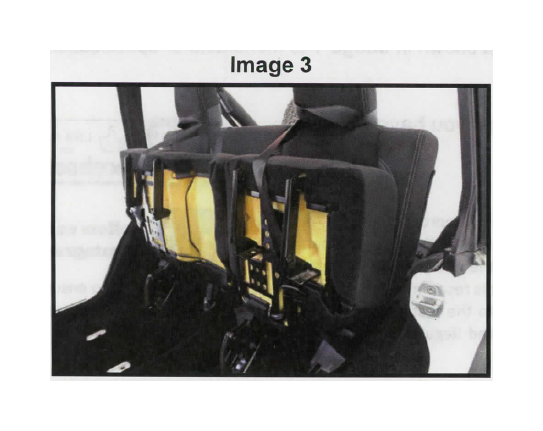
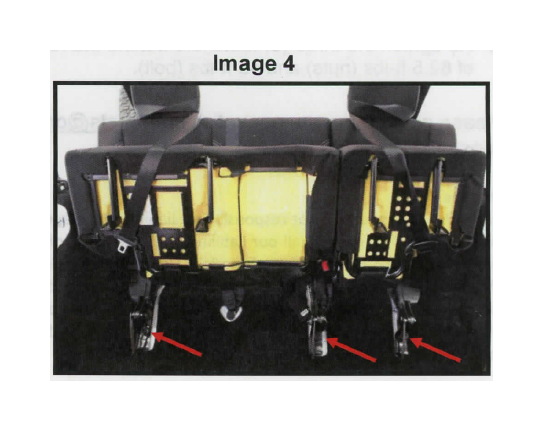
2) Use the rear seat belts to hold up the two lower sections of the rear seat as shown in Image 3. I found it best to pull the rear seat belt across the lower seat section and then wrap the seat belt around the headrest. Remove the three (3) bolts securing the rear seat to the floor as shown in Image 4. You will need a breaker bar (or impact wrench) to get these loose.
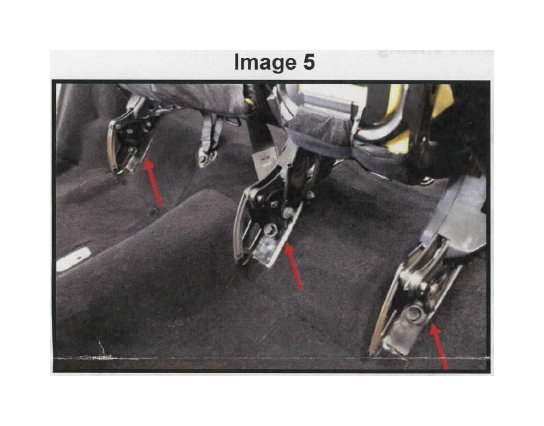
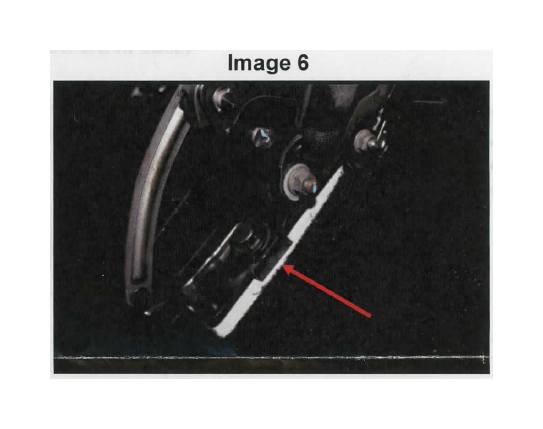
3) Now place one (1) square spacer under each of the three (3) seat brackets as shown in Image 5. Lift up the seat bracket (or just push seat with your shoulder), slide the spacer in, insert the factory bolt finger tight, and ensure spacer is square to seat bracket (not twisted). See Image 6. Once all three factory bolts are in by hand, tighten all three bolts. Make sure they are tight. It is not unusual for them to be difficult to tighten because of the factory thread locker that remains in the threads.
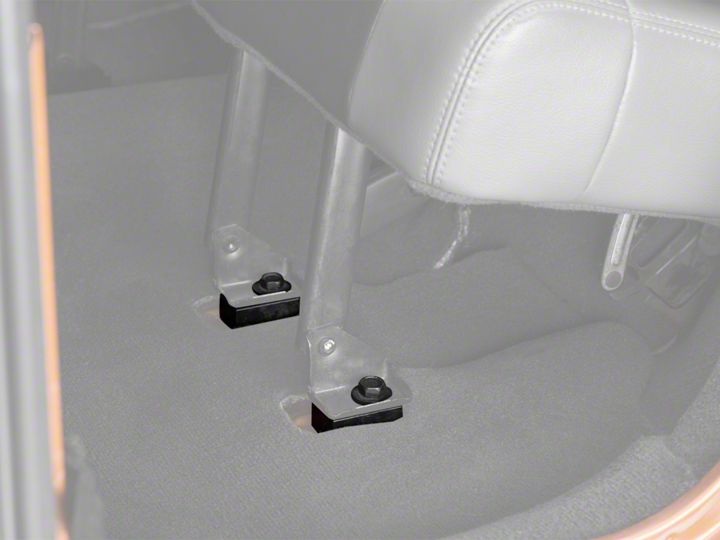
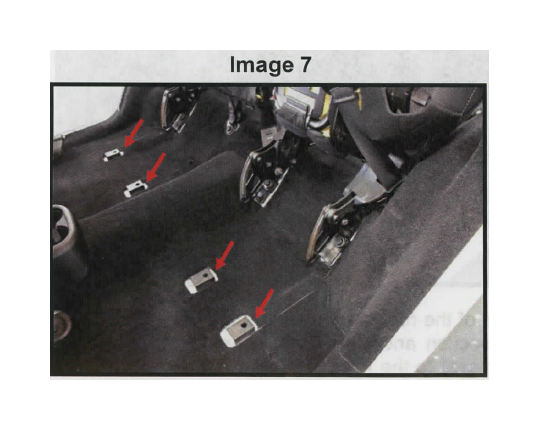
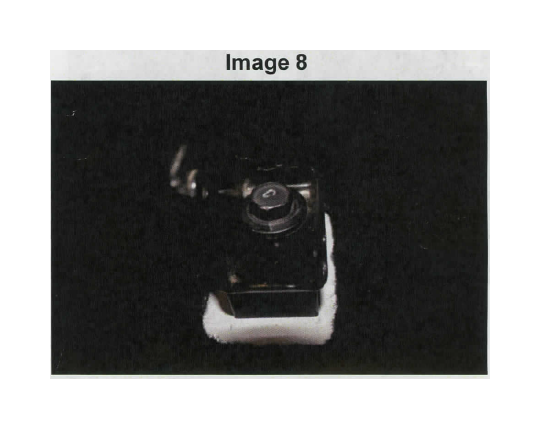
4) Place one (1) rectangular spacer in each of the four (4) leg locations as shown in Image 7 (hole towards REAR of Jeep). Lower the seat legs into place and insert the four new SEM bolts finger tight. Once all four bolts are in, and started by hand, tighten each bolt. It is important to make sure the legs do not twist when the bolts are tightened. Each leg should be sitting square on top of the spacer as shown in Image 8. The leg can be held with an adjustable wrench pinched on the leg while tightening the bolt if necessary.
5) Re-tighten the three (3) fasteners behind the rear seat as shown in Image 1 to manufacturer specifications of 62.5 ft-lbs (nuts) and 45 ft-lbs (bolt).
Please contact me on innovativeikproductsqmail.com if you have any questions or feedback.
The Fine Print
Innovative JK Products is not responsible or liable for damages received by improper installation or use of the product. In no event shall our liability exceed the cost of the goods. As with most aftermarket parts, there are risks with alternating the original manufacturer design and the end user assumes those risks. After installation and the vehicle has been driven for a period of time, it is recommended the check all the fasteners again to ensure that they are tightened properly. Disclaimer: This is a modification to the factory rear seat mounting and in no way is this kit implied to be compliant with Federal Motor Vehicle Safety Standards and Regulations as outlined by the National Highway Traffic Safety Administration. PATENT PENDING

