 FREE 1 to 3-Day Delivery on Orders $149+ Details

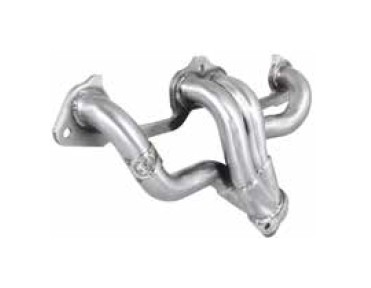
How to Install AFE 1-1/2 in. Twisted Steel Headers (91-02 2.5L Wrangler YJ & TJ) on your Jeep Wrangler
Tools Required
- 3/8" drive ratchet and extensions.
- 9/16" swivel socket
- ½" and 9/16" wrenches
- ½" and 9/16" sockets

Shop Parts in this Guide
Parts Included:
• 3/8" x 1-1/2" Bolts (2)
• 3/8" Nuts (2)
• Gasket (1)
CAUTION: Allow time for your vehicle to cool down prior to installation. When working on or under your vehicle proceed with caution. Exhaust systems reach high temperatures and may cause serious burns. Wear protective safety equipment; eye goggles and gloves to ensure a safe installation. aFe recommends professional installation on our products. Note: aFe’s Downpipe recommends an aftermarket tuner to clear check engine light
1: (Read Instructions prior to installation). Secure vehicle on jack stands (refer to your manual for specified jack stand positions).
2: Disconnect the battery before starting work on the exhaust system.
3: Remove the air inlet tube from the throttle body and set aside.
4: On the intake manifold assembly, remove the throttle cable.
5: Disconnect any electrical connectors and vacuum lines on the intake manifold and throttle body. Be sure to label the lines to ensure correct reinstallment.
6: Remove the fuel injector harness from the cylinder head.
7: Disconnect vacuum harness and vacuum brake booster from the intake manifold under the intake manifold.
8: Remove the fuel line from the fuel rail.
9: Loosen the belt tensioner. Disconnect the power steering pump and bracket from the intake manifold. The pully can be rotated to access the bolts.
10: Remove the (2) nuts and bolts securing the exhaust pipe to the exhaust manifold.
11: Remove the bolts securing the intake manifold/exhaust manifold and remove the intake manifold from the engine block.
12: Remove the bolts securing the exhaust manifold and remove the exhaust manifold.
13: Inspect the exhaust and intake mounting surfaces of the cylinder head and remove carbon that might prevent the aFe power header from sealing. Be careful debris do not enter the engine ports.
14: Install the supplied intake/exhaust manifold gasket onto the cylinder head dowels.
15: Install the aFe power header onto the cylinder head with the original bolts and washers make finger tight only at this time.
16: Install the intake manifold onto the cylinder head dowels. Install the remaining bolts and washers and tighten all exhaust and intake manifold bolts.
17: Install the exhaust pipe to the aFe power header using the (2) nuts and bolt provided and tighten.
18: Reinstall the power steering pump and mounting bracket to the intake manifold. Reinstall the belt and adjust the belt tensioner to the vehicle specification.
19: Reconnect all vacuum lines, fuel injector harness and all electrical connectors on the intake manifold.
20: Reinstall the fuel line.
21: Reinstall the throttle cable.
22: Reinstall the air inlet tube onto the throttle body/airbox assembly.
23: Re-connect battery.
24: Recheck all your work.
