 FREE 1 to 3-Day Delivery on Orders $149+ Details

How to Install Raxiom Bluetooth Light Switch & Accessory Controller on your Jeep Wrangler
Installation Time
60 minutes
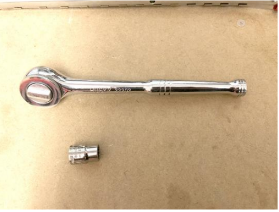
Tools Required
- 10mm Socket and Ratchet
- Optional: Wiring Tools

Shop Parts in this Guide
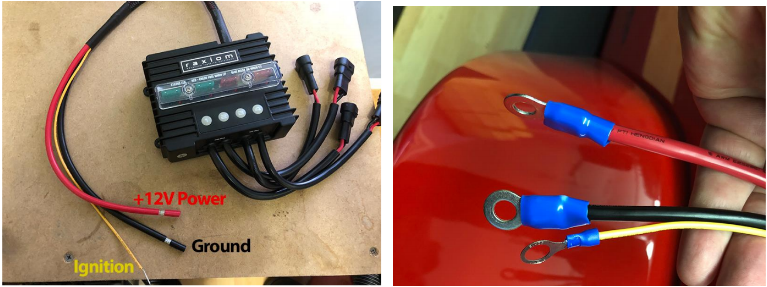
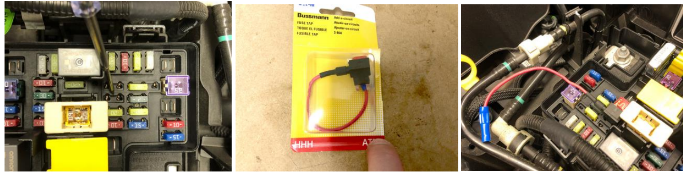
Installation Notes: The Raxiom accessory controller is designed to run with or without an ignition switch wire control. If you choose to run the system without ignition switch control, the yellow wire will need to be connected directly to the positive terminal of the battery. Please note, under that method the Raxiom controller will continuously draw a small amount of power from the battery, when the Jeep’s ignition is off. This draw is typically the same as a power door lock. The advantage of having the accessory controller wired this way is that it provides accessory control while the Jeep’s ignition is off. If you choose to utilize the ignition wire, you can use a fused wiretap in an open block on the adjacent fuse block. The install guide will offer instructions for both installation methods.
Installation Instructions:
1. Start by identifying the wires and crimping the included wire terminals. If you choose not to use the ignition wire control, it will need to be wired to the positive terminal of the battery and also require a wire terminal.
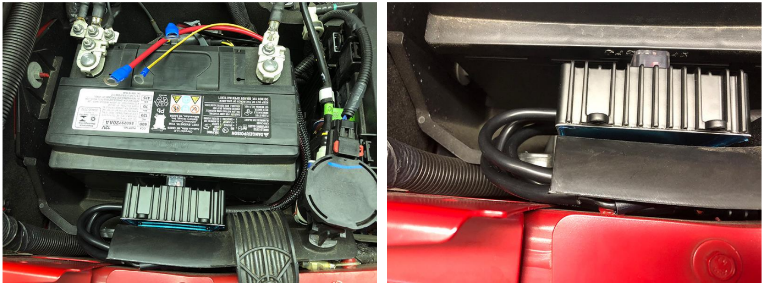
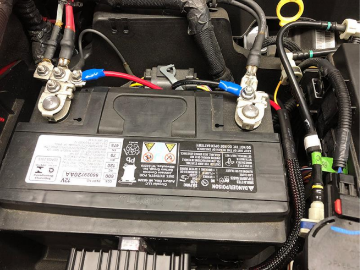
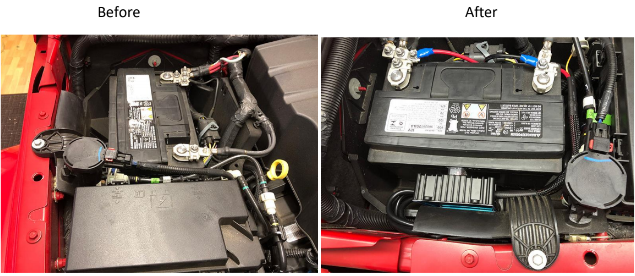
2. Place the control unit in the engine bay as close to the battery as possible. For some Jeep models, there’s a perfect amount of space located along side of the battery. The control unit can slide into place and the wiring can be looped around and into position. This position also has a side plastic opening that can be used to tuck away unused accessory control wires from the controller and protect them from the elements.
3. If you choose not to utilize the ignition wire control, the yellow wire will need to be connected to the positive terminal for continuous power control.
4. If you choose to run the ignition switch control, locate an open spot in the fuse box that is controlled by the ignition switch. Use a properly fused tap wire to provide the power to the yellow ignition wire.
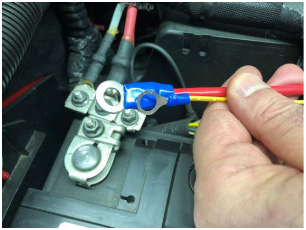
5. Finish the wiring by connecting the black wire to the negative terminal of the battery. Ensure that all of the wiring is neatly tucked into place and not interfering with important engine components.
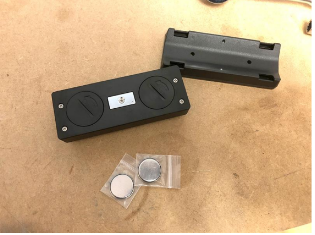
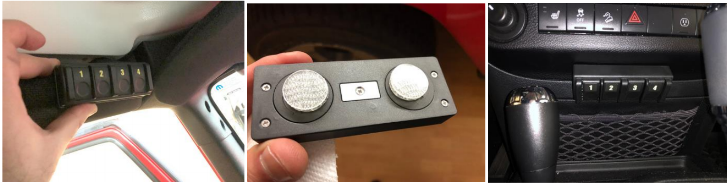
6. Insert the (2) included batteries into the wireless remote. Note, the arrows indicate the direction to “Lock” the caps, not open.
7. Once powered, properly identify the buttons with the corresponding terminal on the control box. Use the provided stickers to identify the buttons going forward.
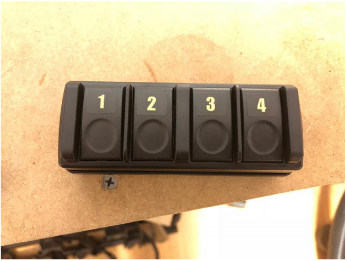
8. Next, finish the install by choosing a mounting location for the remote. The remote includes a curved mounting base that has a strong earth magnet. The curved based is designed to be zip-tied over the roll bar. You can also use the doubled-sided taped Velcro attachments and glue the remote directly to the dash. Both mounting methods allow you to remove the remote for wireless control.
Installation Instructions Written by ExtremeTerrain Customer Louis Orellana 12/5/17
