 FREE 1 to 3-Day Delivery on Orders $149+ Details

How to Install Raxiom Infrared Adjustable Rear Vision Camera System for Factory Display (07-18 Jeep Wrangler JK) on your Jeep Wrangler
Installation Time
2 hours
Tools Required
- T-30 Socket
- 7mm Socket
- Ratchet
- Plastic Trim Removal Tool
- (2) Wire Taps (optional)
- Steel Wire or string

Shop Parts in this Guide
Installation Instructions:
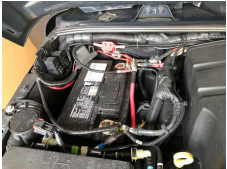
1. Start by opening the hood and disconnecting the battery.
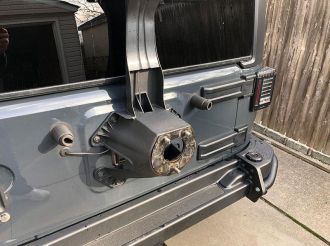
2. Remove the spare tire.
3. Using the plastic trim removal tool, remove the plastic wire cover along the inside of the tailgate.

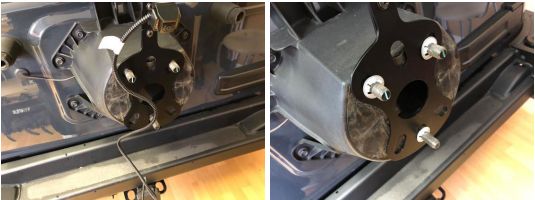
4. Assemble the camera bracket, using the longer arm for aftermarket wheels with more of an offset, or the shorter bracket for factory wheels. Then position onto the spare tire mount. Mount the spare tire to ensure proper clearance of the camera. When satisfied with the position, remove the tire and secure the bracket with the (3) provided stud lock rings.
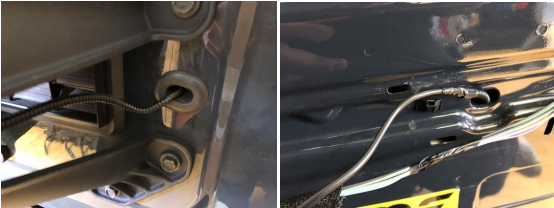
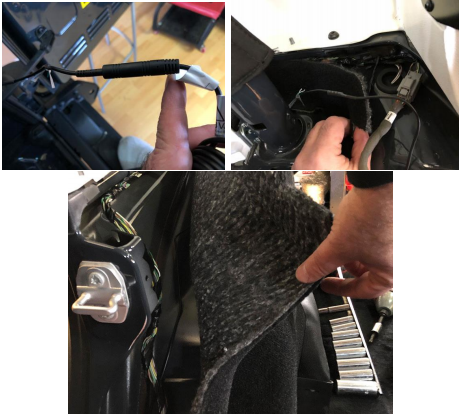
5. Using a steel wire or string, run the camera wire through the grommet along the side of the tailgate, or through the vent plate up through the opening along the inside of the tailgate.
6. Start to remove the side trim panel. Your Jeep might come with a subwoofer in that location. Remove the (2) bolts using the T-30 socket.
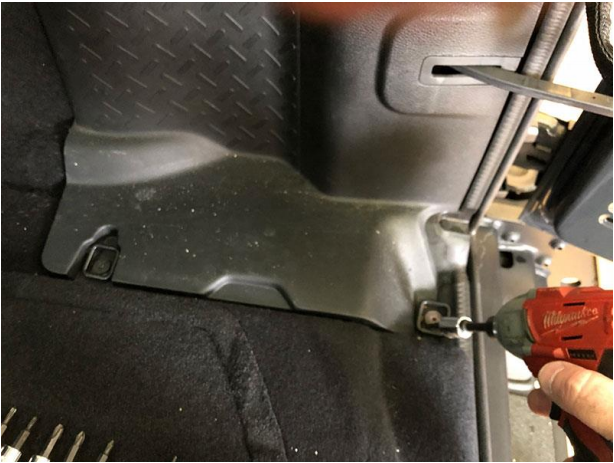
7. Next, using the plastic removal tool, remove the top cap from the seat belt cap, followed by the back half of the post cover.
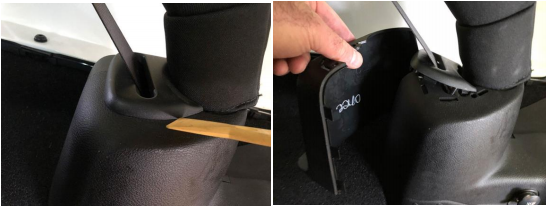
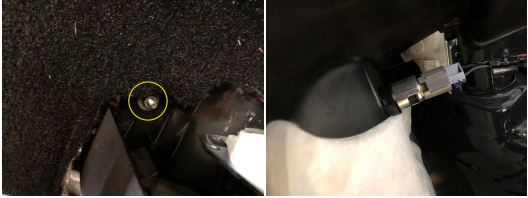
8. It’s important to note that there is a small nut holding the trim panel in place that can only be seen from behind the post. Once removed, disconnect the lighter plug and subwoofer harness.
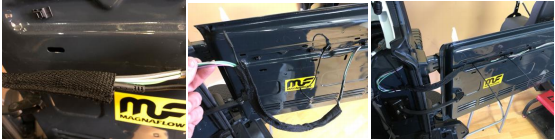
9. Run the wire through the inside of the fabric wire sleeve. Make sure to full open the tailgate and have enough slack in the wire. Then zip-tie the wires using the factory anchors.
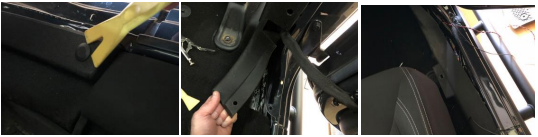
10. Connect the wire terminal to the provided wire extension and run the wire along the side of the Jeep’s interior.
11. Using the plastic trim tool, remove the fasteners holding the side plastic rails along the side of the Jeep’s interior and run the wiring neatly down the side of the Jeep.
12. Open the glovebox and remove it by pinch in the sides and continue running the wire towards the center of the dashboard.
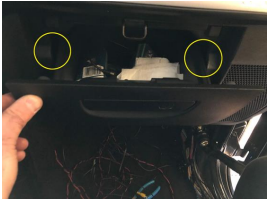
13. Remove the driver’s side knee panel, followed by the (2) 7mm screws along the sides.
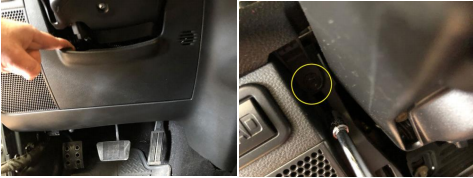
14. Using the plastic trim tool, remove the window control switch. Unplug the switch, by first sliding the red security tab to the side, followed by removing the 7mm bolt.

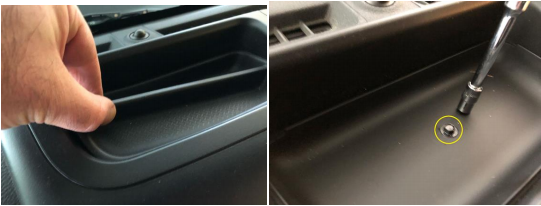
15. Along the top center of the dash, remove the rubber tray, followed by the 7mm bolt.
16. Next, gently pull the dash out, ensuring the steering wheel column is lowered and the dash bezel safely clears over everything.
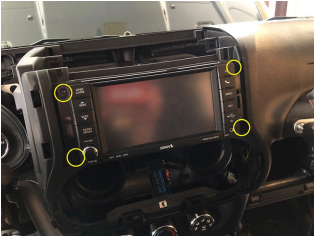
17. Remove the radio, by removing the (4) 7mm bolts along the side and then disconnecting the wiring harness from the radio.
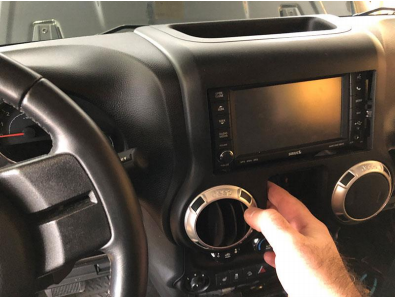
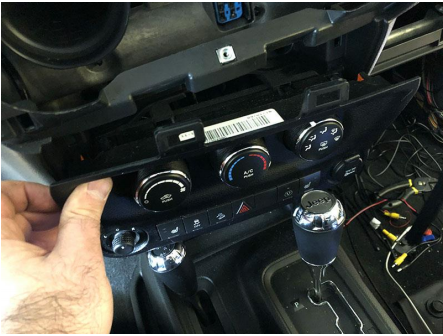
18. For power, the camera will utilize the wiring for the front cigarette lighter. To get access to the wiring harness, pull the climate control panel out.
19. Tap into the wires using (2) wire taps. Blue/red lighter wire = Red camera wire; Black/white lighter wire = Black camera wire.
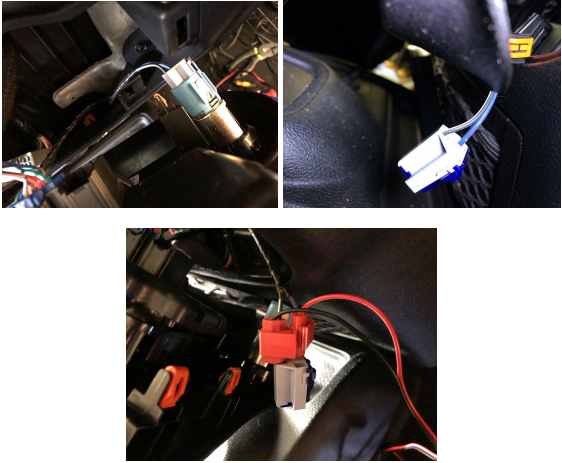
20. Connect the yellow RCA wire to the power terminal harness, then to the white harness into the back of the radio. Reconnect all the radio wiring and carefully slide back into place, ensuring that none of the wiring is pinched along the bracket.

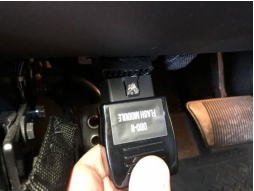
21. Next, reconnect the battery and turn the ignition switch to the ON position. Wait 10 seconds for the chimes to end. Connect the provided OBDII programmer to the OBD port. A series of lights will appear on the OBDII programmer and depending on the year of your Jeep, the horn will honk, or the radio will turn on/off when programming is complete. A green light on the OBDII programmer will also come on. Turn the ignition OFF, remove the programmer and start the Jeep, place in reverse to confirm that the back-up camera is working properly.
22. Finish the install by reinstalling all the panels in reverse order.
Installation Instructions Written by ExtremeTerrain Customer Louis Orellana 1/21/19

