 FREE 1 to 3-Day Delivery on Orders $149+ Details

How to Install Raxiom Flush Mount Dual LED Grille Lights on your 07-18 Jeep Wrangler JK; 2018 Jeep Wrangler JL
Tools Required
- Flat Head Screw Driver
- Drill & Drill Bits
- Socket and Wrench Set
- Tape Measure
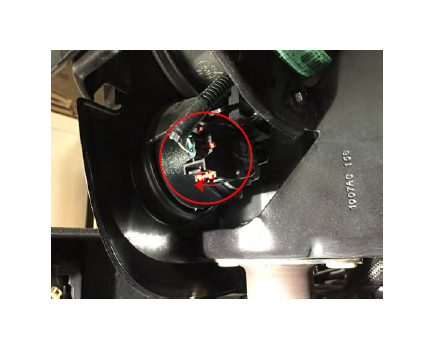
Step 1: Access the connectors on the rear of the turn signals from the wheel wells. The turn signal clips have a red locking tab, slide the locking tab out, then depress the clip to remove the signal plug.
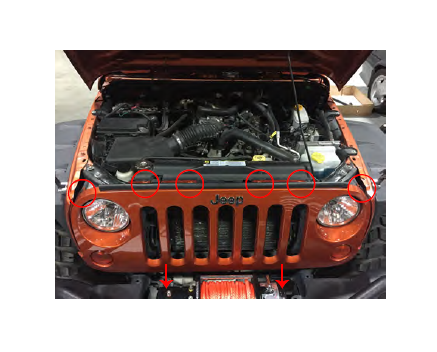
Step 2: Next, raise the hood to gain access to the (6) plastic push clips securing the factory grille to the vehicle. Using a trim removal tool, remove the (6) clips. Then firmly pull on the bottom of the grille to remove the grille from the vehicle.
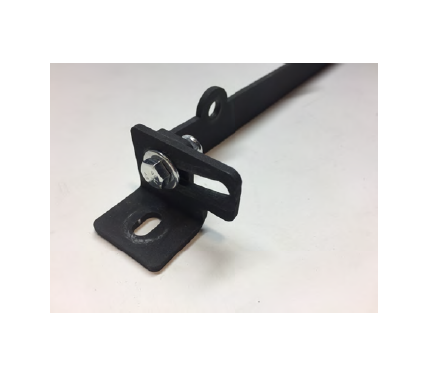
Step 3: Using the supplied 1/4" bolts, washers, and nuts, install the lower end brackets onto the lower center light bracket.
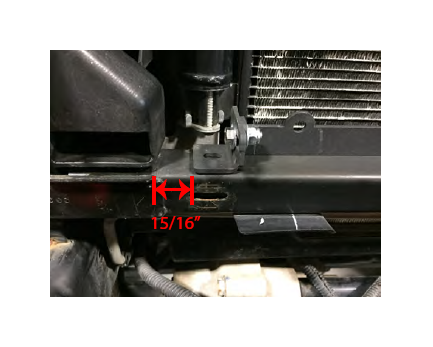
Step 4: Measure 15/16" from the frame rail tab to the outside of the lower end bracket. This will center the lower light bracket in the grille surround.
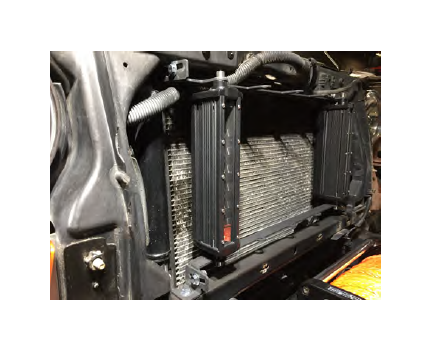
Step 5: With the brackets centered on the radiator support, mark the location and drill a 9/32" hole through the lower radiator support.
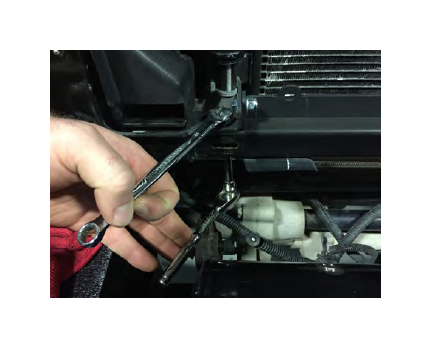
Step 6: Loosely attached the lower light bracket using the supplied 1/4" bolt, washers, and nuts.
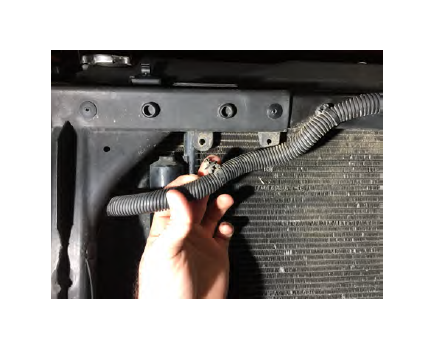
Step 7: Remove the wire loom clips from the upper radiator support.
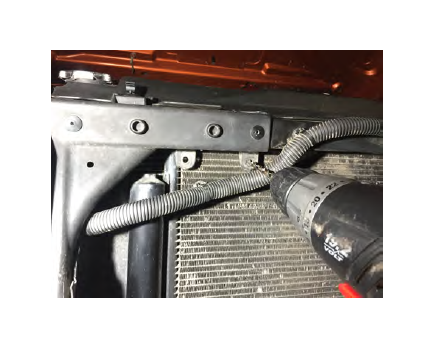
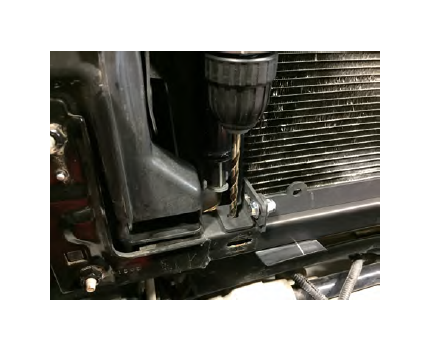
Step 8: If necessary, carefully drill the existing upper radiator support holes to 9/32".
**Note: Place a block of wood behind the holes will prevent you from accidently piercing the A/C condenser with the drill bit.
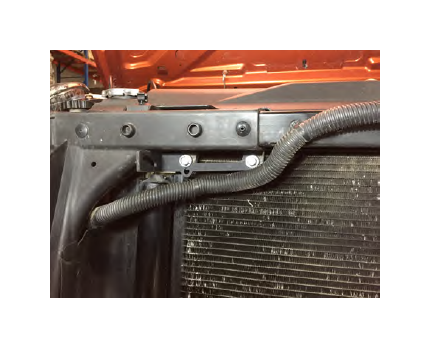
Step 9: Loosely install the upper end brackets using the supplied 1/4" bolts, washers, and nuts. The extra hole faces down, this is where you will reclip the factory wiring harness.
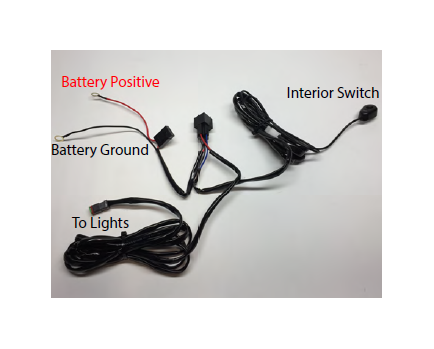
Step 10: Connect the supplied wiring harness to the LED lights. Connect the red eyelet to the positive battery terminal, and the black eyelet to the Negative terminal. Run the on/off switch to the passenger compartment using a suitable body grommet or by drilling your own hole. Zip tie the excess wire away from heat and moving parts.
Step 11: Turn on the lights and adjust them as desired. Then tighten any and all loose bolts.
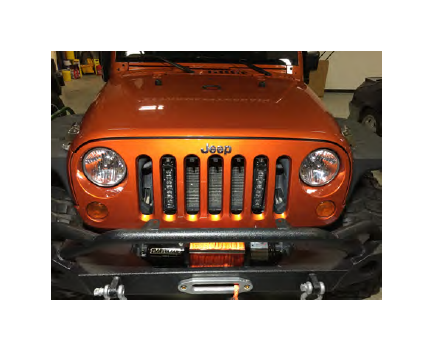
Step 12: Reinstall the grille using the factory clips, making sure to reconnect the turn signals.
