 FREE 1 to 3-Day Delivery on Orders $149+ Details

How to Install Rampage Replacement Soft Top w/Skins & Tinted Windows Khaki Diamond on your Wrangler
BEFORE INSTALLING:
To ease installation: Install the TOP when temperatures are above 70°F. The material shrinks substantially at lower temperatures, and may be more difficult to install. The TOP may have a wrinkled appearance when first installed. This is caused by the fabric becoming wrinkled in shipping. It will relax after a few days on the vehicle.
If there is currently a soft top on the vehicle, remove it, saving any hardware removed (screws). This should leave the bow assembly on the vehicle. Do not begin installation without a bow assembly!
NOTE: Before assembly, the owner may want to detach the window pieces to avoid scratching them. This merely requires pulling Velcro apart and unzipping.
INSTALLATION
1. Fold the bow assembly back and down.
2. Lay Replacement TOP in Jeep with inner side facing up with plastic strip (at front of Replacement TOP) at rear of Jeep.
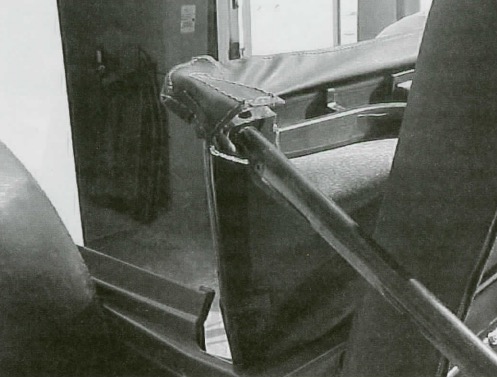
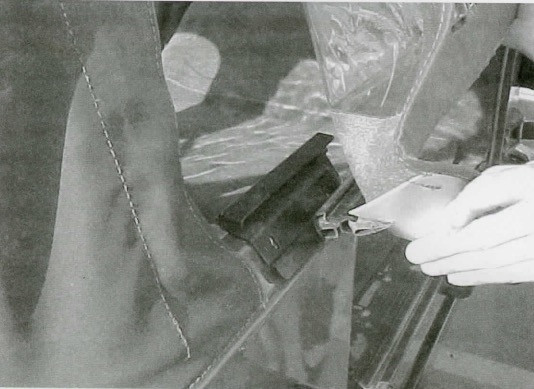
3. Pull plastic strip up onto bow assembly. Line up fourteen (14) holes in strip and frame. Attach strip to frame with 14 screws from removal of OEM soft top. (fig. 1)

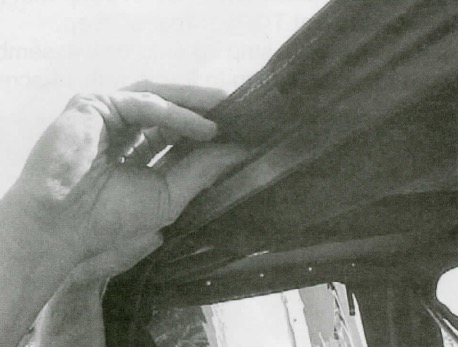
Fold the front corners of the Replacement TOP over the bow assembly. (fig. 2)
5. Flip the Replacement TOP up, over and out of the back of the Jeep.
6. Pull the front of the bow assembly (where the Replacement TOP is attached) forward.
7. Loosely latch the TOP at the front with the two (2) interior latches as follows: For each latch, push the handle up against the TOP and hold. Push the tab on the Latch arm forward into the slot in the Jeep frame. Release the Latch handle.
8. Use the snaps at the rear of the TOP to attach it to the bow assembly.
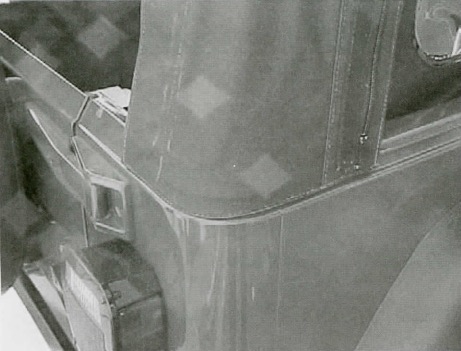
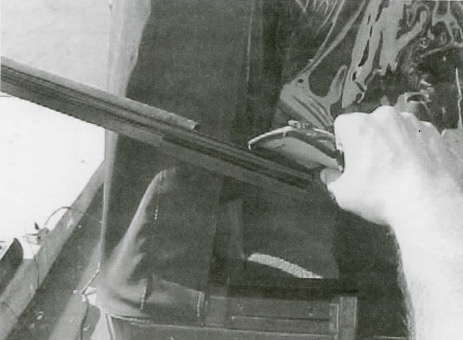
9. In the rear corners of the vehicle are horizontal slots. Push the hard lower edge of the TOP securely into them. (fig. 3)
10. If windows are detached, attach them now by zippering and Velcro'ing.
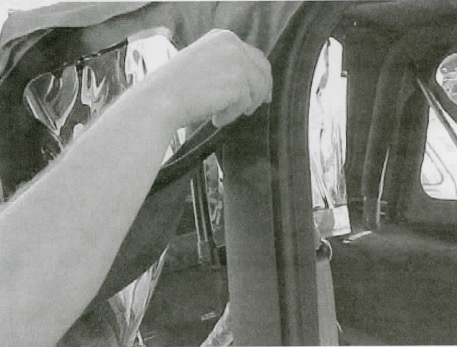
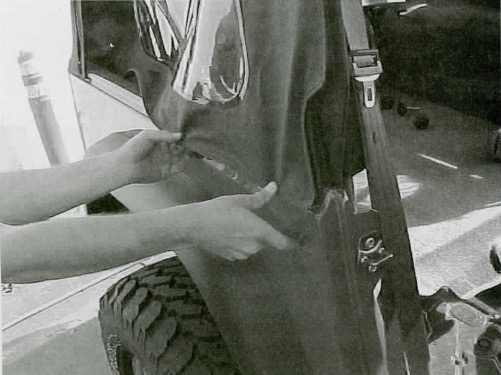
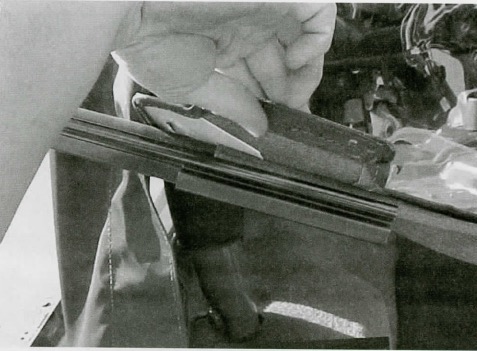
11. Starting at the top rear of either side door, insert the edge of the TOP into the groove on the door frame. (fig. 4) Working your way down, and then back toward the rear of the Jeep, continues pushing the TOP into the retaining grooves on the Jeep. (fig. 5) Repeat on other side of Jeep.
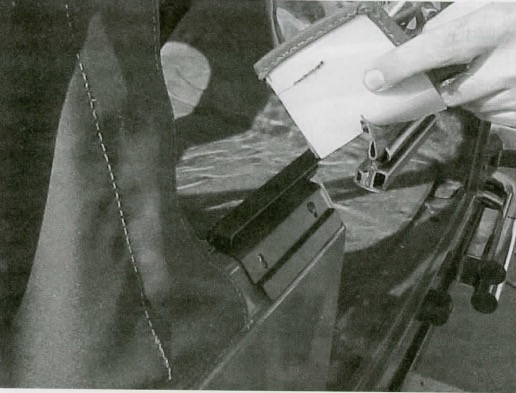
12. Above each door, push two (2) flaps on the TOP into the retaining grooves on the Jeep. (fig. 6)
13. At the rear of the Jeep, insert the edge of the TOP into a groove in the Factory Retaining Bar. Slide the Bar across the rear of the TOP, capturing its rear edge. (fig's. 7 and 8)
14. Rotate the bar downward and toward the vehicle until the rubber gasket on the bar is on top. (figs. 9 and 10) Push the Bar into the receiving channel in the brackets mounted on either side of the Jeep's rear door. Make sure that the Bar is secure.
15. Secure the front of the Replacement TOP by pulling the handles of the two latches from step 7 down until they touch the latch arms.
This completes the Replacement TOP installation.
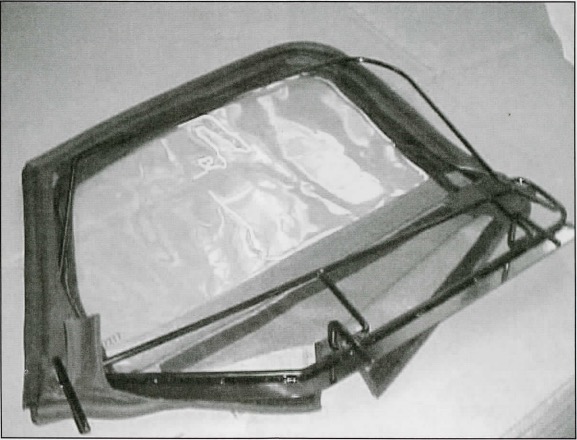
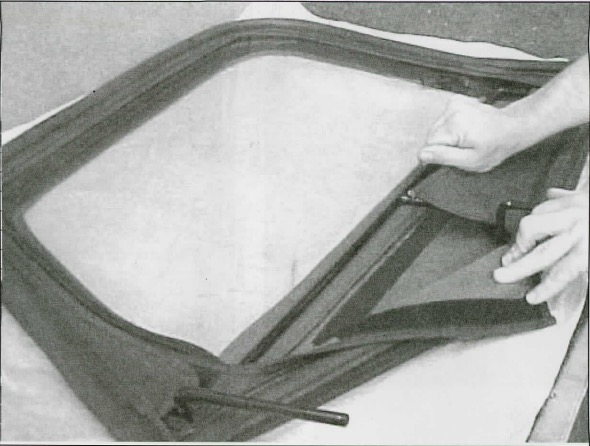
16. Lay the door skin on a clean flat surface and release the Velcro. Insert the front corner into the door skin moving clockwise. Once the frame is inside of the door skin, unzip window. This will make adjusting easier.
17. Pull bottom flaps up to meet Velcro. Now tighten the bottom Velcro to achieve the desired fabric-to-frame-to-retaining strip tension.
18. Install the upper door onto the vehicle door.
19. Now is the time to go back to all the screws and bolts securing the hardware to your vehicle and properly tighten them all. Loose bolts will keep the top from fitting properly.
