 FREE 1 to 3-Day Delivery on Orders $149+ Details

How to Install Poison Spyder Trail Stinger - Bare Steel on your Wrangler
APPLICATIONS
These installation instructions apply to the following Poison Spyder products:
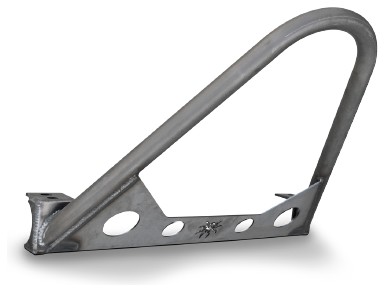
13-11-010 YJ Trail Stinger
13-12-010 YJ Comp Stinger
14-11-010 TJ Trail Stinger
14-12-010 TJ Comp Stinger
PARTS LIST
(1) Front Stinger (Trail or Comp)
BEFORE YOU BEGIN
The Poison Spyder Customs Front Stinger comes as un-painted, bare steel. You will want to either powder coat or paint the bumper prior to install. If painting yourself, careful preparation will make a big difference in the quality and longevity of your paint job, even using “rattle can” aerosol paints. Begin by thoroughly cleaning the Stinger with solvent or degreaser, then make sure all residue is removed. Even if you use cheap paint, try to use a good quality primer. “Etching” primers are best to use on bare, un-painted metal. Allow it to properly dry before paitning, and between paint coats.
INSTALLATION PROCEDURE
1. Park the Jeep on a flat, level surface and set the parking brake.
2. Remove existing front bumper. If it is still the OEM bumper and hardware, there are four bolts (two on the top and two on the bottom that hold the bumper in place). These will likely be Torx bolts, use a T55 torx bit.
3. Using the same hardware, install the Stinger Bumper in place of the bumper that was removed. Torque to OE specifications.
