 FREE 1 to 3-Day Delivery on Orders $149+ Details

How to Install Poison Spyder Body Mounted Rocker Knockers - Bare Steel on your Wrangler
Tools Required
- 1/2" open end wrench
- 7/16" open end wrench
- 7/32" hex key
- 5/32" hex key
- 1/2" drill motor
- 1/4" drill bit
- 7/16" drill bit
- 9/16" drill bit
- Anti-sieze compound
- Pneumatic or electric cut-off wheel, body saw or reciprocating saw (optional)
- Die grinder with 1/4" bit (optional)
- Touch-up paint (optional)
- Fine point felt tip marker
- Center punch
- Hammer
- Measuring tape
- 1/4" drive ratchet
- 10mm X 1/4" driver socket
- 13mm X 1/4" drive socket
- 7/16" X 1/4" drive socket
- 3" socket extension, 1/4" drive
Thank you for purchasing Poison Spyder Rocker Knockers for your Jeep JK. You now own the ultimate in rocker panel protection for your Jeep. If you purchased, the Slider option, these have already been welded to the Rocker Knockers and install in the same manner, with the few exceptions noted in the instructions. Installation is fairly simple with the right tools and good mechanical abilities. If you are not confident in your mechanical skills, please seek the help of a professional to perform the installation. Please read through these entire instructions before proceeding with installation.
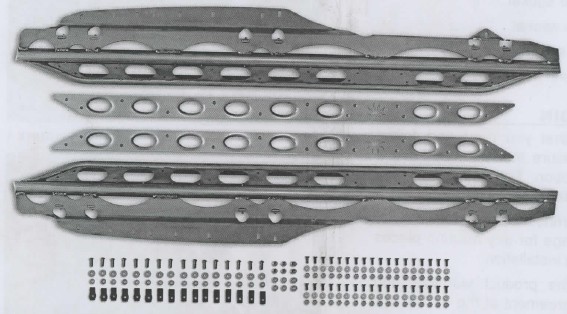
PARTS LIST
Please check your packages immediately upon arrival to ensure that everything listed is included, and to check for damage during shipping. If anything is missing or damaged, call Poison Spyder at (951) 849-5911 as soon as possible.
(1) Driver side JK Rocker Knocker
(1) Pass. side JK Rocker Knocker
(16) 3/8-16X1 SS button head socket cap screw
(16) 3/8 flat washer
(16) 3/8 split lock washer
(10) 3/8-16 U-nut clip "fat"
(6) 3/8-16 U-nut clip "skinny"
(12) 5/16-18 nylon insert lock nut (12) 5/16 flat washer
The following items are provided only for Rocker Knockers with Sliders. and vary by model: 2-DR 4-DR
(22) (28) 1/4-20X3/4 SS flat head cap screw
(22) (28) 1/4-20 nylon insert lock nut
(22) (28) 1/4 flat washer
BEFORE YOU BEGIN
• It is imperative that you read and follow instructions to ensure that you will have a successful installation. Failure to do so may result in an unsatisfactory installation.
• It is the purchaser/installer's responsibility to inspect the package for any missing pieces prior to beginning installation.
• Carefully read the product warranty and hold harmless agreement at the end of this document
• Read through instructions thoroughly before beginning installation.
INSTALL PREPARATION:
1. Park vehicle on a level surface and set the emergency brake. You will want to wear eye protection beyond this point in time.
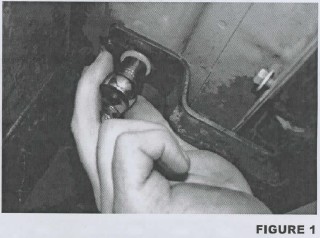
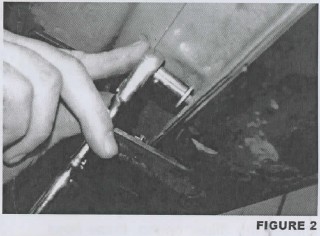
2. If your Wrangler is a Rubicon edition or it is equipped with rocker protection or steps, they will now need to be removed. Factory installed rocker protection is held on by:
a. 2-DR: four (4) nuts in the pinch weld and two (2) bolts that go into the bottom of the tub.
b. 4-DR: six (6) nuts in the pinch weld and three (3) bolts that go into the bottom of the tub.
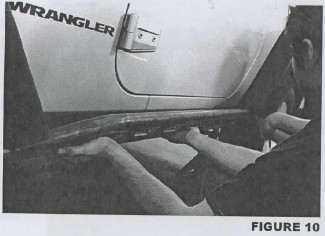
Using the 1/4" drive, 10mm socket and the 13mm socket remove the hardware that fastens the rocker protection to the Jeep. Do not discard the hardware as you will need it to reinstall the rockers. Remove the factory rocker protection from the Jeep by gently pulling it away from the tub. See figure 1, 2 and 3
3. Locate and remove the four (4) nut clips that are located under the Jeep (two on each side). These are what the OEM bolts threaded into. On 4-door models the rear-most bolt threads directly into the tub. Do not attempt to remove this nut insert!

INSTALLATION PROCEDURE
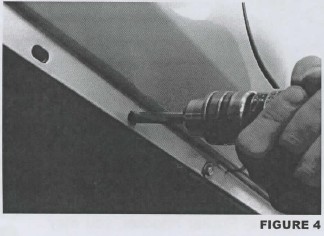
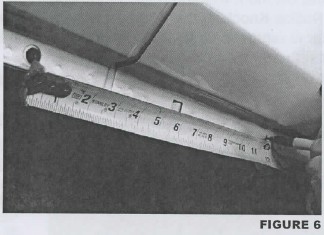
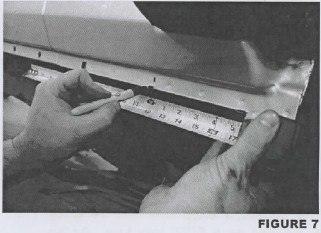
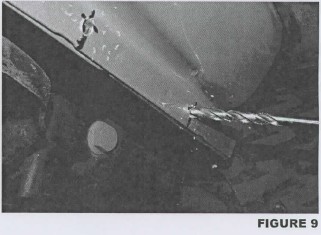
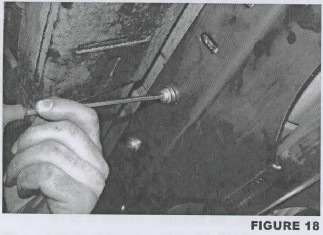
1. Starting with the drivers side, use the 7/16" drill bit to open up the existing holes in the pinch weld flange as shown in figure 4. There are four (4) of these holes on a 2-door JK, and six (6) on a 4-door. Use caution when drilling these holes-the material is thin and a bit this size can catch and distort the metal.
2. (2-door models only) Starting from the front of the Jeep, count backward to the fourth hole in the pinch weld flange.
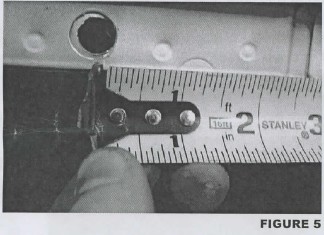
From the center line of the fourth hole, measure backward (toward the rear of the Jeep) 11-3/4" and mark a vertical line in the pinch weld flange.
From this mark, measure another 4-5/16" toward the rear of the Jeep and make another mark in the pinch weld flange.
Next, measure from the bottom edge of the pinch weld flange, at each vertical mark, and make a horizontal mark 5/16" up from the bottom edge.
You should now have two cross-marks on the pinch weld flange.
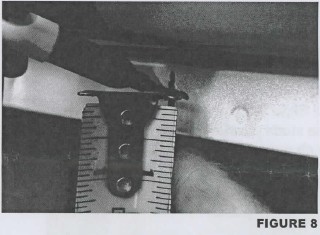
3. (2-door models only) Center punch and drill two 1/4" holes through the pinch weld flange, one at each cross-mark made in the previous step.
Use the 7/16" drill bit to open up the two holes. Use caution when drilling these holes as the material is very thin and a large drill bit can catch and distort the metal.
5. (Optional) Use the die grinder to elongate the holes in the pinch weld about 1/16" toward the front and back. The holes should now have the appearance of an oval. This step will make it easier to install and remove the Rocker Knockers.
6. If you are installing Rocker Knockers with Sliders, remove the dimpled panel at this time and set aside. For this you will need your 7/16" socket, 3" extension and 1/4" drive ratchet, as well as a 5/32" hex key. As an optional step to achieve a more unique look, you may paint or powder-coat these dimpled panels, in order to provide some additional color to your Jeep.
7. Have a helper assist you for the following steps. Hold the Rocker Knocker up to the rocker area of the Jeep, and carefully align the six (6) mounting studs of the Rocker Knocker with the six holes in the pinch weld seam. Slide the Rocker Knocker into place, with the studs protruding through the holes in the pinch weld flange.
8. With your helper applying pressure to the Rocker Knocker against the side of the Jeep, use a fine-tip felt marker to trace the six (6) elongated holes in the Rocker Knocker mounting flange under the Jeep.
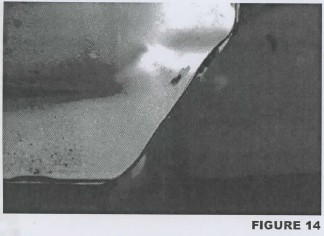
9. (Optional) For additional tire clearance at both ends of the Rocker Knocker, you may trim a small corner of the Jeep's body tub at either end of the Rocker Knocker. With the Rocker Knocker installed (it is temporarily installed at this time, it will be removed again before final installation), use a fine-tip felt marker to trace an angled cut mark on the corner of the body tub as shown.
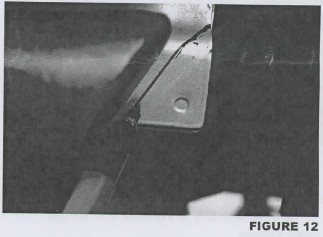
Align the cut mark with the angle of the end of the Rocker Knocker tube. After the Rocker Knocker is removed (in later steps), trim the corner with a pneumatic cut-off wheel, body saw or reciprocating saw.
Use a file to remove burrs, then apply some aerosol clear coat paint to the cut edge to prevent rust.
10. Remove the Rocker Knocker and set it aside. Center-punch and drill 1/4" holes at each of the ovals you traced into the underside of the Jeep in step 8. Then use the 9/16" drill to open the same holes further.

11. Use some aerosol clear coat or paint color of your choice to coat the cut edges of the drilled holes to prevent rust. Do this for the holes made in step 10 as well as those made earlier in the pinch weld flange in step 3.
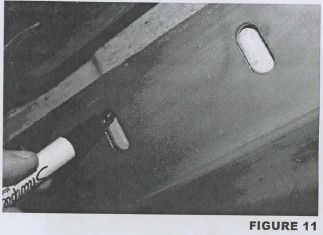
12. Locate the 3/8-16 U-nut clips that are supplied in the hardware kit. Note that some are flat along their edges while others are bulged. The flat-edged ones are referred to as "skinny" nut clips, while the bulge-edged ones are referred to as "fat" nut clips. For each side you will use three (3) skinny clips and five (5) fat clips. These nut clips will slip into the rectangular holes along the underside of the Jeep as shown in Figure 16, allowing the nut portion of the clip to locate at the round holes you just drilled adjacent to the rectangular holes.
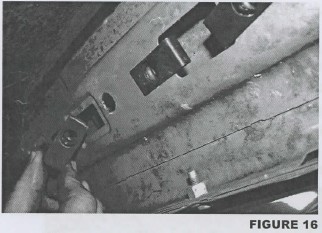
Note that some of the rectangular holes are narrower than others, specifically at the 4th, 5th and 6th bolt locations (counting back from the front of the Jeep). These are where you will use the "skinny" clips, while you will use the "fat" clips in the wider rectangular holes.
13. If installing Rocker Knockers with the optional Slider bar, re-install the dimpled panel that was removed in an earlier step. Used the 1/4-20X3/4 SS flat head cap screws, 1/4 flat washers and 1/4-20 nylon insert lock nuts that were included with the hardware kit. There will be 22 of each of these for 2-door JK's, 28 of each for 4-doors. Use the 1/4" drive ratchet, extension and 7/16" socket, along with the 5/32" hex key, to tighten these fasteners. CAUTION: hold the screw head stationary with the hex key as you tighten the nut with the ratchet. If you let the bolt head spin it may damage the paint or powder coat. Tighten these fasteners to 15 ft./lbs.
14. Reinstall the Rocker Knocker onto the Jeep, this time for final installation. Carefully align the studs with the mounting holes in the pinch weld flange, as before. Install a 5/16" flat washer and 5/16-18 nylon insert lock nut onto each of the Rocker Knocker's mounting studs, where they protrude through the pinch weld flange. Only finger-tighten the nuts at this time.
15. Insert a 3/8" SS button socket head cap screw with 3/8" split lock washer and 3/8" flat washer (in that order, under the head of the screw) through each of the eight (8) elongated holes in the Rocker Knocker mounting flange along the underside of the Jeep, and thread into the 3/8-16 U-nut clips previously installed at each location. Be careful not to strip the threads on the nut clips! It is sometimes necessary to "jiggle" the bolt and/or nut clip a little bit to properly align the threads. Only finger-tighten these screws at this time.
16. Use the 1/2" box end wrench to tighten the six (6) 5/16-18 lock nuts on the mounting studs that protrude through the pinch weld flange.
17. Use the 7/32" hex key to tighten the eight (8) 3/8-16X1 SS button head socket cap screws on the Rocker Knocker mounting flange along the underside of the Jeep.
18. Repeat the procedure for the passenger side.


