FREE 1 to 3-Day Delivery on Orders $149+ Details

How to Install Poison Spyder BFH II Rear Crossmember w/ Hitch - Bare Steel on your 07-18 Jeep Wrangler JK; 2018 Jeep Wrangler JL
Tools Required
- Reciprocating saw with bi-metal blade OR pneumatic cutoff wheel OR plasma cutter OR similar tool for cutting metal
- Welder
- Mechanic’s tool set with an assortment of wrenches, sockets, etc.
- Angle grinder
- Light-color fine-tip felt marker or scribe
- Primer and paint

Shop Parts in this Guide
APPLICATIONS
These installation instructions apply to the following Poison Spyder products:
PARTS LIST
Please check your packages immediately upon arrival to ensure that everything listed is included, and to check for damage during shipping. If anything is missing or damaged, call Poison Spyder at (951) 849- 5911 as soon as possible.
BEFORE YOU BEGIN
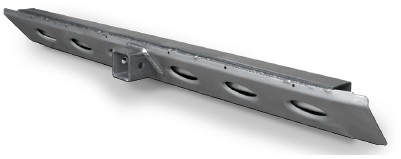
NOTE: The JK BFH II Rear Crossmember may be installed by itself and used as a “minimalist” high clearance bumper, or a Poison Spyder JK BFH II Rear Bumper may be installed over it. Procedures for installing the bumper are not covered here-they are provided with the bumper.
This item comes as unpainted, bare steel. You will need to paint the crossmember after installation.
IMPORTANT: The reciever tube built into part number 17-17-030 is not rated for towing on public highways. Do so at your own risk. It is provided as a convenience for short non-highway tasks such as launching a boat or moving a trailer on private property. Most standard reciever hitches will not fit through the reciever tube without being shortened.
INSTALLATION PROCEDURE
1. Park the Jeep on a flat, level surface and set the parking brake. You will want to wear eye protection beyond this point in time.
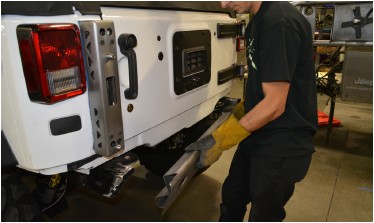
2. Remove existing rear bumper. If a JK BFH II Rear Bumper will be installed after installing the crossmember, keep the OE hardware that attached the bumper to the frame rails, as some of it will be re-used.
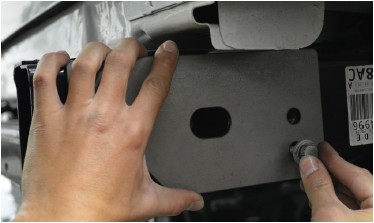
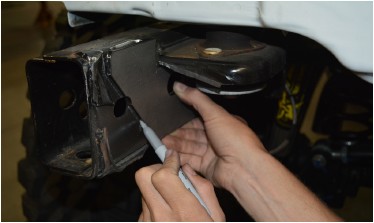
3. Attach the provided JK BFH II Rear Frame Cut Template (laser cut from steel plate) to the side of the frame rail, using two of the OE bumper bolts as shown in the following photo. Make sure that the template is exactly aligned with the frame rail as the bolts are tightened. In other words, the top and bottom edges of the template must be parallel with the top and bottom of the frame rail.
4. Use a light-colored felt-tip marker or scribe to mark a cut-line along the diagonal edge at the rearward end of the cut template.
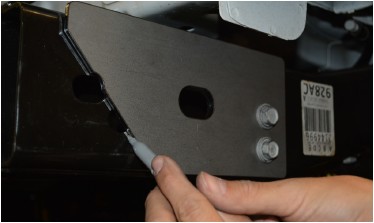
5. Continue marking the cut-line over the top surface of the frame rail. Use a square to ensure that the cut-line is exactly perpendicular to the outer edge of the frame rail.
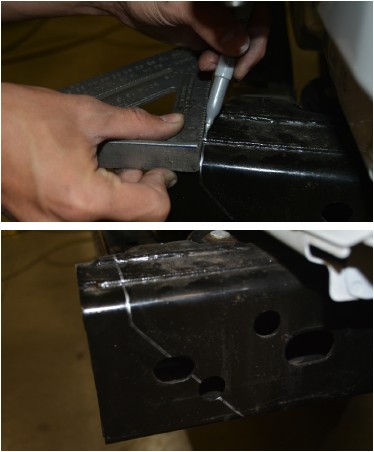
6. Repeat the cut-line marking process for the other frame rail.
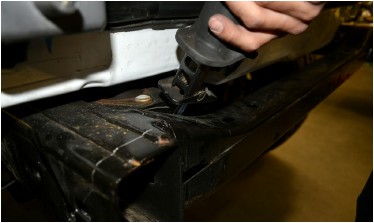
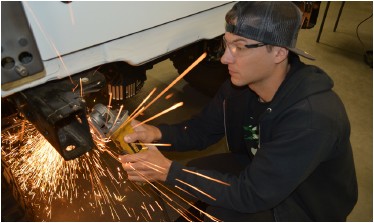
7. Use a torch, plasma cutter, pneumatic or electric cutoff wheel, reciprocating saw, or the cutting device of your choice to cut the rear crossmember out from between the frame rails.
8. Note that the rear-most body mounts attach to the rear crossmember on either side. A cut will have to be made along the seam where they join, to separate the crossmember from the body mount. Cut away only the crossmember-LEAVE THE BODY MOUNT IN PLACE.
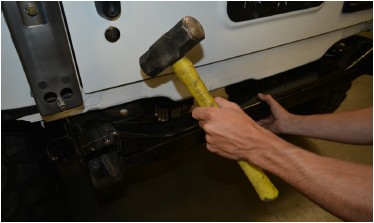
9. Some gentle persuasion with a Big Freakin’ Hammer might be needed to coax the final separation of the crossmember from the Jeep’s frame.
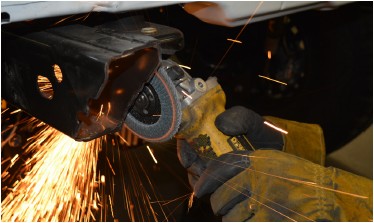
10. With the crossmember removed, use a grinder to remove any remnants of the crossmember and smooth out the surface of the frame rail where the crossmember had been attached.
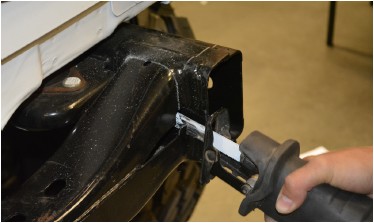
11. Re-use the steel Cut Template to make the cut-lines on the inboard side of each frame rail. There are no bolt holes on the inboard side, but the template can be manually aligned with the oval-shaped hole and the hole that slightly intrudes into the diagonal cut line. Also, ensure that the template is once again parallel with the frame rail, and even with the perpendicular cut-line that was made across the top of the frame rail in earlier steps.
12. Use a reciprocating saw or cut-off wheel to cut each frame rail along the cut-lines made in the previous steps. For the bottom of the frame rail, simply cut across perpendicularly between the diagonal cuts on both sides.
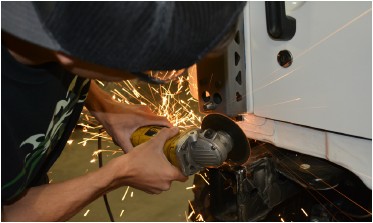
13. Once the cuts have been made and the trimmed pieces removed, de-burr the edges with a grinder or flap wheel.
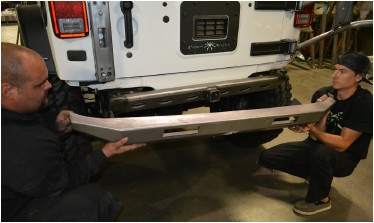
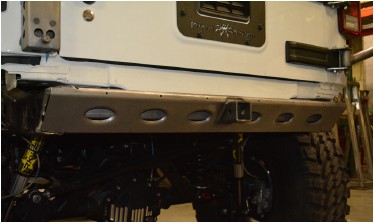
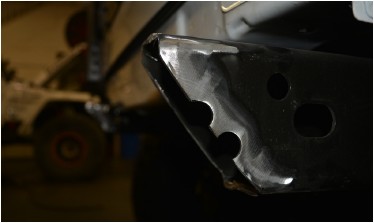
14. Test-fit the JK BFH II Rear Crossmember to the ends of the frame rails. It should extend over the cuts on each side, to the outside of each frame rail.
15. Some additional grinding may be needed to achieve a perfect fit. The crossmember will be welded to the Jeep’s frame rails at every seam and joint, so the pieces must be closely fitted to achieve the best results. Lay a straight-edge across the tops of the frame rails in order to make sure the crossmember is exactly straight in relation to the frame. The top surface of the crossmember must be parallel to the top surfaces of the frame rail, both side-to-side and front-to-back.
16. Once the crossmember is properly fitted, use a scribe or light colored fine-tip felt marker to mark around the ends of the crossmember where it joins into the inboard side of each frame rail. Once this is done, remove the crossmember and use a grinder or flap-wheel to remove all paint, undercoating, oil and other residue from the area to be welded along the line that was made. Also grind or sand away paint and residue from the cut ends of the frame rails where the crossmember will be welded.
17. Re-position the crossmember, again checking for straightness in relation to the Jeep’s frame, and tack into place. After a final check that it is straight and plumb, fully weld around all seams and edges where the crossmember meets the frame rails.
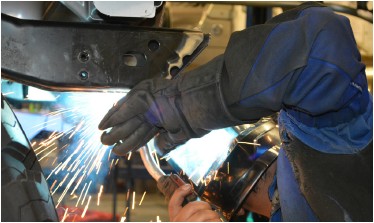
18. Once the welds have cooled, primer and paint the bare steel crossmember as well as any sanded or cut areas of the frame. If painting yourself, careful preparation will make a big difference in the quality and longevity of your paint job, even using “rattle can” aerosol paints. Begin by thoroughly cleaning the bumper with solvent or de-greaser, then make sure all residue is removed. Even if you use cheap paint, try to use a good quality primer. “Etching” primers are best to use on bare, unpainted metal. Allow it to properly dry before painting, and between paint coats.
Congratulations, you have installed your Poison Spyder Customs JK BFH II Rear Crossmember! You may now either use your Jeep with only the Crossmember as a “minimalist” bumper, or you may proceed with installation of the Poison Spyder JK BFH II Rear Bumper!