 FREE 1 to 3-Day Delivery on Orders $149+ Details

How to Install PIAA LP530 3.5 in. LED Fog Lights (10-18 Wrangler JK) on your Jeep Wrangler
Installation Time
2 hours
Tools Required
- Ratchet with 15mm & 18mm socket
- Medium Philips Screw Driver
- Wire Cutters
- Medium Flat Head Screw Driver

CONTENTS
A. 530 LED Driving Lamps (2)
B. Lamp Mounting Bracket (2)
C. Wiring Harness (1)
D. Hardware Pack (1)
HARDWARE
1. ½” metal screw (8)
2. ½” Lock Washer (8)
3. ½” Washer (8)
4. Screws (4)
5. One-Touch Connector
6. Switch
7. 5” Wire Ties (5)
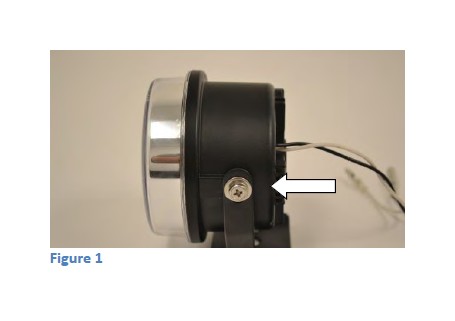
1. Remove the stock PIAA bracket that comes on the LP530 LED’s with
a screwdriver. Image #1
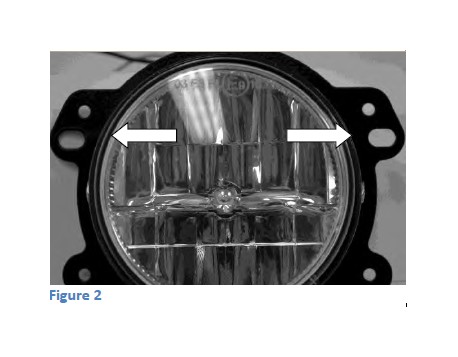
2. Use existing hardware and install new supplied Jeep bracket onto
PIAA LP530 lamps. Make sure that portion of the bracket with two
holes is at the top of the PIAA lamp.(note: at this time the lamp depth
should be set. Notice the holes in the bracket are slotted for front to
back movement. The lamp should be installed to the furthest forward
point for best fitment but tolerances will vary on vehicles. Properly
tighten the hardware to the lamps; you will be able to aim the lights by
hand after wiring and installation.)Image #2
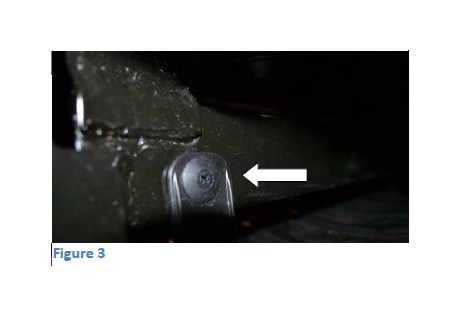
3. Remove the plastic push pins from the top bumper protector and the
bottom plastic skid plate. Image #3
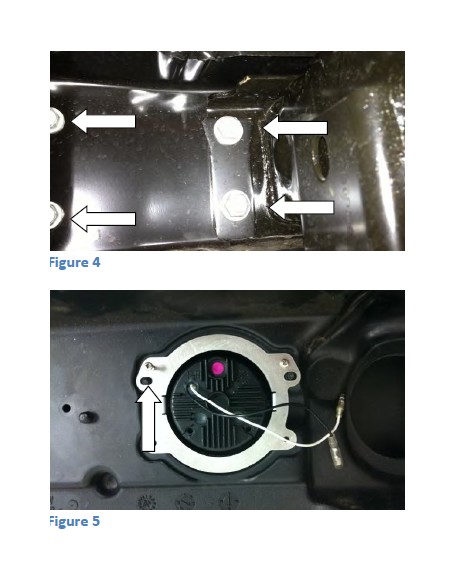
4. Use a 15mm socket to remove the 2 outer bolts on each side of the
metal bumper brace (Image #4). Also remove the 8 inner bumper
mount nuts using the 18mm socket, and remove the metal plates
and unplug the factory fog lights and remove the bumper.
5. With the bumper removed from the Jeep you can now remove the
metal brace and install the PIAA lamps. Using supplied hardware (1/2”
metal screws ) install the lamps and brackets as shown. Make sure
you install the bracket with the two holes towards the top of the
bumper. *Do not over tighten the screws, as they are going into
plastic. Image #5
6. When the lights are properly mounted into the bumper you can now
re-install the metal bumper brace and bumper to the vehicle with the
bolts you removed in step 4.
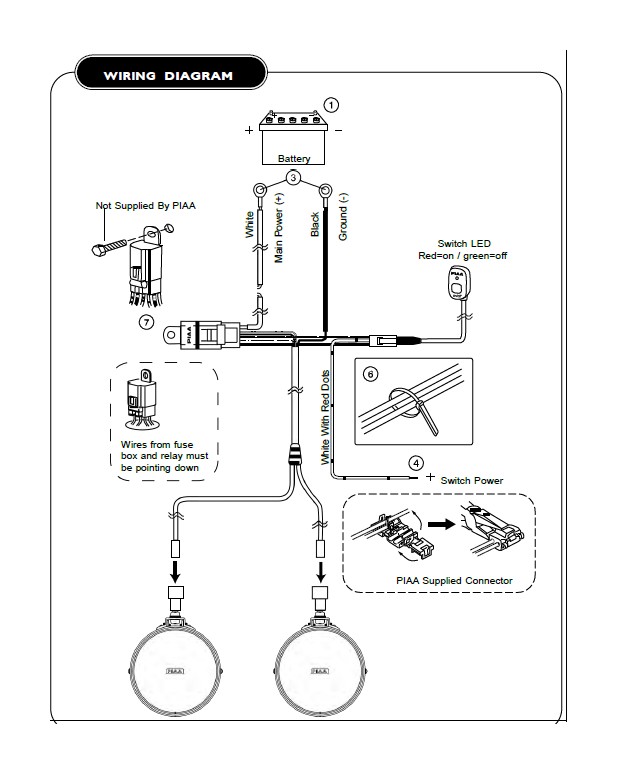
7. Now you are ready to wire the lamps, see page 4.
8. After wiring you can now aim the lamps while they are in the bumper.
In step 2 you should have tightly secure the lamps to the bracket but
you can still adjust the lamps up and down slightly. Refer to page 5
for lamp aiming guide.
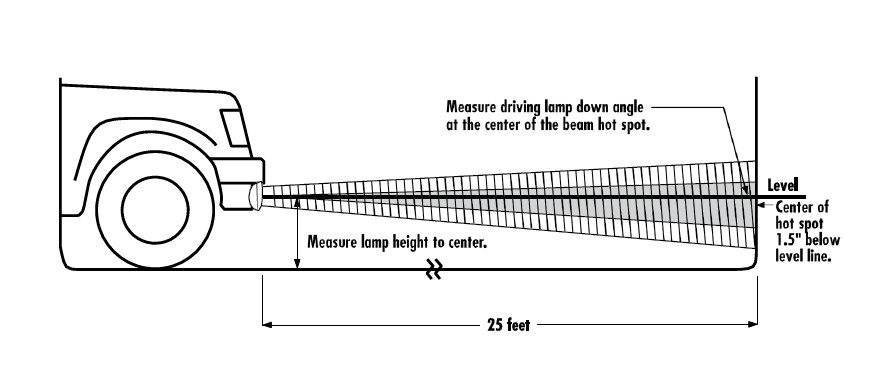
DRIVING LIGHT AIMING
Visual aim is made with the center of the beam hot spot 1.5 inches below the lamp center at 25 feet with the lamp facing straight forward. (see below.)
CAUTION:
Do not use driving lights into oncoming traffic.
Driving lights should never be the only foreword light source.
Driving lights should only be used with the headlamp high beams.

