FREE 1 to 3-Day Delivery on Orders $149+ Details

How to Install Olympic 4x4 57 in. Rock Rear Bumper w/ Hitch - Textured Black (97-06 Wrangler TJ) on your Jeep Wrangler
Installation Time
1 hours
Tools Required
- 1/2" or 3/8" drive ratchet wrench
- Socket sizes: 5/8", 11/16"
- Combination wrench sizes: 5/8", 11/16"
Instructions for 1997 to present Wrangler 553-12X

Step 1. Remove OEM bumper to expose rear cross member. See photo 1.
Step 2. Install the mounting brackets on the bumper bottom with the angle sides facing towards each other. Use 7/16" hex head bolts and 7/16" flange nut to secure the mounting brackets to the bumper. Use a 5/8" wrench. Do not fully tighten down these nuts and bolts; they only need to be snug enough for the flange nut to grab the bumper.
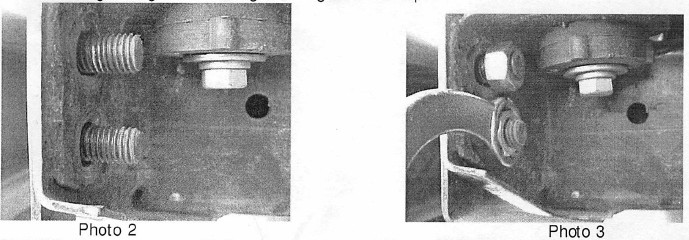
Step 3. Position bumper so that the threaded bolts that are welded to the bumper install through the rear cross member on your jeep. Secure the bumper to the cross member using flat washers and 7/16" Nylock nuts on the threaded bolts that are welded to the bumper. Do not fully tighten these bolts. See photos 2&3.

On some model jeeps the passenger side may not have the 2" mounting hole for the rear mounting bracket. This will not dramatically affect the strength of the bumper.
Step 4. Install a 7/16" hex head bolt through the oblong access hole on the side of they ehicle frame and down through the hole in the bottom of the frame next to the oblong access hole and then through the mounting bracket. Secure with a 7/16" flange nut. Do not fully tighten at this tine. Photos show how to install the bot and the second photo shows the bolt installed through the bottom of thef rame. See photos 4&5. On 2003 and newer jeeps you will reuse the factory bolts that hold on your bumper and tow hook that run along the bottom of the frame. You will skip this step and not use the hardware provided for attaching on the driver side bumper mounts. Passenger side bumper mounts will use one OEM bolt similar to step 5 and one of the 7/16" hex head bolt as assembled in step 4.
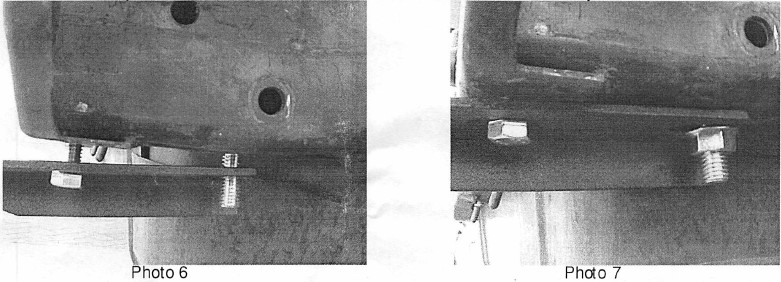
Step 5. Install a 7/16" hex head bolt through the mounting bracket and into the hole in the bottom of the frame that has a nut welded inside the frame. Securely tighten these bolts, and then securely tighten all other nuts and bolts you installed. You will use a lock washer then a flat washer before inserting the bolt through the mounting bracket and into the frame. See photos 6&7.
Step 6. After 500 miles or first off-road trip re-check tightness on all nuts and bolts. You may want to use a penetrating grade Ioc-tite that can be applied after all hardware has been re-torqued. This will help prevent the hardware from becoming loose.
Instructions for 1988-1995 Wrangler YJ 553-11X
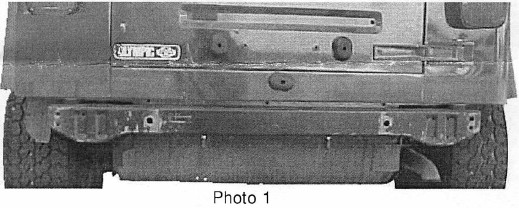
Step 1. Remove OEM bumper to expose rear cross member. See photo 1
Step 2. Install the mounting brackets on the bumper bottom with the angle sides f acing towards each other. Use 7/16" hex head bolts and 7/16" flange nut to secure the mounting brackets to the bumper. Use a 5/8" wrench. Do not fully tighten down these nuts and bolts; they only need to be snug enough for the flange nut to grab the bumper.
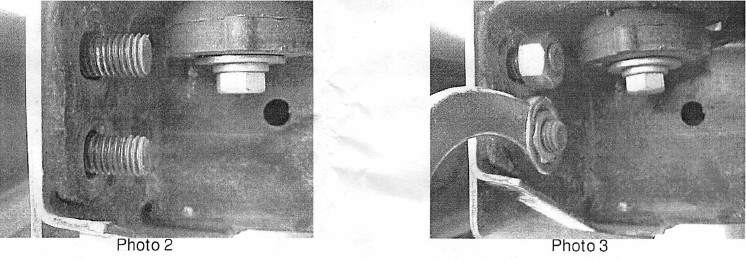
Step 3. Position bumper so that the threaded bolts that are welded to the bumper install through the rear cross member on your jeep. Secure the bumper to the cross member using flat washers and 7/16" Nylock nuts on the thread bolts that are welded to the bumper. Do not fully tighten these nuts. See photos 2&3.
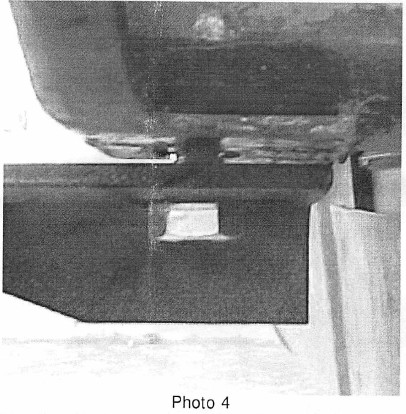
Step 4. Photo 4 Install a 7/16" hex head bolt through the mounting bracket and into the hole in the bottom of the frame that has a nut welded inside the frame. You will use a lock washer then a flat washer before inserting the bolt through the mounting bracket and into the frame. Securely tighten these bolts, and then securely tighten all other nuts and bolts you installed. See photo 4.
Step 5. After 500 miles or first off-road trip re-check tightness on all nuts and bolts. You may want to use a penetrating grade loc-tite that can be applied after all hardware has been re-torqued. This will help prevent the hardware from becoming loose.
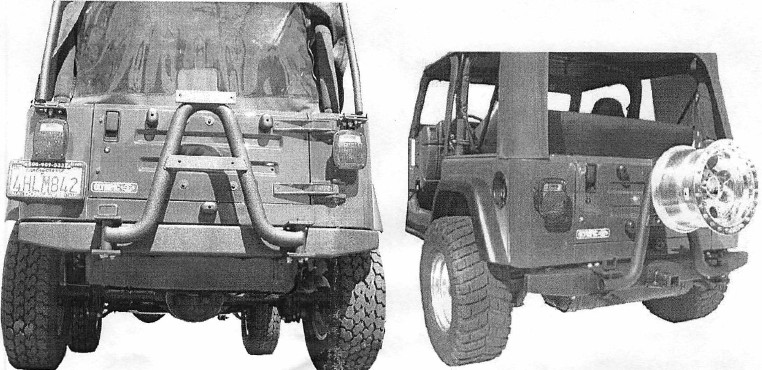
Note: You can also add Olympic's 700-tire swing to your new rock receiver rear bumper. The 700-tire swing holds up to a 37" tire.