 FREE 1 to 3-Day Delivery on Orders $149+ Details

How to Install Off Camber Fabrications by MBRP Rock Rail Kit - LineX Coated on your Wrangler
PLEASE READ BEFORE STARTING INSTALLATION
While MBRP Inc. has made every effort to ensure that all components of this kit are of superior quality and properly packaged, it is the installer's responsibility to ensure the following before starting:
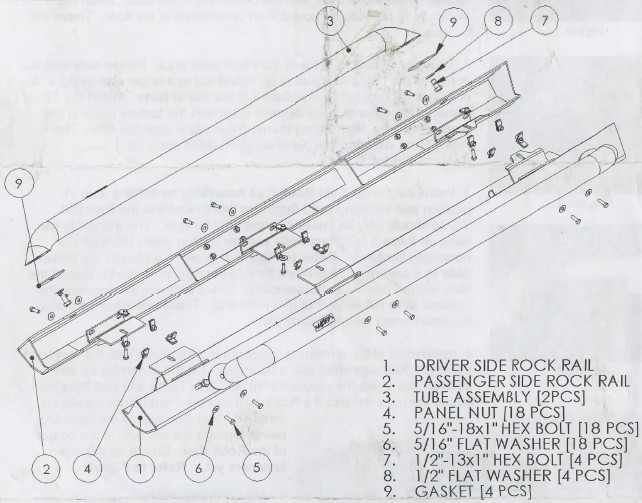
• that ALL components shown above are present.
• that ALL mating components fit together.
• that there are no damaged components.
• that the kit you have purchased is appropriate for your year and model of vehicle.
• that the kit will not interfere with any modifications previously installed or planned.
• that you have read and understand these instructions.
If you have any questions or are uncertain about any aspect of the installation of this kit on your vehicle please contact your dealer before commencing installation.
2007-2009 Jeep JK Rock Rail Kit
1. Remove the factory installed rock rails by removing the fasteners located at the pinch weld, and the underside in the floor. Keep the 6 fasteners [3 per side] removed from underneath in the floor. These will be reused.
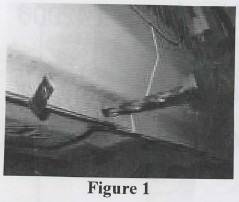
2. There are 6 factory holes in the pinch weld area. Please note that a couple of the holes will need to be drilled out to a larger size using a 1/2" drill bit to accommodate installation of the Panel Nuts. Install the 12 Panel Nuts [6 per side] by aligning them with the factory holes in the pinch weld area, then sliding them up into place over the hole. The Panel Nuts will snap into place when installed correctly. Refer to Figure 1.
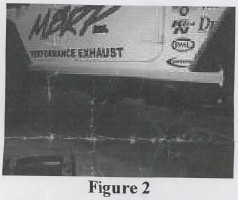
3. Install the Driver Side Rock Rail Assembly by holding it up in position and installing the 3 fasteners that thread into the floor first. These should only be installed finger tight for now. The assembly can hang on these 3 fasteners while you are getting ready to install the remaining hardware. Refer to Figure 2. Note: To identify the Driver Side vs Passenger Side Rock Rail Assembly, note the location of the Nuts welded into the rail assemblies. These nuts are for mounting the optional Step Kit #0130715 [not included]. These holes will be below the doors when mounted correctly.
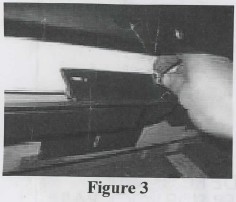
4. Installation of the remaining fasteners is a lot easier with the weight of the Rock Rail supported with a floor jack. Lift the assembly up into position and using the supplied 5/16"x1" Hex Bolts and Flat Washers, thread the bolts through the Rock Rail into the Panel Nuts previously installed. You can access the mounting points through the cut-outs in the bottom of the Rock Rail. Do not tighten the fasteners yet. Refer to Figure 3.
5. With all the fasteners installed finger tight, confirm there is no risk of interference with the body/ frame. If everything is ok, tighten all the fasteners.
6. Follow the same steps for installation of the Passenger Side Rock Rail.
Congratulations! You are finished.

