 FREE 1 to 3-Day Delivery on Orders $149+ Details

How to Install Off Camber Fabrications by MBRP Front Full Width Winch Bumper w/ Formed Light Bar on your 07-18 Jeep Wrangler JK; 2018 Jeep Wrangler JL
PLEASE READ BEFORE STARTING INSTALLATION
While MBRP Inc. has made every effort to ensure that all components of this kit are of superior quality and properly packaged, it is the installer's responsibility to ensure the following before starting:
• that ALL components shown above are present.
• that ALL mating components fit together.
• that there are no damaged components.
• that the kit you have purchased is appropriate for your year and model of vehicle.
• that the kit will not interfere with any modifications previously installed or planned.
• that you have read and understand these instructions.
Removing the OEM Bumper
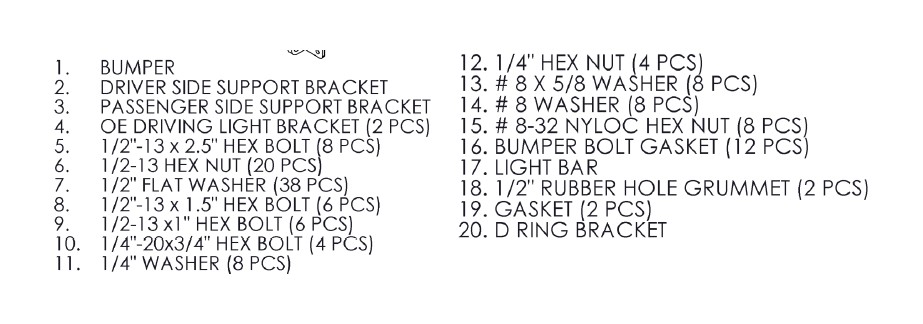
1. Remove the OE [Original Equipment] splash guard by removing the push
rivets. Refer to Figure 1.
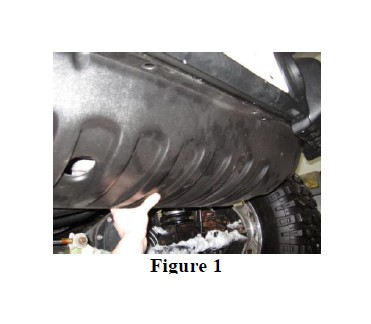
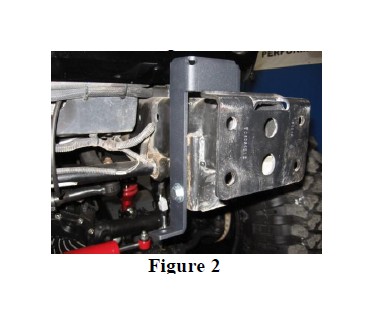
2. Remove the OE bumper by first unplugging the driving lights and then unclipping the wiring harness from the bumper crash bar. Then remove the eight nuts located on the frame horns. Once the eight nuts are removed, remove and retain the four backer plates. The bumper assembly will slide off. Remove the OE driving lights from the OE bumper. Refer to Figure 2.
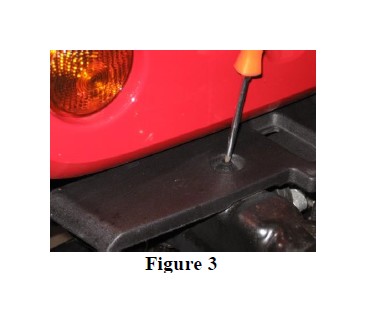
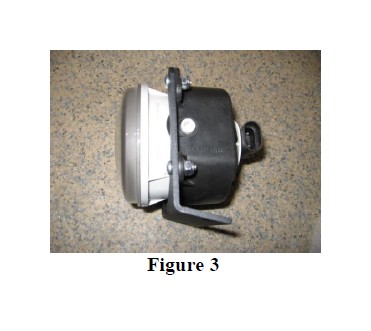
3. Remove the two push rivets from the plastic filler panel between the OE bumper and the grill using a Phillips screwdriver to remove the core, and then pulling the rivets out. The core may spin without backing out. If this happens, try to pry up on the head of the rivet with a flat screwdriver while unscrewing the core. This will help the rivet pinch the threads of the core allowing removal. Once the rivets are out, remove the panel. This panel will not be reused. Refer to Figure 3.
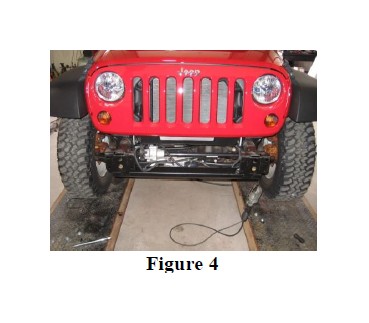
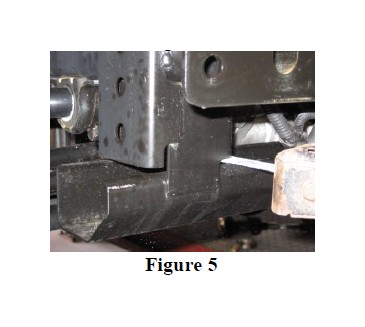
4. The crossbrace connecting the LH and RH frame horns needs to be removed to provide clearance for the Bumper. Separate the crossmember using a sawsall or similar tool to cut the tabs as shown at each frame horn. Use a grinder to smooth the cut edges and seal with paint. Refer to Figures 4 and 5.
Installation of the Bumper Combo Kit
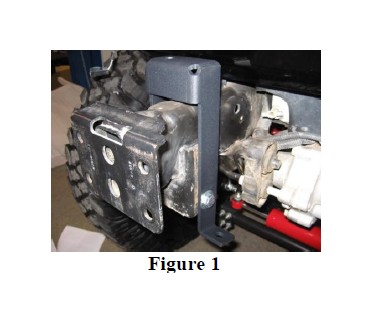
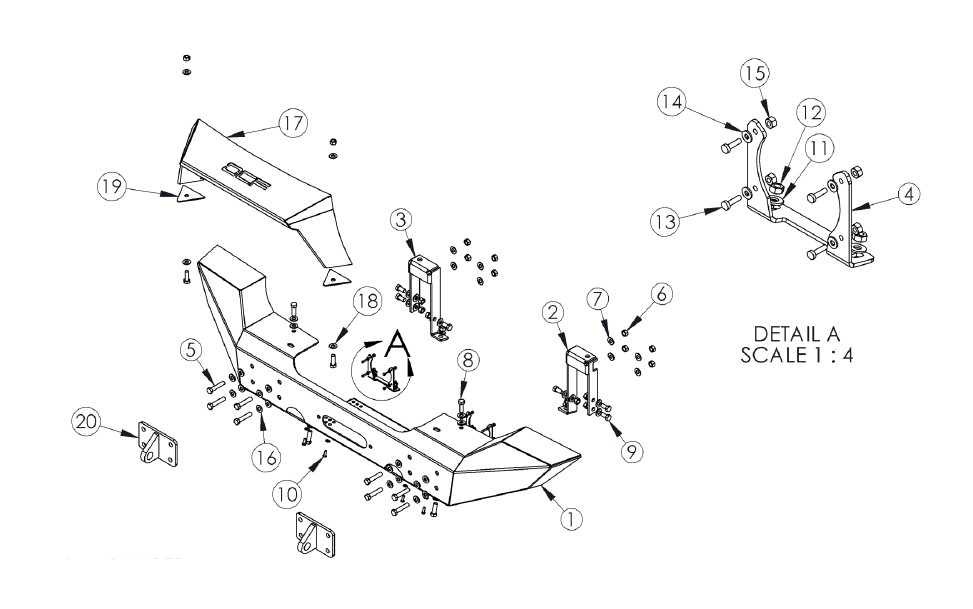
1. Install the Driver and Passenger Support Brackets as shown above with the supplied 1/2”x1” Hex Bolts, 1/2” Washers, and 1/2” Hex Nuts. The brackets must be installed exactly as shown with the lower tab facing the center of the vehicle and the open area at the upper through hole facing rearward. If the brackets are installed backwards the lower tabs will not line up with the lower face of the Bumper. Leave all fasteners loose enough to allow adjustment of the brackets in the following steps.
Refer to Figures 1 and 2.
NOTE: On ‘11 Jeeps, the upper outboard mounting hole for the Frame Brackets is not present. Position the Frame Brackets on the Frame and secure with the 2 mounting holes that do line up. Drill the 3rd hole with a 1/2” drill bit and secure using the supplied hardware.
2. Mount both of the previously removed OE Driving Lights into the supplied OE Driving Light Brackets using the supplied #8x5/8” Machine Screws, #8 Washers, and #8 Nyloc Nuts. Refer to Figure 3.
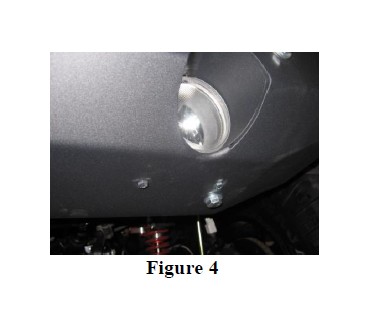
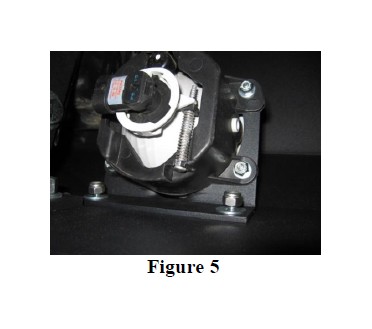
3. Install both OE Driving Lights into the Bumper using the supplied 1/4”x3/4” Hex Bolts, 1/4” Washers, and 1/4” Hex Nuts. Refer to Figures 4 and 5.
Install light bar on bumper. Refer to Figure 6
NOTE: If you plan to wire up lights, The Wiring can be hidden by drilling the top face of the bumper to allow the wiring to pass through from inside the Light Bar.
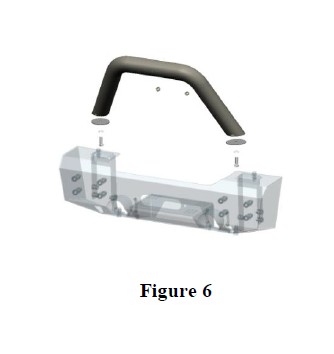
4. Loosely Place the two Gaskets between the Light Bar and the top face of the bumper.
5. While holding the Light Bar in position on the bumper, install the supplied %” Hex Bolts, and %” Washers from the underside of the bumper and thread them into the Light Bar.
6. Align the profile of the Gaskets with the Light Bar tube and tighten the fasteners.
7. Install the Grommets into the wiring holes on the Light Bar.
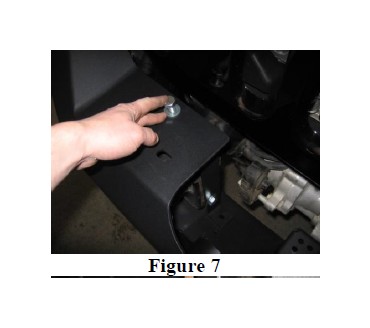
8. With help from a friend, install the Bumper onto the Jeep by sliding the assembly onto the frame horns and over both Driver and Passenger Support Brackets. The assembly can be temporarily pinned in place by installing the two %”x1.5” Hex Bolts with %” Washers and Bolt Gaskets through the top surface of the Bumper into the Driver and Passenger Support Brackets. Some alignment of the brackets may be required.
Refer to Figure 7.
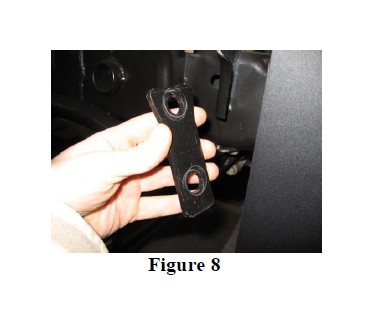
9. Install the remaining fasteners to secure the Bumper starting by inserting the eight %”x2.5” Hex Bolts, %” Washers and Bolt Gaskets through the D Ring Brackets then the front face of the Bumper. Secure on the backside by first reinstalling the OE backing plates (Refer to Figure 8) followed by the supplied %” Washers, and %” Hex Nuts. Leave the fasteners loose. Do not tighten yet.
10. Install the two supplied %”x1.5” Hex Bolts, %” Washers, and Bolt Gaskets in the lower face of the Bumper. These bolts will pass through the lower tabs of the Driver and Passenger Support Brackets. Some alignment of the brackets may be required. Secure with the supplied %” Hex Nuts and %” Washers.
10. secure the two %”x1.5” Hex Bolts and %” Washers installed in Step 8
using the supplied %” Hex Nuts and %” Washers. Once all mounting fasteners
are in place, tighten all 1/2” fasteners to 60 ft-lbs in the following sequence.
- 8 bolts in the front face of the Bumper.
- 2 bolts in the top face of the Bumper.
- 2 bolts in the bottom face of the Bumper
- 6 bolts connecting the Driver and Passenger Support Brackets to the Frame.
11. Reconnect the Driving Light wiring and secure to prevent chaffing of the wiring.
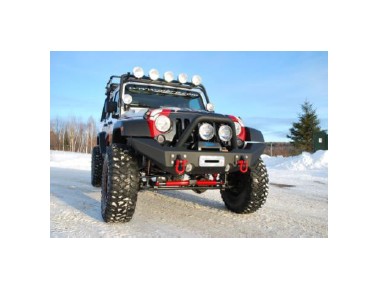
Congratulations! You are finished. We are sure that you will enjoy This Off
Camber Fabrications product by MBRP Inc.

