

How to Install a Mishimoto Aluminum Performance Radiator on your 1987-2006 Jeep Wrangler YJ & TJ
Tools Required
- Ratchet and Extension
- 10mm Socket
- Flathead Screwdriver
- Channel Lock Pliers
- Teflon Tape
- Coolant Drain Pan
- Coolant
- Coolant Funnel
- Pliers

Shop Parts in this Guide
PARTS LIST
01PC | MISHIMOTO RADIATOR
01PC | MISHIMOTO RADIATOR CAP
06PC | TRANSMISSION LINE FITTINGS (3 SETS OF 2)
DISCLAIMER
- Mishimoto Performance is not responsible for any vehicle damage or personal injury due to installation errors, misuse, or removal of MP products.
- MP always suggests that a trained professional install all MP products.
- Refill coolant system with 50/50 coolant, unless specified by the manufacturer.
- Do not run the engine or drive the vehicle while overheating. Serious damage may occur.
INSTALLATION INSTRUCTIONS
01 | REMOVING THE OEM RADIATOR
1. Make sure the vehicle is in park and the negative terminal of the battery has been disconnected. Remove the coolant drain plug located beneath the radiator under the vehicle. No tools will be necessary as the drain plug is a twist-off butterfly plug. Drain all coolant from the vehicle using a drain pan to catch all used coolant. Removing the radiator cap will aid in the draining process.
2. Using a flathead screwdriver, remove the overflow hose from the filler neck of the radiator.
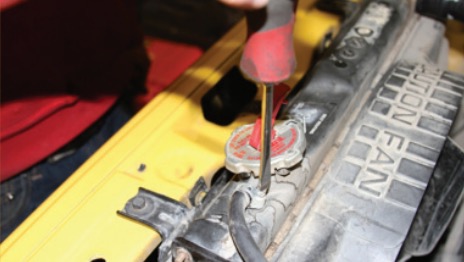
3. Remove the radiator overflow bottle by pushing on the round tab in the middle and pulling upwards.
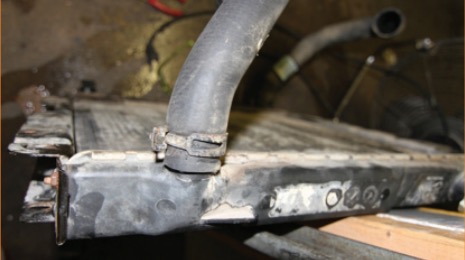
4. Using your hose clamp pliers or channel lock pliers, disconnect and remove the upper radiator hose. (Radiator removed for better visibility.)
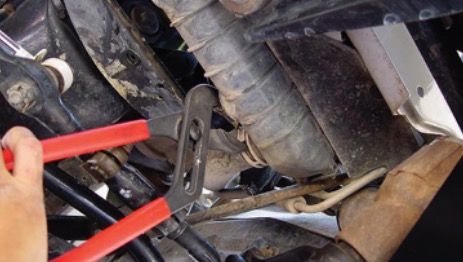
5. Using your hose clamp pliers or channel lock pliers, remove the lower radiator hose from the vehicle. (Note: For automatic transmission vehicles, you must remove the two transmission cooler lines at this time. Place a drain pan below as fluid may leak once the lines are removed.)
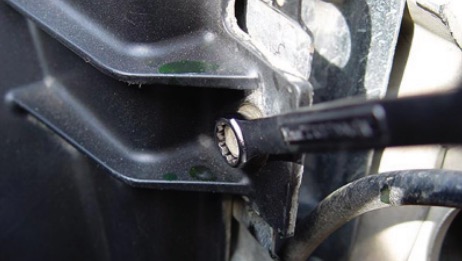
6. Using your 10mm socket or wrench, remove the four 10mm bolts securing the fan shroud to the OEM radiator. Allow the shroud to rest on the fan at this time.
01 | REMOVING THE OEM RADIATOR CONTINUED
7. Remove the six 10mm bolts (three on each side) securing the OEM radiator and differential breather hose to the vehicle.
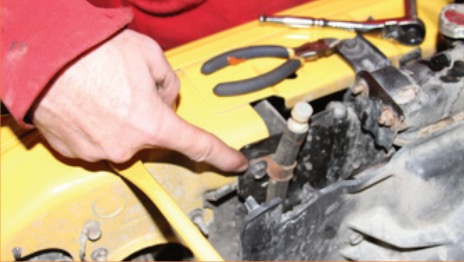
8. You will be able to pull the OEM radiator out of the vehicle at this point.
02 | PREPPING THE MISHIMOTO RADIATOR FOR INSTALLATION (For Automatic Transmission Vehicles)
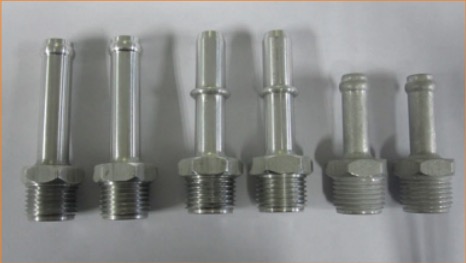
1. Locate the proper Mishimoto transmission line fittings for your vehicle. Using Teflon tape, install the fittings into the threaded ports on the bottom of the Mishimoto radiator. (Note: For 97-06 vehicles, it is necessary to bend back the tab on the passenger side of the Mishimoto radiator.)
01 | INSTALLING THE MISHIMOTO RADIATOR
1. Lower the Mishimoto radiator into the vehicle and secure it, utilizing the six 10mm bolts you previously removed.
2. Reinstall the OEM fan shroud, reusing the four 10mm bolts previously removed.
3. Reinstall the OEM lower radiator hose using the OEM spring clamps you previously removed.
4. Reinstall the OEM lower radiator hose. (Note: For automatic transmission vehicles, install the previously removed OEM transmission lines onto the fittings you installed on the Mishimoto radiator reusing the OEM spring clamps.)
5. Reinstall the coolant overflow reservoir tank and reconnect the coolant overflow hose to the Mishimoto radiator using the OEM worm clamp.
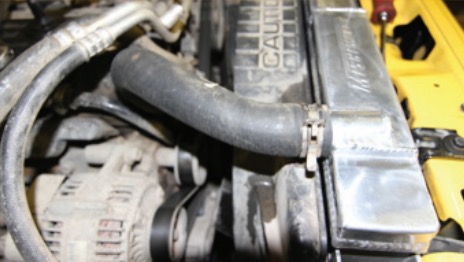
6. Ensure that the Mishimoto magnetic drain plug is tight. Reinstall and tighten the negative terminal of the battery. Remove radiator cap, fill cooling system with a 50/50 mix of coolant and distilled water, check for leaks, and bleed out air by turning the vehicle on and squeezing the upper and lower radiator hoses. Reinstall radiator cap once bleeding process is complete.
For automatic transmissions: At this time, check transmission fluid level and condition. Add or replace fluid if necessary.
Color and condition guide for automatic transmission fluid:
Clean, uncontaminated fluid has a pinkish or reddish color. Fluid that has been overheated turns dark brown or black.
A white, milky appearance can mean engine coolant is leaking into the transmission.
04 | PROCEDURE FOR CHECKING FLUID LEVEL WITH A DIPSTICK (All Transmissions)
1. The Transmission temperature must be between warm and hot.
2. The vehicle must be level. With the engine running, switch on the air conditioning. This will increase the idle speed and ensure that all oil passaged in the transmission are filled with oil.
3. Step on the brake firmly, apply the parking brake fully, and move the selector level through each gear position, pausing briefly in each gear.
4. Pull out the dipstick, check fluid level, and wipe clean with a lint-free cloth.
5. Add fluid as needed. Be sure to check both temperatures if your dipstick is marked with a "warm" and "hot" level.
