 FREE 1 to 3-Day Delivery on Orders $149+ Details

How to Install a Lifetime LED Light Bar Grill Mount, 21 in. on your 2007-2017 Jeep Wrangler JK
WARNING
Please be advised that state and local laws are different from state to state and some may require that off-road or additional lights be at certain heights, and be covered when on paved roads. Please know and abide by your local laws. Strike Force Zebra is not liable for the use or misuse of you new light mount. Drive safely, read and understand all manufacturers warnings and product instructions before installation and use.
This and all ACME Manufacturing products are intended to provide added “off-road” convenience and utility to your vehicle. Please use safely and wisely.
1. Open your hood and remove the (6) plastic bolt inserts that hold the plastic grill in place.

2. Remove the turn indicator lights from both sides (left/right).

3. Remove the grill by gently pulling the lower section away from the front of your JK. This will release the snap inserts and free the grill.

4. Remove the plastic bolt type inserts that hold the air blocking rubber type panels from each side (push the panels back to reveal the holes.)
5. Using a drill and a 25/64 (can use a 3\8 size bit) bit to enlarge the holes to fit the threaded nutsert.

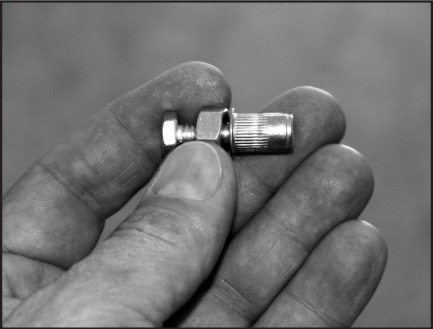
5.1 Use the 1/4-20 one inch bolt and the 5/16 nut as a poor man’s nutsert tool to mount the 1/4-20 nutsert
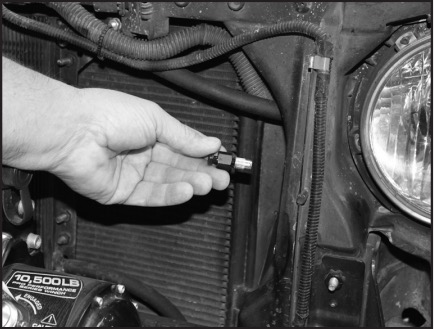
6. Insert the nutsert into the hole that was enlarged in step 5. Tighten down until it is snug or tight within the hole. (hold the 5/16 nut with an open end wrench while using a xxxxxxx socket to tighten the nutsert into the hole.
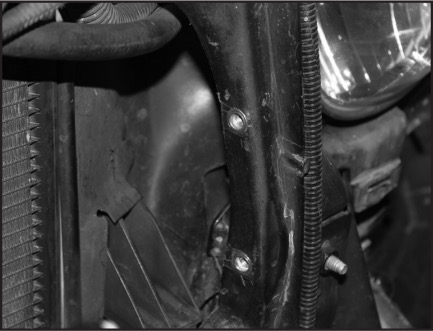
6.1. The finished install of the nutserts.
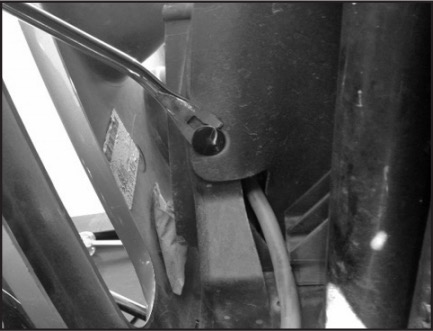
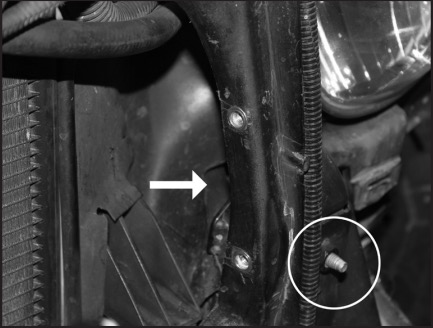
7. See the circle, using a 1/2 wrench, remove the mounting bolt from behind the grill mounting area.
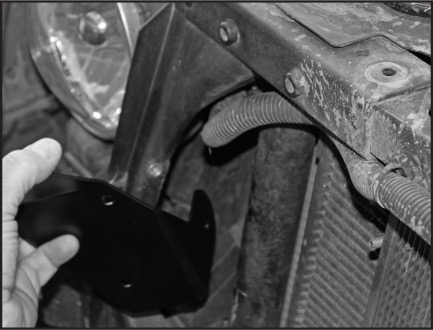
8. Slide mounting brackets into place, insert and hand tighten the bolt (do not tighten all the way down yet).
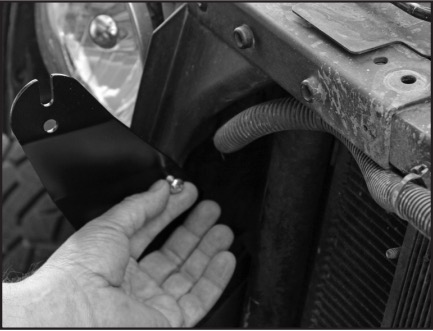
9. Insert the 1/4-20 Phillips head bolts through the mounts and into the nutserts installed earlier (do not tighten all the way down yet).
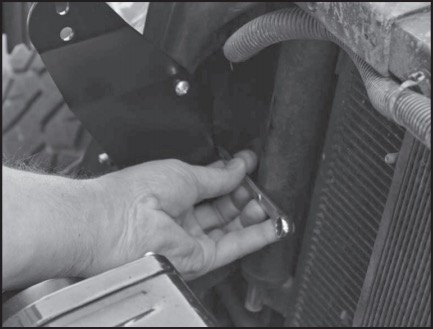
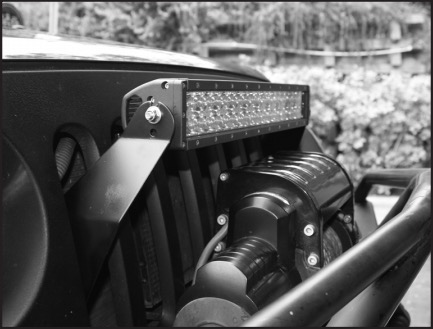
10. Place your LED light bar onto the brackets and adjust the brackets to make the level.

Once level, tighten all the bolts (1/2 bolt from behind the grill area and the Phillips head bolts on the side of the bracket).
11. Remove the LED light bar and replace the grill by sliding the grill over the brackets and onto the JK. Push in the lower snap pins and replace the upper plastic bolt inserts removed in step 1.

12. Replace the turn indicator lights into both sides (left/right).

13. Install your LED light bar and complete the wiring as required.
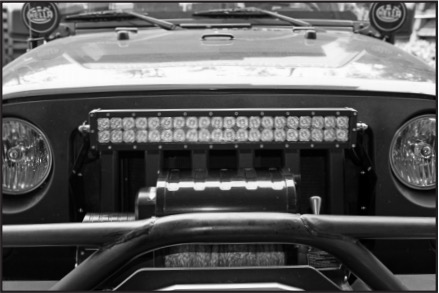
The finished unit now on your JK.
If you get a chance, please post a review and a picture of your install on the various forums and on our Facebook page.
www.facebook.com/strikeforcezebra.com
For assistance, please contact us at 661-310-7829
24307 Magic Mountain Parkway, Unit 425, Valencia, CA 91354
www.strikeforcezebra.com ★ [email protected]

