 FREE 1 to 3-Day Delivery on Orders $149+ Details

How to Install JMS PedalMax Drive by Wire Throttle Enhancement on your 12-18 Jeep Wrangler JK; 2018 Jeep Wrangler JL
Included in the PedalMAX kit:
(1) PedalMAX assembly
(1) 4-pin RED de-sensitizing throttle plug
(2) Cable ties
(1) Small Screwdriver
Please read the complete installation instructions before attempting to install this product. PedalMAX will increase the torque and responsiveness of the OEM drive-by-wire throttle assembly. The PedalMAX unit is designed to be mounted inside the vehicle cabin, under the dash near the accelerator pedal position sensor. PedalMAX should not come into direct or prolonged contact with water or extreme engine heat ( 250F).

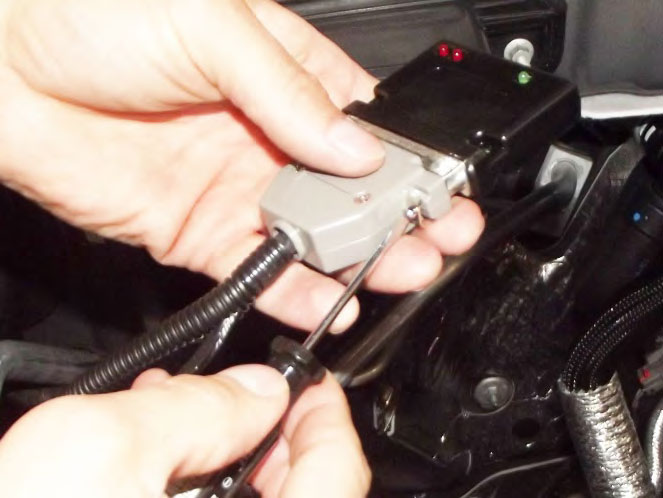
Connect the Assembly: Attach the black PedalMAX device to the wiring harness.
Plug it into the 25-pin connector and secure it with the two small screws. Use the supplied screwdriver.
Important: Disconnect the negative terminal of the battery before installing this product. If you do not disconnect the battery the factory computer will not learn the correct starting pedal position.
Step 1: Locate the pedal position sensor assembly. It is located on the top of the accelerator pedal.
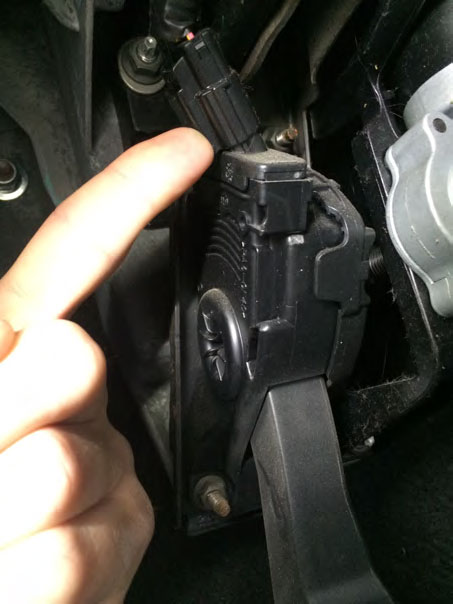
Step 2: Unplug the wiring harness from the pedal position sensor.
Note: To separate the connector from the sensor: press the black tab down to remove the connector.
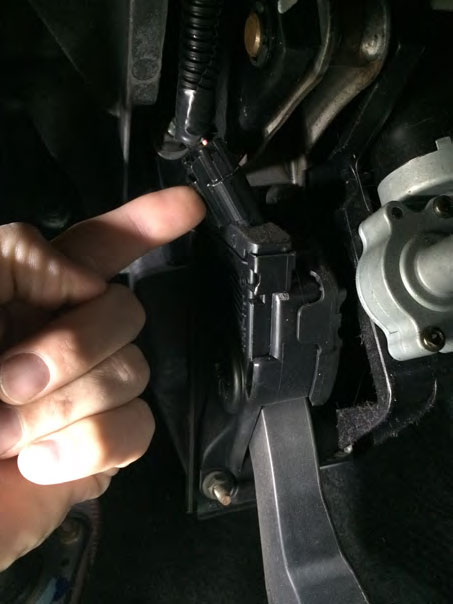
Step 3: Plug the PedalMAX device in-line between the pedal position sensor and OE wiring harness by connecting the male and female PedalMAX connectors to the Original Factory connector and sensor.
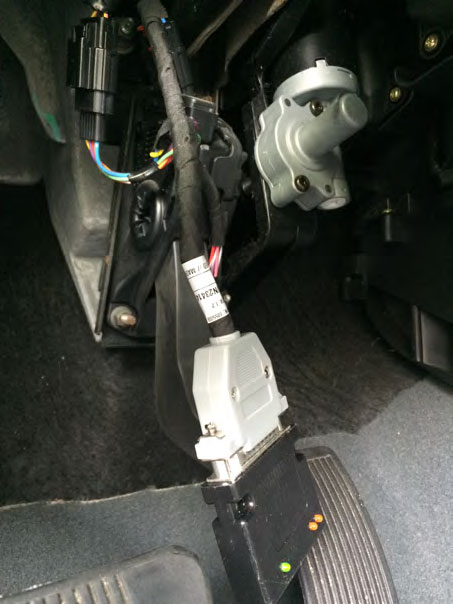
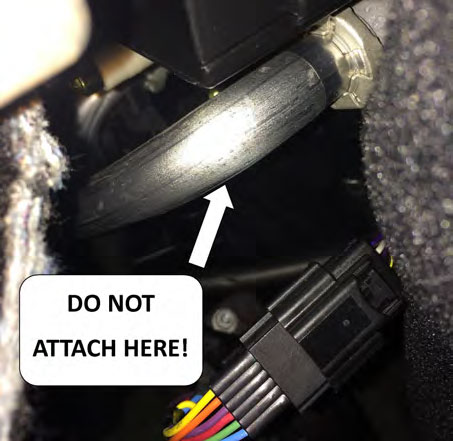
Step 4: Secure the PedalMAX unit using the (2) supplied cable ties. The device should not be hanging loosely or unsecured. Do not attach or mount to any moving assemblies such as the steering column. Do not attach or mount to the air conditioning return line shown in the image, this line is extremely hot under operating conditions!
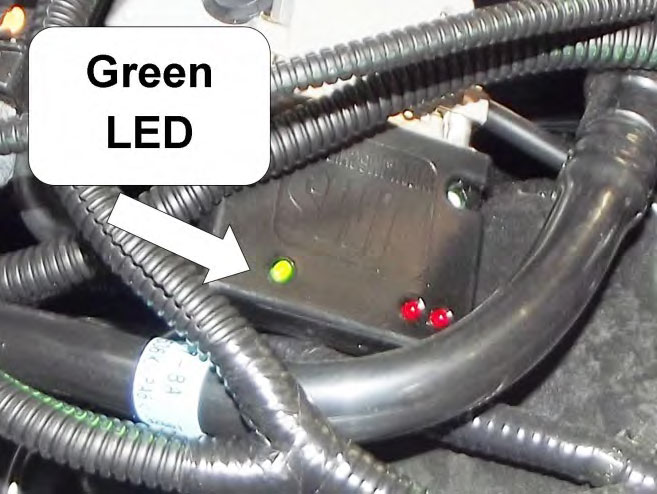
Step 5: Test the device – Once the device is installed and secured, insert the ignition key, and start the vehicle. Let the vehicle idle, and look at the device to make sure the green LED is illuminated, which alerts you that the device is active and functioning.
Step 6: Test drive the vehicle – Drive the vehicle under normal conditions. You should notice a significant improvement in throttle responsiveness and acceleration.
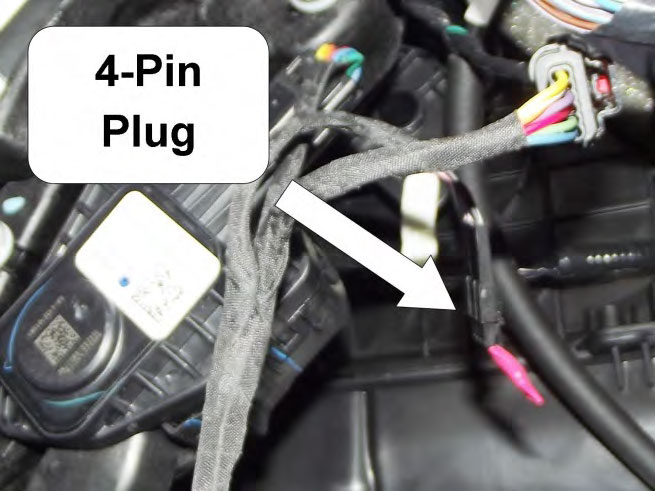
RED Plug: The PedalMAX device is pre-configured to provide the maximum increase in throttle response. If this amount of increase is too aggressive for your driving style, you can connect the supplied 4-pin RED de-sensitizing plug into the 4-pin connector on the device. The RED de-sensitizing plug will decrease the amount of increased throttle response to about 60% of the maximum setting for a less-aggressive response.
Notes and Troubleshooting:
• Check Engine Light - If you experience a check engine light and have no pedal response after starting the vehicle immediately following installation, and the green LED is illuminated, turn the key back to the off position, remove the ignition key and restart the vehicle after waiting 45 seconds. If you have a key fob: make sure that the vehicle is off and that the dash lights are off for at least 45 seconds. When you restart the car this should eliminate the check engine light and restore the pedal response.
• No LED’s (Unit does not function) – Re-Check the connectors at the pedal position sensor and verify that the green LED is illuminated when the vehicle is powered on or running.
• Red Plug – The PedalMAX device is pre-configured to provide a increase in throttle response. If this amount of increase is too aggressive for your application, you can connect the optional RED PLUG to decrease the throttle response.
Optional Control Accessory: The optional single pedal knob (P/N BX-6999-SINGLE) is designed to plug in to the 4-pin connector and over-ride the pre-configured throttle response settings. With this option, you have ultimate control over the sensitivity with a range of 0% increase to the 100% maximum increase, based on the position of the control knob.

