 FREE 1 to 3-Day Delivery on Orders $149+ Details

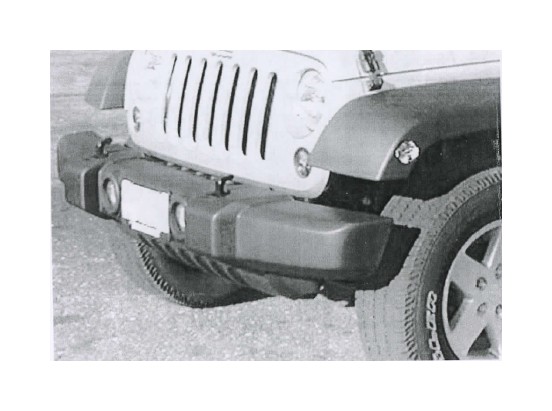
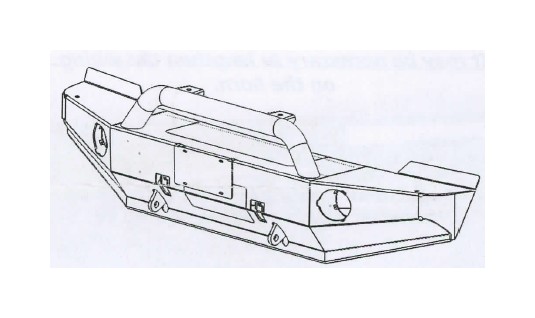
How to Install TJM Bull Bar Equipped Front Bumper on your 07-18 Jeep Wrangler JK; 2018 Jeep Wrangler JL
• Read instructions fully before commencing fitment.
• Left hand & Right hand components are determined as seated in the vehicle.
• Check for (& remove) any build up in all captive nuts fitted to the FPS.
• Estimated Fitting Time: 1.5hrs
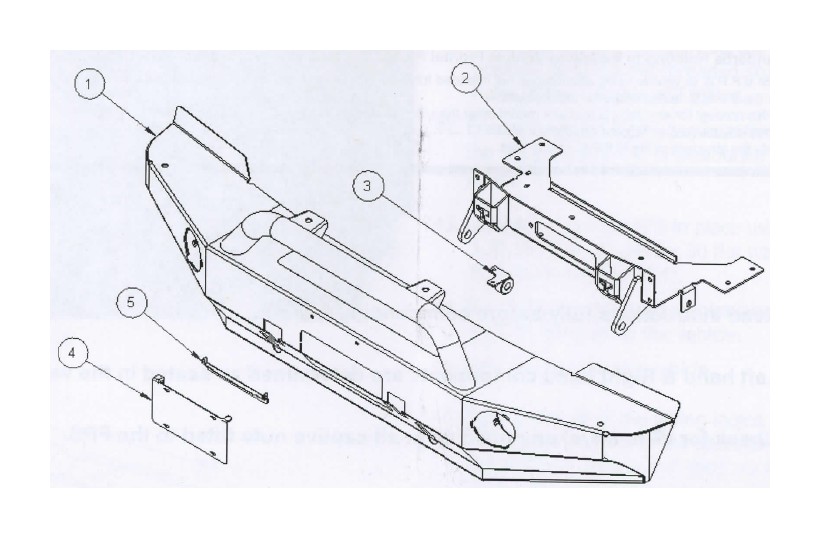
1. Remove (& retain) the number-plate and fasteners.
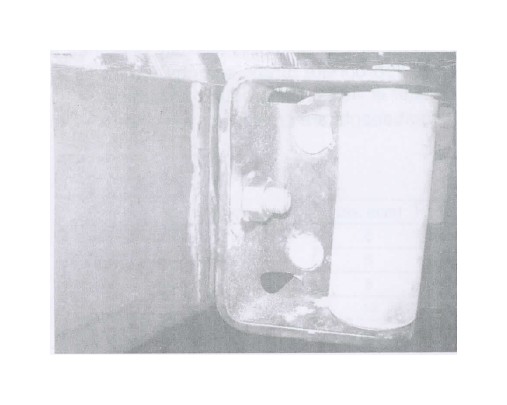
2. Remove the screws (3) from the back of the bumper which secure the plastic covers in place.
3. Disconnect the wiring loom from the OE fog-lights.
4. Remove the push clips (2) from the bumper, located in front of the grille.
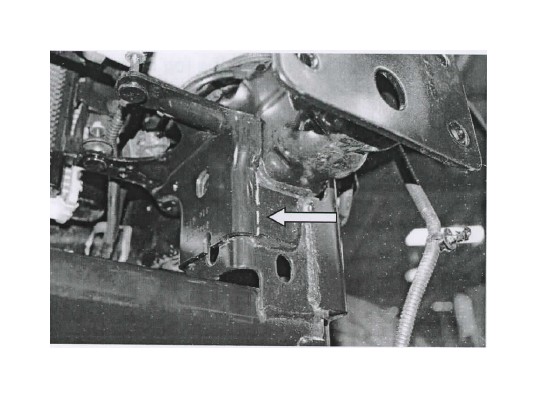
5. Remove the fasteners (2) on the inside of the bumper at each end, which secure the bumper to the bumper support bracket.
6. Remove and discard the bumper.
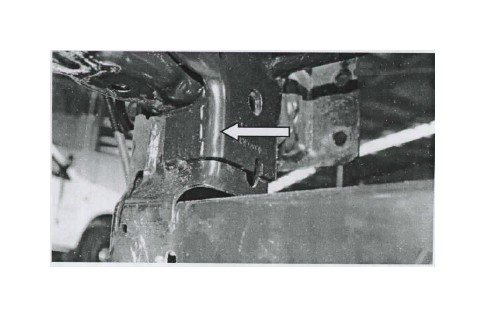
7. Remove the push clips (4) that retain the lower plastic guard to the bumper support bracket and push clips (2) that retain the plastic guard to the chassis.
8. Remove the plastic guard and discard.
9. Unclip the wiring harness from the bumper support.
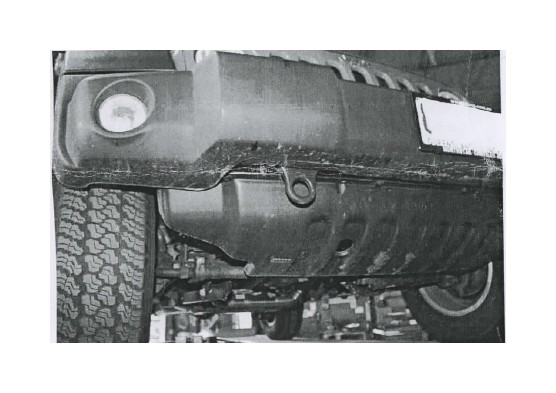
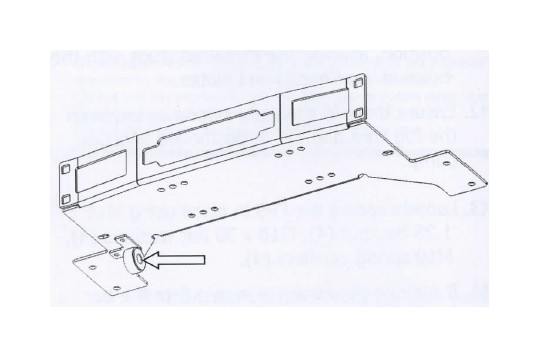
10. Unbolt and remove the bumper support, ensuring you retain the horn for re-fitment.
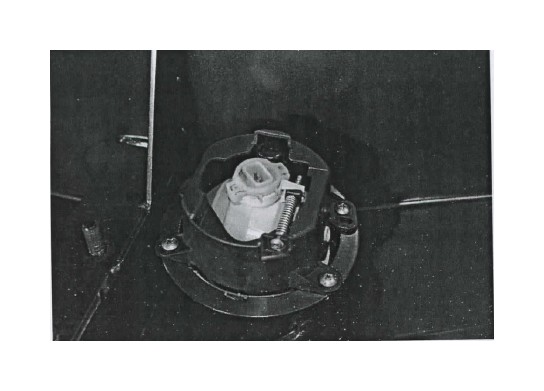
11. Remove the fog lights from the bumper.
12. Drill the mounting holes in the fog light out to 6mm.
13. Re-fit the fog lights to the bulbar using M5 x 20mm Stainless Steel Mush Head Screws (8).
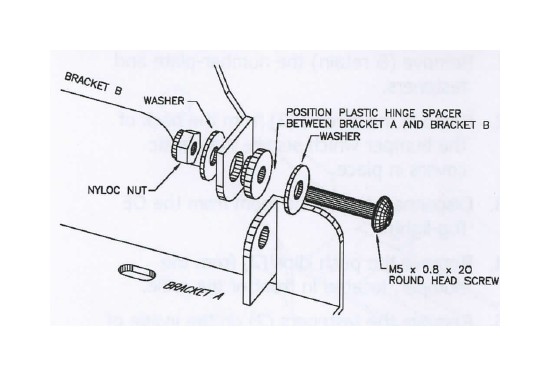
14. Assemble the number plate holder by securing bracket A and bracket B together as shown using M5 x 0.8 x 20mm pan screws (2), plastic hinge spaces (2), 3/16 x 1/2" flat washers (4) & M5 Nyloc nuts (2).
15. Secure the number-plate, to the number plate holder bracket assembly using M5 x 0.8 x 20mm pan screws (2), 3/16 x 1/2" flat washers (2) & M5 Nyloc nuts (2).
16. Mount the number plate holder bracket assembly to the FPS using M5 x 0.8 x 20mm pan screws (2), 3/16 x 1/2" flat washers (2) & M5 Nyloc nuts (2).
17. Align the bump-ons in the inside of bracket A so that they touch the winch fairlead rollers when the number plate holder bracket is lowered into position
Steps 18 to 23 only apply if vacuum pump is installed. Otherwise, please proceed to step 24.
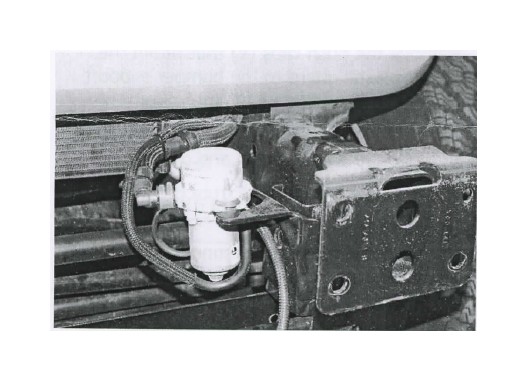
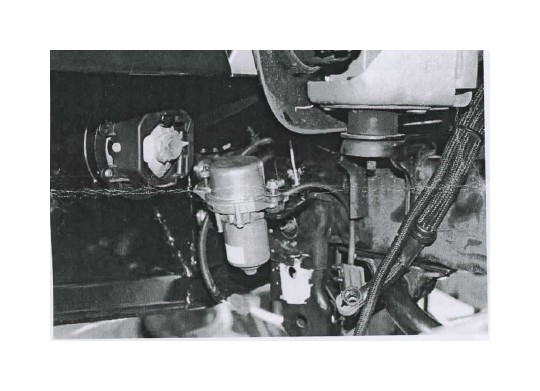
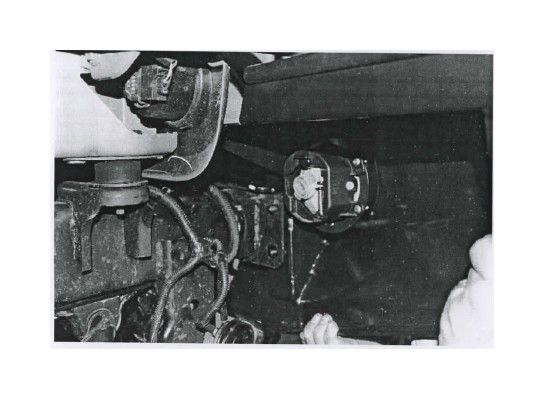
18. Disconnect pump from bracket and retain fasteners
19. Cut vacuum bracket off chassis at the marked locations.
20. De-burr the bracket edges & clean the area/surface of any swarf/debris, then treat raw exposed surfaces with a rust preventative.
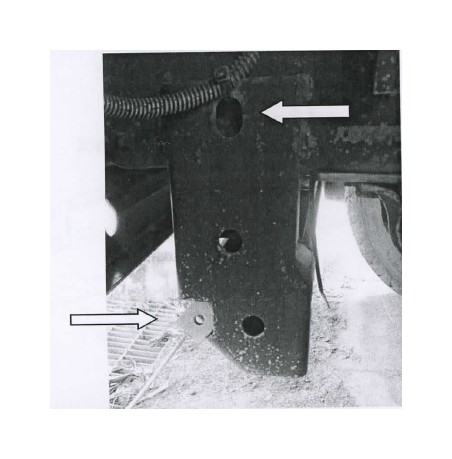
21. Insert the M8 threaded plate into the chassis mount lining up with the top hole
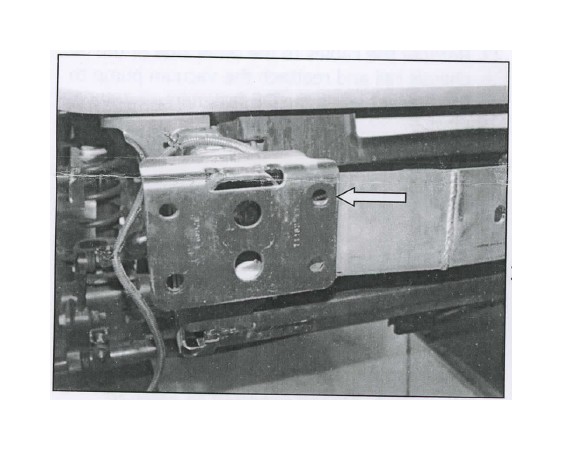
22. Reattach vacuum bracket with M8 x 1.25 x 30mm hex bolt (1), M8 x 19mm flat washer (1) & M8 spring washer.
23. Reroute the cables to the other side of the chassis rail and reattach the vacuum pump to the bracket using the OE fasteners.
Steps 24 to 27 only apply if electronic sway bar disconnect is installed. Otherwise, please proceed to step 28
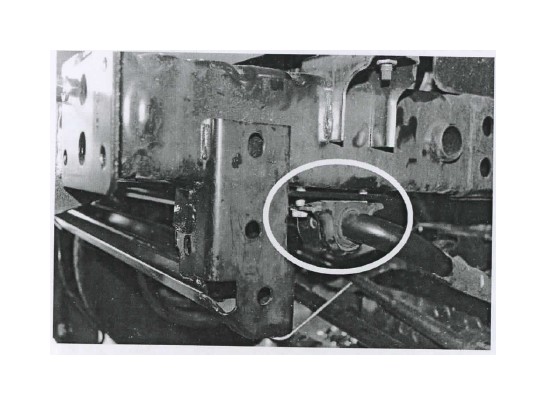
24. Remove (& retain) the fasteners securing the sway bar disconnect unit to the rubber mount.
25. Cut the 'S' shaped pin from the sway bar mount.
26. De-burr the edges & clean the area/surface of any swarf/debris, then (if applicable) treat any raw exposed surfaces with a rust preventative.
27. Using M8 x 1.25 x 25mm hex bolts (2), M8 x 019mm flat washers (4), M8 spring washers (2) & M8 hex nuts (2), secure the sway bar retaining bracket in place, as shown.
28. Unbolt the front sway bar (retaining the fasteners) from the driver's side of the differential and from both sides of the chassis, so the sway be can hang in front of the vehicle.
29. Slide the winch frame into position from behind the cross-member and align with the two upper holes on each side of the chassis end plates.
30. Secure the frame in place using M12 x 1.25 x 30mm hex bolts (4), M12 x 24mm flat washers (8), M12 spring washers (4) & M12 hex nuts (4).
31. Fix the winch frame to the side of the chassis using M12 x 1.25 x 30mm hex head bolts (2), M12 x 24mm flat washers (4), M12 spring washers (2) & M12 hex nuts (2).
32. Reposition the sway bar onto the vehicle and using the OE fasteners removed in step 14, fasten the assembly through the winch frame into the chassis where it was previously installed.
33. Tighten all bolts securing the winch frame and the sway bar
Steps 34 to 36 only apply if electronic sway bar disconnect is installed. Otherwise, please proceed to step 37.
34. Insert the polyurethane bush into the sway bar retaining bracket.
35. Use the OE fasteners and secure through the replacement bracket and through the original hole in the electronic sway bar disconnect unit.
36. Route the wiring harness under the winch frame and into the cross member.
It may be necessary to lengthen the wiring on the horn.
Steps 37 to -40 only apply if fitting a winch. Otherwise, please proceed to step 41.
37. Ensure the roller fairlead is fitted to the winch frame first with the bolts coming through from the rear.
38. Refer to the winch fitting instructions and fit the winch to the winch frame.
39. Secure the control box to the winch motor using the polyurethane mount blocks (2) and hose clamps (2) supplied.
40. Remove the micro jointed sections from the upper and lower center section of the bar. Remove any sharp edges left and treat any raw surfaces.
41. Using two people, carefully lift the FPS into position, aligning the threaded studs with the holes in the Chassis end plates.
42. Ensure there is adequate clearance between the fog light and the re-positioned vacuum pump.
43. Loosely secure the FPS in place using M10 x 1.25 hex nut (4), M10 x 30 flat washers (4), M10 spring washers (4).
44. It may be necessary to manipulate the bar for it to sit level on the vehicle.
45. Refit the horn to the vehicle.
46. Ensure that all of the wiring looms are connected and check the operation of the fog-lights to ensure that they are functioning correctly.
47. Ensure that all fasteners are fully tightened to the appropriate torque settings & that, as a result of fitting the product, no vehicle components are crushed or will chafe.

