 FREE 1 to 3-Day Delivery on Orders $149+ Details

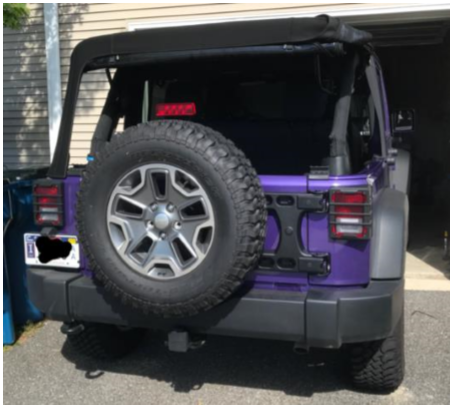
How to Install Iron Cross Stubby Rear Bumper (07-17 Wrangler JK) on your Jeep Wrangler
Installation Time
1 hours
Tools Required
- ½" Deep Socket
- 16mm Socket
- ½" Allen Wrench
- Torque Wrench

Shop Parts in this Guide
Installation Notes: the assistance of a friend will be necessary for part of this installation.
Installation Instructions:
1. Remove the spare tire. Note: It is not necessary to remove the factory tow hitch if installed. If the factory tow hitch is installed, remove any hitch receiver plug to aid in installation.
2. Remove existing stock bumper including rear recovery hook(s) if applicable. Set aside 4 16mm frame mount bolts (to be used in step 4). All remaining hardware and recovery hooks can be discarded; they will not be used in this application.
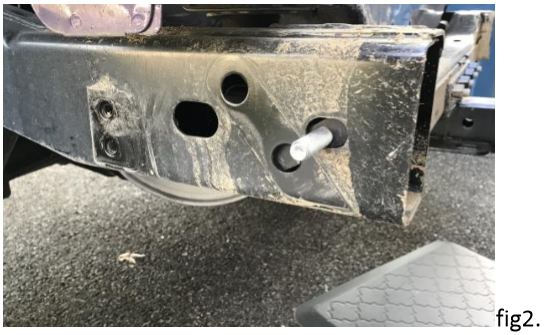
3. Locate the frame lock bolt (looks like a bolt welded to a steel bar). Place the frame lock bolt into the driver’s side frame rail with the threads going through the oval hole closest to the end of the frame rail. The steel bar should be oriented so that the bar does not stick out of the frame rail (see fig. 2).
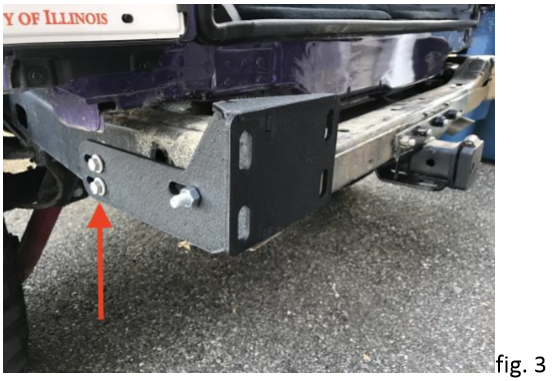
4. Locate the driver’s side frame rail bracket. Orient the bracket so that the bracket is along the outside of the frame rail with the flat mounting surface pointed towards the center of the Jeep (see photo below). Install two of the stock 16mm mounting bolts (that had been set aside from step 2) into the frame holes with welded nuts (see fig. 3). Place one ½ inch nut onto the frame lock bolt.
5. Pull the frame rail bracket away from the Jeep’s tub so that it is as extended as much as possible and hand tighten all bolts/nuts. The frame rail bracket should be positioned like photo below (fig. 4) to aid in later installation steps:

6. Repeat steps 3-5 to install the passenger’s side frame rail bracket.
7. With the assistance of a friend/helper, place the bumper onto the frame rail brackets lining up the mounting holes. At this step, it is helpful to place one allen head bolt into one of the holes on the face of the bumper loosely securing with a ½ inch nut to temporarily secure the bumper while working on the other side.
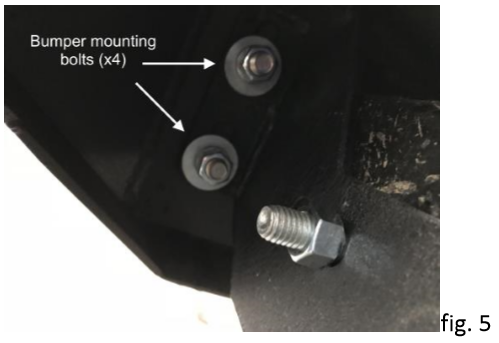
8. Locate the shackle mount plate. Align the holes of the shackle mount plate with the holes in the face of the bumper and holes in the frame rail bracket. Insert 4 allen head bolts into the four holes in the shackle plate.
9. On the inside of the bumper install one flat washer followed by one lock washer and one ½ inch nut on each bolt (the large, flat washer should sit closest to the bumper followed by the lock washer). Snug but do not tighten each bolt (you will need to reach up from the bottom of the bumper to snug/tighten each bolt).
10. Remove the temporary bolt securing the bumper from step 7. Repeat step 8-9 for the remaining side of the bumper.
11. Check the bumper is level and make any adjustments to the 8 bolts in the shackle mount plate as needed. Once the bumper is level, tighten all shackle mount plate bolts to 60ft/lbs.
12. Adjust the bumper alignment to the tub of the Jeep, providing adequate spacing between the tub and the bumper (you do not want the bumper to sit directly against the tub of the Jeep). Ensure even spacing on each side of the bumper and tub. Tighten frame lock nut to 60ft/lbs on each side. Tighten all remaining frame bolts to 30ft/lbs.
13. Reinstall spare tire and hitch plug/cover (if applicable)
Installation Instructions Written by Ginger Miller 09/26/2017

