 FREE 1 to 3-Day Delivery on Orders $149+ Details

How to Install Iron Cross Front & Rear Fender Flares - Black (07-18 Jeep Wrangler JK) on your Jeep Wrangler
Installation Time
3 hours
Tools Required
- 3/8” Drive Rachet
- 3/8” Drive 10mm Socket
- 10mm Wrench
- Auto Trim Clip Removal Pliers (Alt. Large Flat Head Screwdriver, Small Crow Foot Pry Bar)
- Utility Knife
- 3/32” Hex Key Wrench (Small screw driver may be used)
- Optional: Tin Snips (Used if retaining part of factory inner fender liner)

Shop Parts in this Guide
Factory Fender Removal (If Equipped):
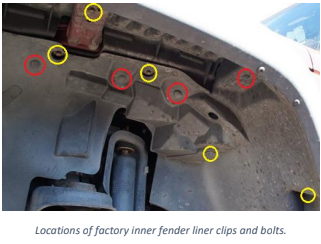
1. Remove all trim clips and bolts from factory inner fender liners.
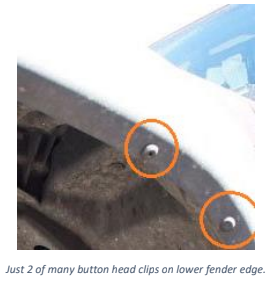
2. Locate small button head clips along lower fender edge. Using 3/32” hex key wrench, depress center button of clip while removing clip with auto trim clip removal tool.
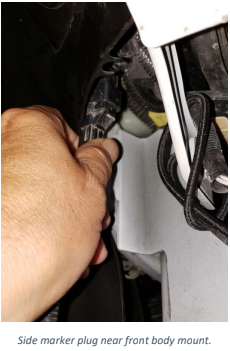
3. Disconnect factory side marker light at front body mount.
4. Pull fenders in an upward and rearward direction to remove the fender from its body clips.
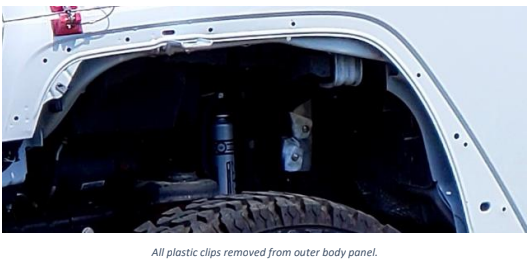
5. Remove all remaining plastic clips from outer body panel.
Pre-Installation Instructions:
1. Clean surface area on vehicle where fender flares are to be installed using mild soap and water.
2. Verify that all hardware has been included with fender flares.
a. 16 – 6mm x 1” bolts
b. 16 – 6mm flat washers
c. 16 – 6mm flange nuts
d. 2 – 5’ edge molding trim
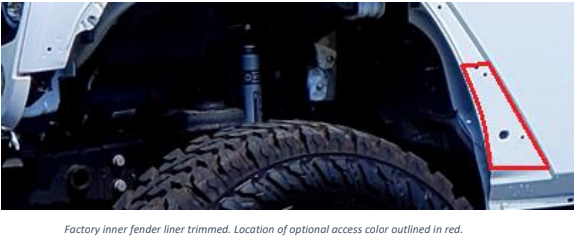
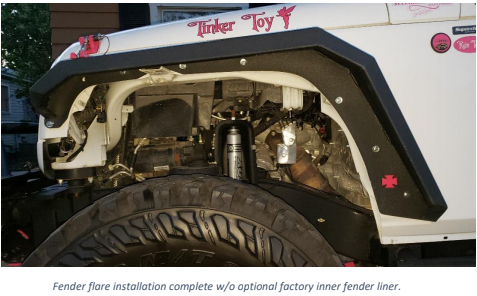
Option 1: If retaining factory inner fender liners, they will need to be separated from factory fenders, installed, cut along edge of body with tin snips, and removed prior to installation of new fender flares.
Option 2: Accent color for Iron Cross logo should be added at this time. Using vinyl or paint, add color to lower rear corner of fender opening. Do not go beyond body panel ledges.
Installation Instructions:
1. Install edge molding trim to back edge of fender flares cutting excess trim with utility knife.

2. With the help of an assistant, position fender flare onto vehicle and loosely install all fender hardware. When installing bolts, insert bolt with washer from outside of vehicle and place flanged nut inside of fender well. Caution: Do not tighten bolts until all hardware is installed. After all hardware is installed, tighten to 1 full turn past snug.
3. Repeat for opposite side.
Installation Instructions Written by ExtremeTerrain Customer Nathan Robert 09/05/2018

