FREE 1 to 3-Day Delivery on Orders $149+ Details

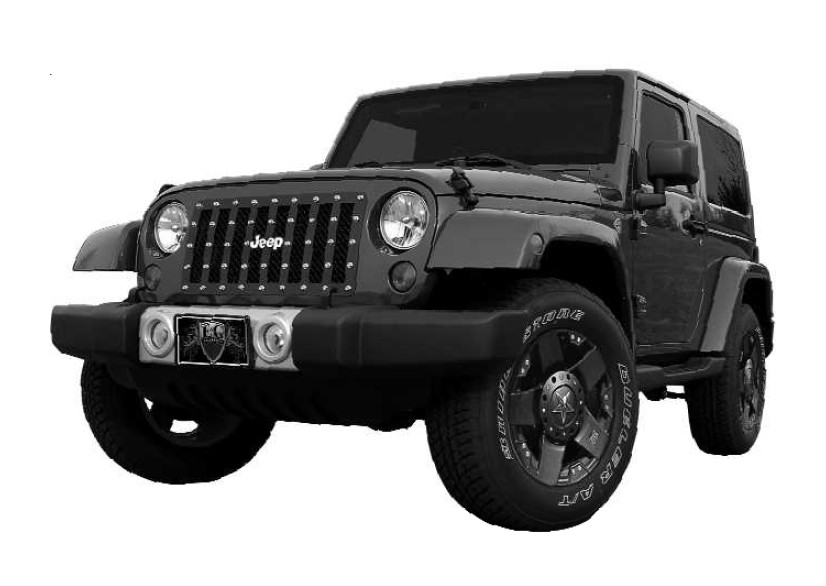
How to Install E & G E-Power Vertical Bar Heavy Mesh Grille - Gloss Black (07-17 Wrangler JK) on your Jeep Wrangler
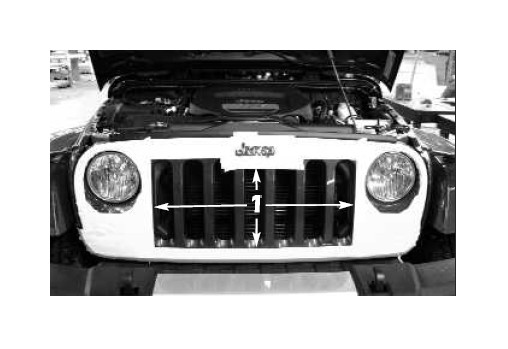
1. Open the hood and apply masking tape to the factory grille as shown. Completely surround the Jeep lettering with several lay-ers of masking tape to protect the factory paint.
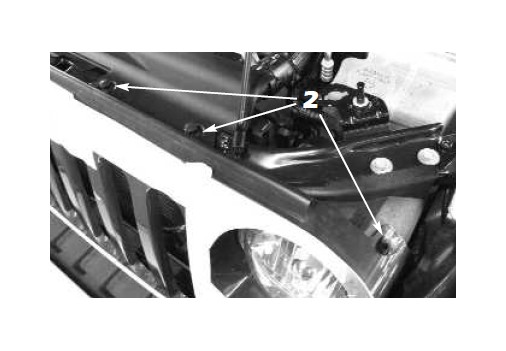
2. Use a flat blade screwdriver to remove the six (6) factory push pins securing the top of the factory grille center section to the radiator support panel (driver side shown).
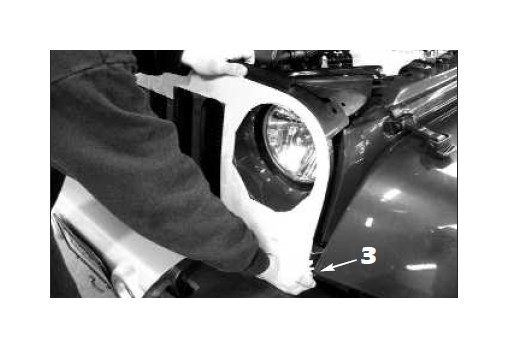
3. Hold the top edge of the grille and give the grille several quick tugs across the bottom edge to unclip it from the support. Do not pull the grille too far out, the turn signal bulbs are attached to the back of the grille.
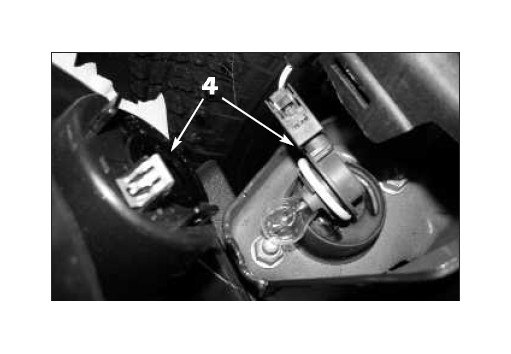
4. Carefully rotate the turn signal bulbs to remove them from the lamp sockets attached to the factory grille.
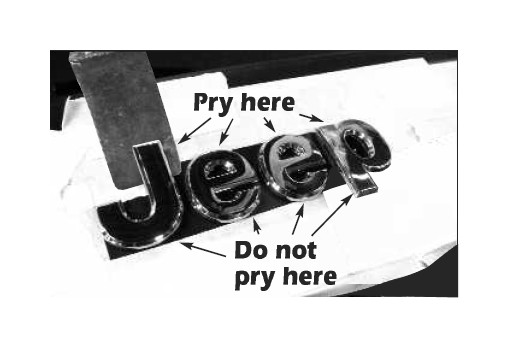
5. If using a tucking tool to remove the Jeep lettering, do so from the top down. Do not work from the bottom up or you will damage the paint at the tops of the letters. You can also use fishing line to cut through the factory double faced tape.
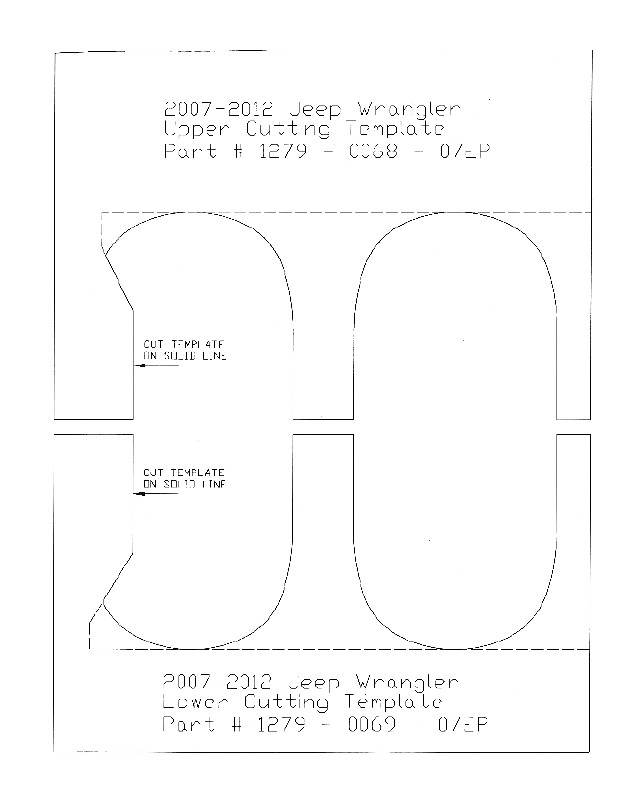
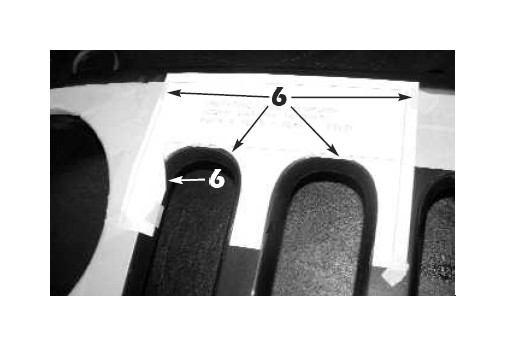
6. Cut out and align the upper grille cutting template and tape it in place as shown. Use a sharpie or grease pencil to mark the side of the grille where the template folds down on the side. Untape the template, turn it over, align it on the opposite side and tape it into place and mark the side of the grille.
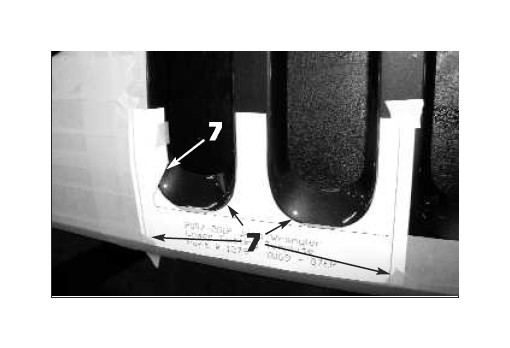
7. Cut out and align the lower grille cutting template and tape it in place as shown. Use a sharpie or grease pencil to mark the side of the grille where the template folds down on the side. Untape the template, turn it over, align it on the opposite side and tape it into place and mark the side of the grille.
8. Use a jig or vibrating saw to cut through the sides of the grille where marked in the previous steps.

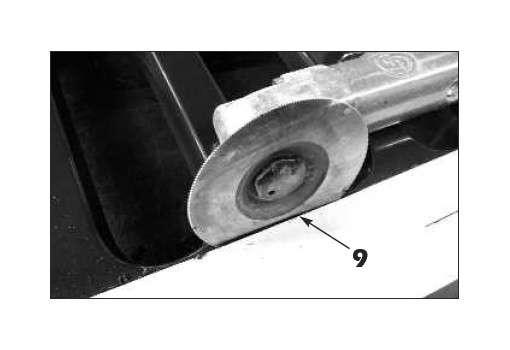
9. Cut across the top and bottom openings of the factory grille where shown.
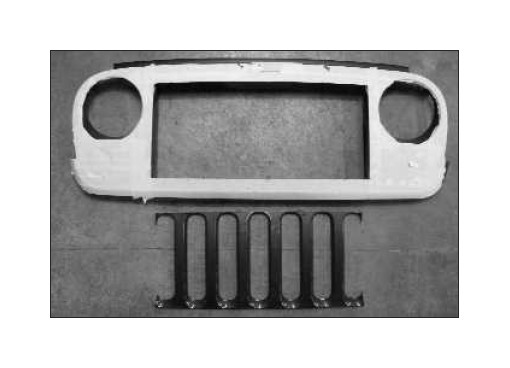
10. The finished cut should look like this. Factory grille center section is not reused. Remove the protective masking tape once the cutting is finished.
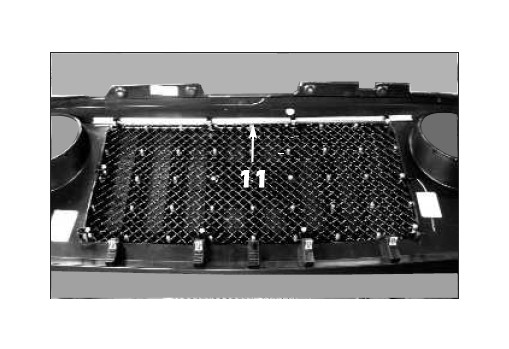
11. Align the cut factory grille over the E&G E-Power mesh grille as shown. Align the supplied upper grille reinforcement across the top edge of the inside of the factory grille prior to U-shaped grille retainer installation.
12. Align the U-shaped grille retainers across the top of the grille and install a #8-32 ESNA half nut and tighten until the grille surround is flush with the factory grille.

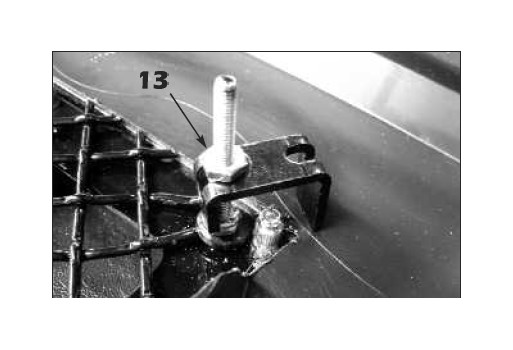
13. Align the U-shaped grille retainers into the lower corners of the grille and install a #8-32 ESNA half nut and tighten until the grille surround is flush with the factory grille.
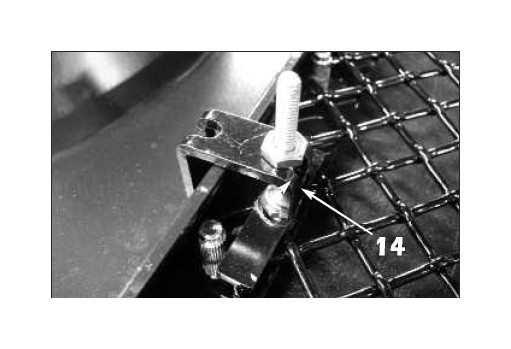
14. Align the U-shaped grille retainers onto each side of the grille and install a #8-32 ESNA half nut and tighten until the grille surround is flush with the factory grille.
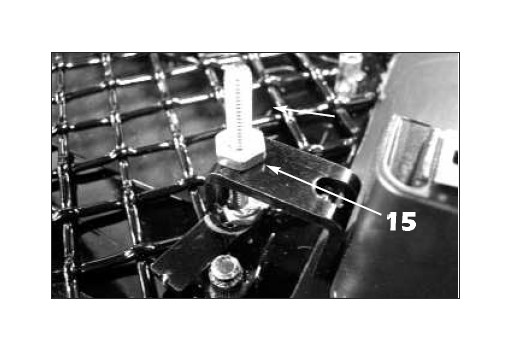
15. Align the U-shaped grille retainers across the bottom of the grille and install a #8-32 ESNA half nut and tighten until the grille sur-round is flush with the factory grille. Important: Apply black paint to all studs to conceal them once the E-Power mesh grille is installed onto the vehicle.
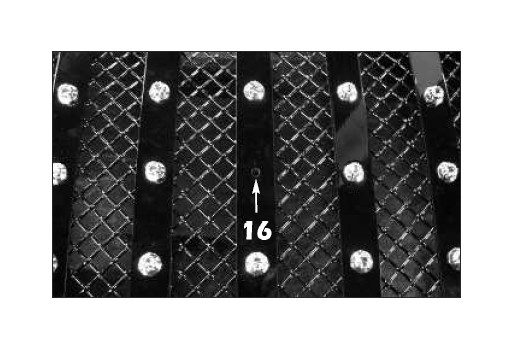
16. If the grille will use the supplied emblem plate, remove the center 12 point stud from the grille using a small punch and mallet from the reverse side.
17. Install the supplied .045" x 1" double faced tape onto the back of the factory Jeep lettering. Make sure the tape does not protrude past the edges of the letters.

18. Cut out the supplied template using an X-Acto knife (as shown). Carefully align the template over the supplied emblem mounting plate for lettering installation.

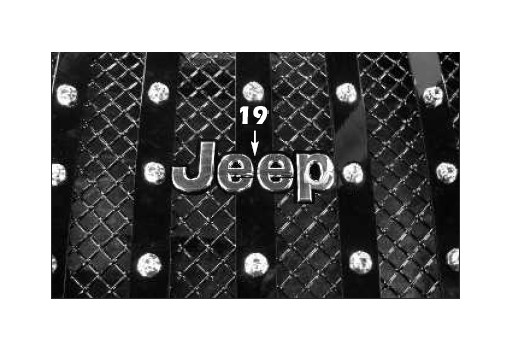
19. Peel off the double faced tape backing, align the Jeep lettering onto the emblem mounting plate and install it onto the E-Power grille using the large black plastic washers between the emblem plate and the mesh. You might have to clip a mesh wire in order to center the emblem.
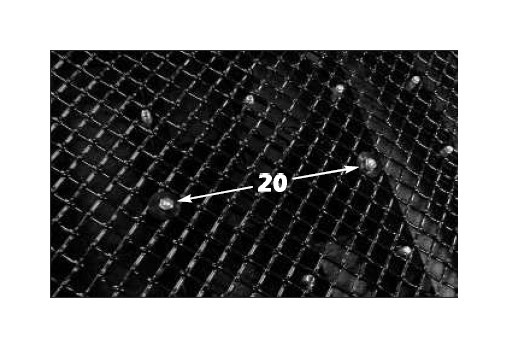
20. Turn the grille over and secure the emblem assembly using the supplied large black plastic washers and the #8-32 ESNA half nuts.
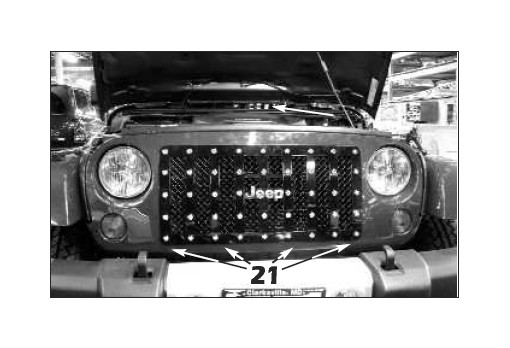
21. Align the assembled grille back onto the vehicle and clip the lower edge into place.
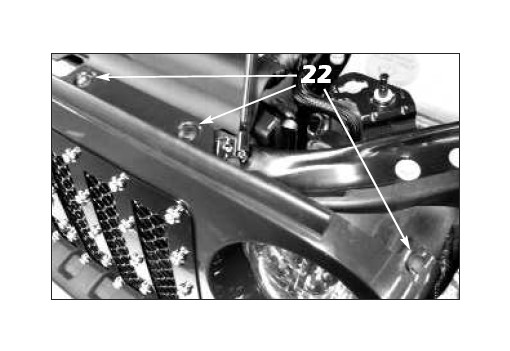
22. Reinstall the factory push pins across the top edge (driver side shown) and close the hood to finish the installation.