FREE 1 to 3-Day Delivery on Orders $149+ Details

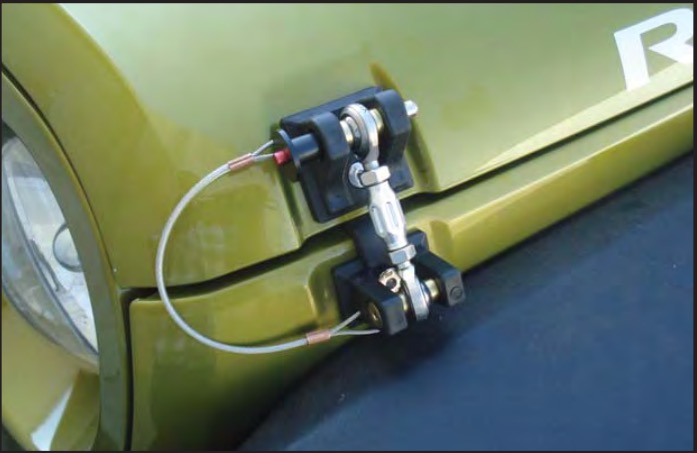
How to Install Drake Off Road Hood Hold Downs on your 2007-2017 Jeep Wrangler JK
Tools Required
- 5mm allen wrench
- 4mm allen wrench
- 1/4" drive ratchet and socket set with10mm and 13mm sockets
- 3" and 6" extensions for 1/4" drive ratchet
- two 13mm open ended wrenches orsmall adjustable wrench

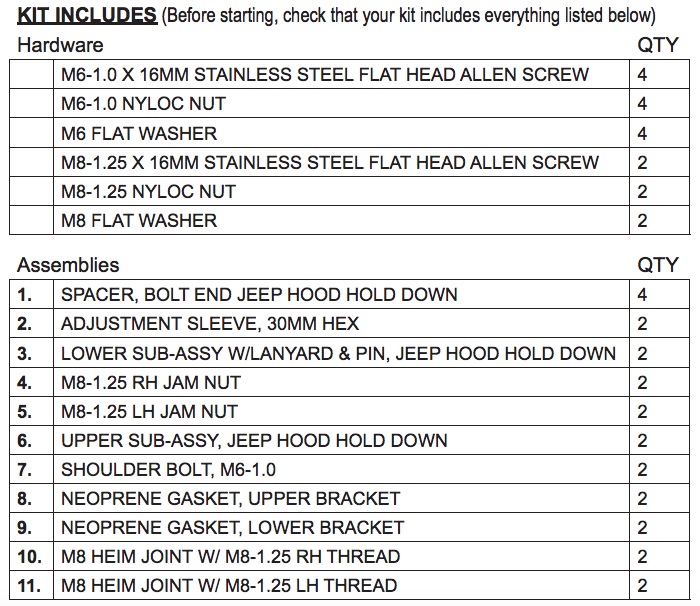
Shop Parts in this Guide
Note:
Designed to work with stock hood and fender and may not be compatible with some aftermarket hoods, fenders and fender fl airs.
1. Open hood.
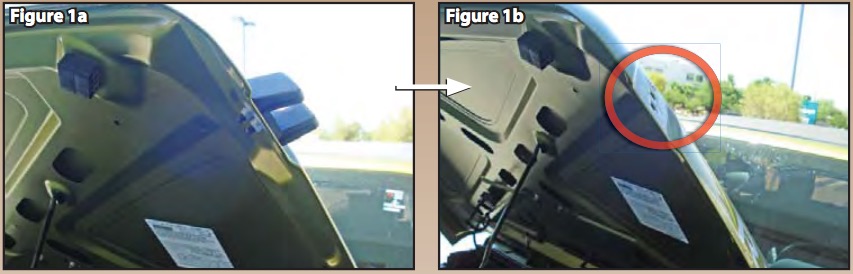
2. Using a 10mm socket or wrench, remove two nuts securing stock hood latch to hood and remove from both sides of vehicle. (Figure 1a & 1b)
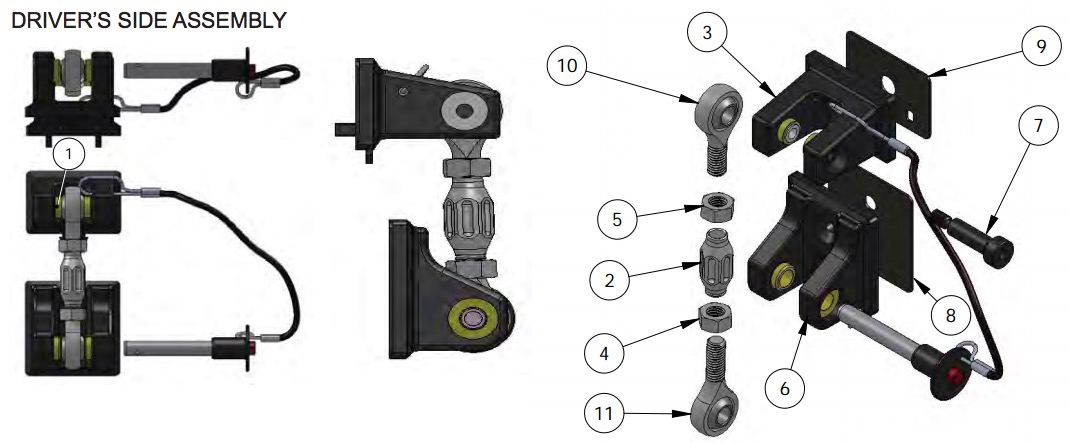
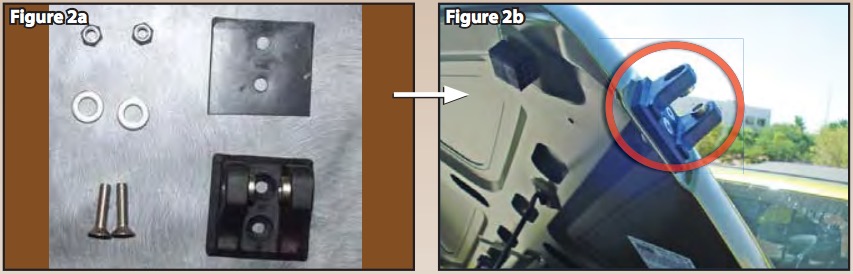
3. Install Drake Off Road Hood brackets on both sides of hood using allen head M6 bolts, washers and nuts supplied. (4mm allen wrench and 10mm socket) Orient bracket so that bushings are towards the top half of the bracket when installed. Make sure to place rubber pad between hood and bracket. Tighten securely. (Figure 2a & 2b)
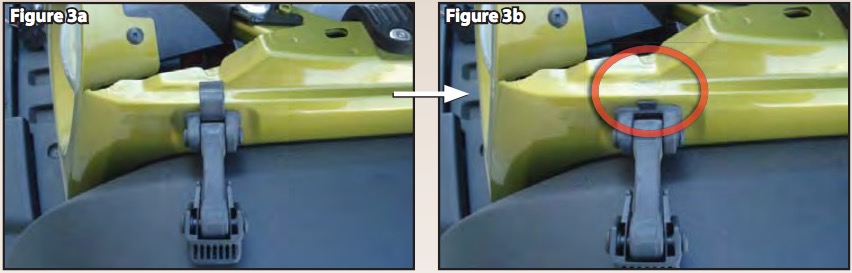
4. Grab small rubber bumper on original lower bracket and pull it sideways to remove it. Keep this to install on Drake Off Road Hood Hold Down. (Figure 3a & 3b)
5. Remove original lower hood hold down bracket using a 13mm socket with extensions and ratchet. (Figure 4)
Tip: New hardware is supplied with the Drake Hood Hold Down but the installer may fi nd it easier to install the new brackets using the factory nut.
Tip: On passenger side using a small ¼” ratchet should allow access to remove and install nut.

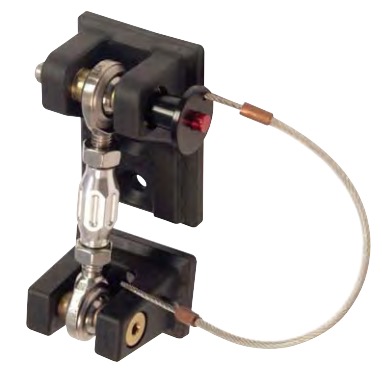
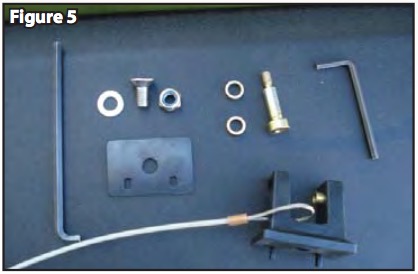
6. Use 4mm allen wrench to remove turn buckle assembly from Lower bracket on Drake Hood Hold Down. Remove both sleeves and set aside. (Figure 5)
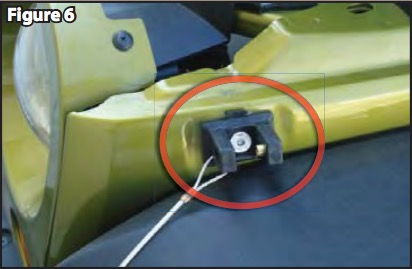
7. Install bracket on Jeep with rubber pad between bracket and body using M8 fl at head bolt with 5mm allen wrench and 13mm socket (combination of extensions may also be needed). As mentioned previous, installer may fi nd reusing factory nut to be easier. (Figure 6)
Note: Notice there is a left and a right bracket. The bracket should be installed with the lanyard facing forwards on the vehicle and the tab for the rubber bumper should face upwards.
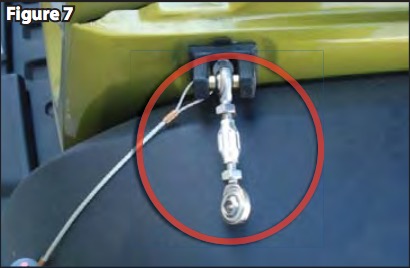
8. Reinstall turn buckle assembly into lower bracket that was previously removed using 4mm allen wrench. (Figure 7)
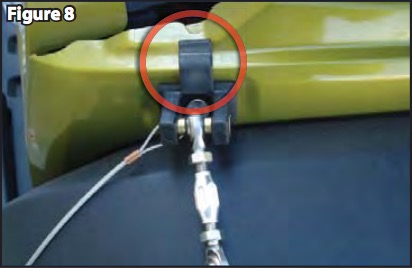
9. Push factory rubber bumper onto tab. (Figure 8)
10. Make sure turn buckles are fl ipped out of the way and resting on the fenders.
ALWAYS MAKE SURE TURNBUCKLES ARE FLIPPED OUTWARD BEFORE CLOSING HOOD TO AVOID DAMAGE!
11. Close hood.
12. Line up turnbuckle and install quick release pin. Direction of the Quick release pin is user preference and it can be installed from the front or the back.
Setup
1. Make sure jam nuts are threaded all the way against the heim joints as seen in the previous picture.
2. Gently apply downward pressure to hood while turning billet aluminum turn buckle to adjust hood down until it contacts the rubber pad. Adjustment is set to personal preference but we’ve found that spinning the turnbuckle until the quick release pin is almost diffi cult to pull out works best. With it adjusted to this tension we are able to gently push down on the hood to relieve the pressure on the pin and pull it out at the same time.
3. Once adjusted to your preferred tension use two 13mm wrenches to tighten jam nuts on turnbuckle against the billet aluminum center piece. Once adjusted properly you should not need to use turnbuckle to open and close your hood.